Thermal imaging cameras can create detailed maps of commercial low-slope roofs, showing where excess moisture is trapped, where the source of a leak may be, or where there is soaked or compromised insulation. Roofing professionals scan the roof, taking images to compile into a composite map, or they take an aerial image of the whole roof. These thermal images narrow the search for water intrusion, without damaging or puncturing the roof, saving time and pinpointing areas for repair.
Thermal imaging cameras capture infrared radiation, a part of the electromagnetic spectrum that is not visible to humans. Infrared light can be used as a way to measure the heat radiated by an object. Also, because thermal cameras completely ignore the visible light, their heat readings aren’t obscured by solid objects, like walls or roof membranes.
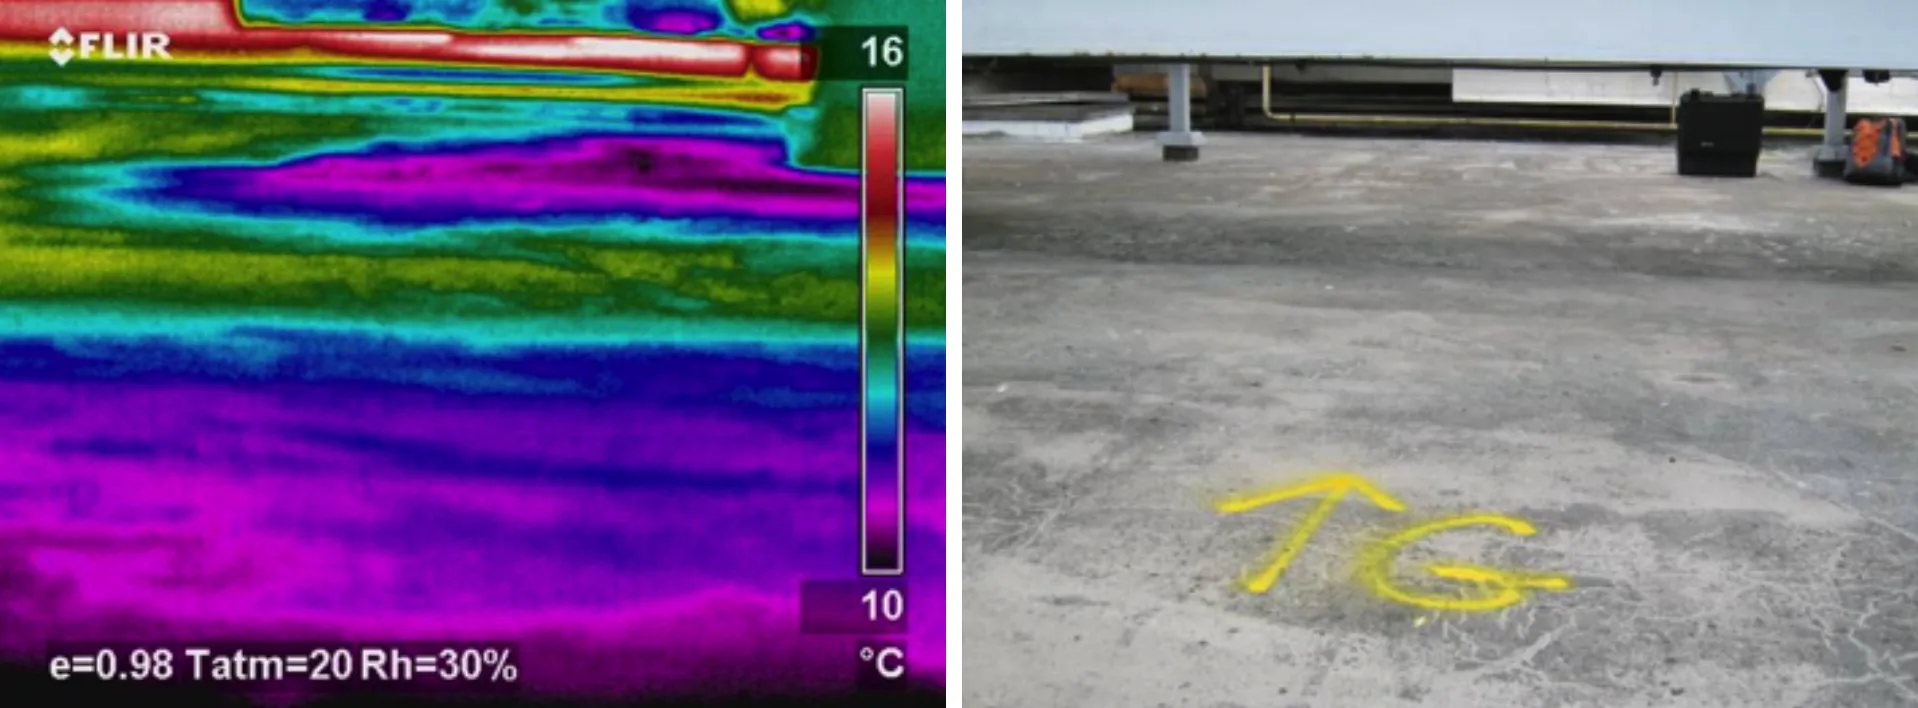
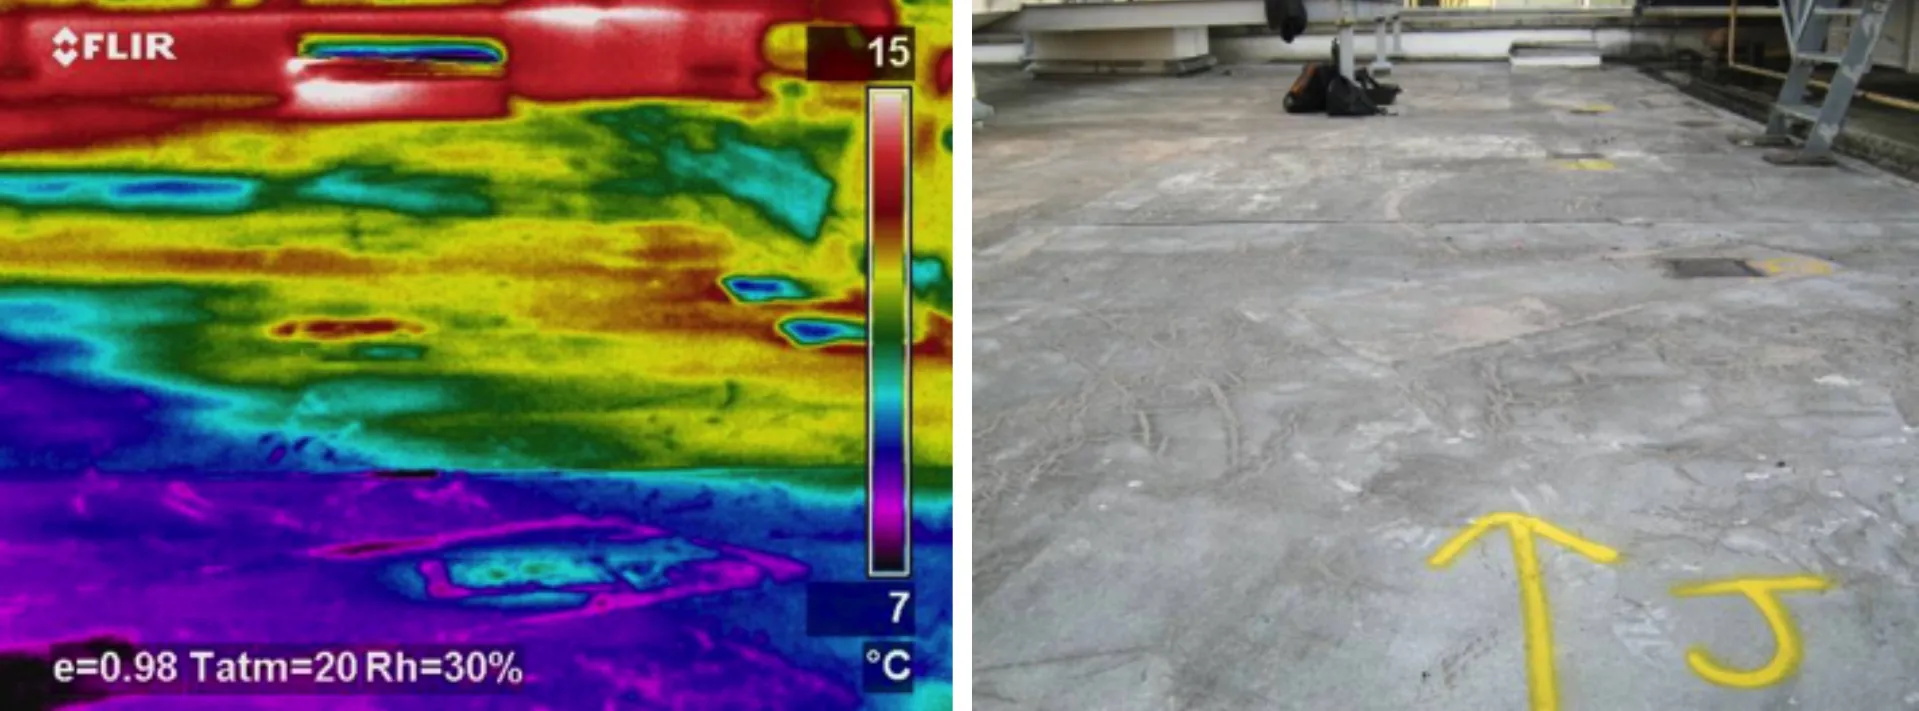
The basic principle behind the technology is that moisture adds thermal mass to a roofing material, which makes it hold onto heat longer than the dry material next to it. Under the right conditions, the thermal camera captures that heat the way normal cameras capture visible light, creating an image that shows the extent of moisture problems within the roofing system.
Thermal imaging is an essential element in the predictive maintenance of a multimillion-dollar roof asset. It is an excellent means to illustrate moisture infiltration and migration in the field of a roof and can aid in planning for life cycle budgets and provision for remediation. Thermal imaging can identify good parts of a roof and result in long-term conservation. Utilizing this technology can help prevent water destruction before a leak becomes serious and therefore allows owners to be proactive in stopping collateral damage to the building interior. It is another resource to evaluate the overall health of the roof without random or destructive testing.
There is a lot to learn about thermal imaging to ensure you get the full benefit from it. We’ll cover what you need to know in this guide.
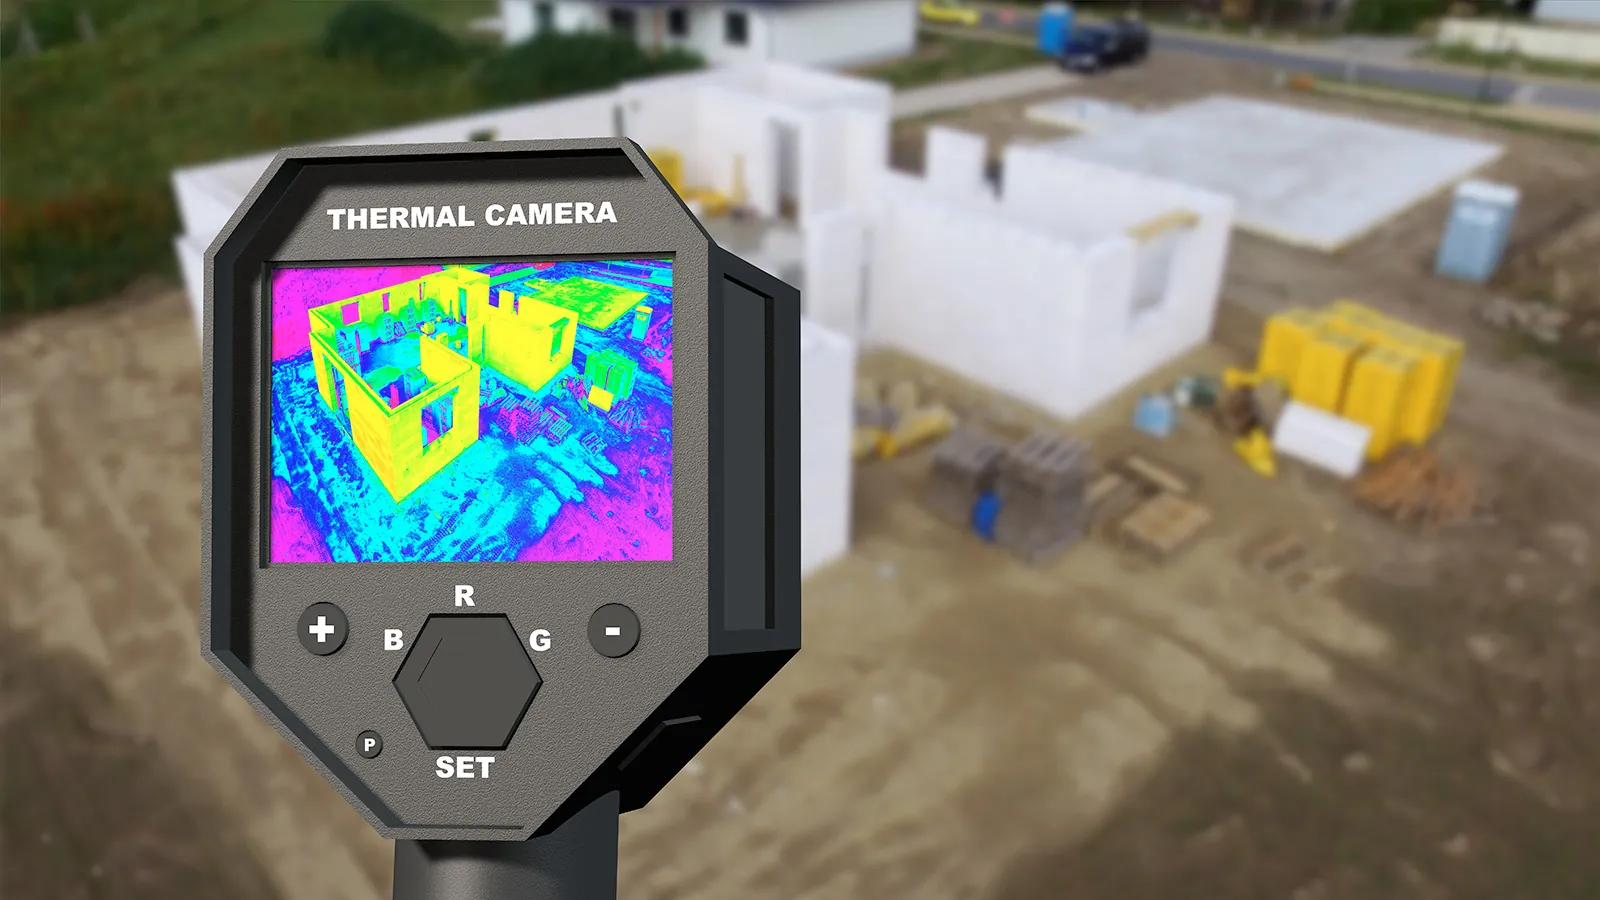
Why Thermographic Cameras are Important for Roofing Professionals
Before thermographic cameras were available, roofing professionals used different methods to find leaks and condensation on flat commercial roofs. These methods, such as using dielectric capacitance meters and nuclear density gauges, only allowed for spot measurements and also possibly involved taking sacrificial samples of the roof. Testing an entire roof with these technologies was time-consuming, intrusive and expensive guesswork. In contrast, thermographic imaging is quite fast and relatively inexpensive.
Thermographic imaging offers the building owner significantly more information about exactly where moisture is hidden, even which specific layer of the roof the moisture is on and which areas of the roof are still dry and functioning. This allows owners to save a significant amount on their investment and replace only what is wet, saving money by minimizing tear-offs.
This additional information that thermographic imaging offers also makes it an excellent choice for property management companies or large corporations where many people are involved in the decision-making, for several reasons:
- Thermographic imaging produces maps that can be included in reports about the roof’s status. With interpretation from a certified infrared professional, these maps can be easy to reference, understand and used to start action outlines.
- These maps can also help plan your budget and estimate the costs of roof repair.
- Facilities managers can use the maps to find leaks and other insidious and dangerous issues, such as formation of mold or moisture erosion of the roof deck’s structural integrity. Long-term exposure to moisture can cause some metal decks to rust and weaken.
- Insurance companies may take thermal maps into account when assessing real-time conditions of the building and determining rates. Some roof manufacturers may require thermal imaging to maintain warranties or guarantees. Potential buyers are highly likely to require this type of roof assessment.
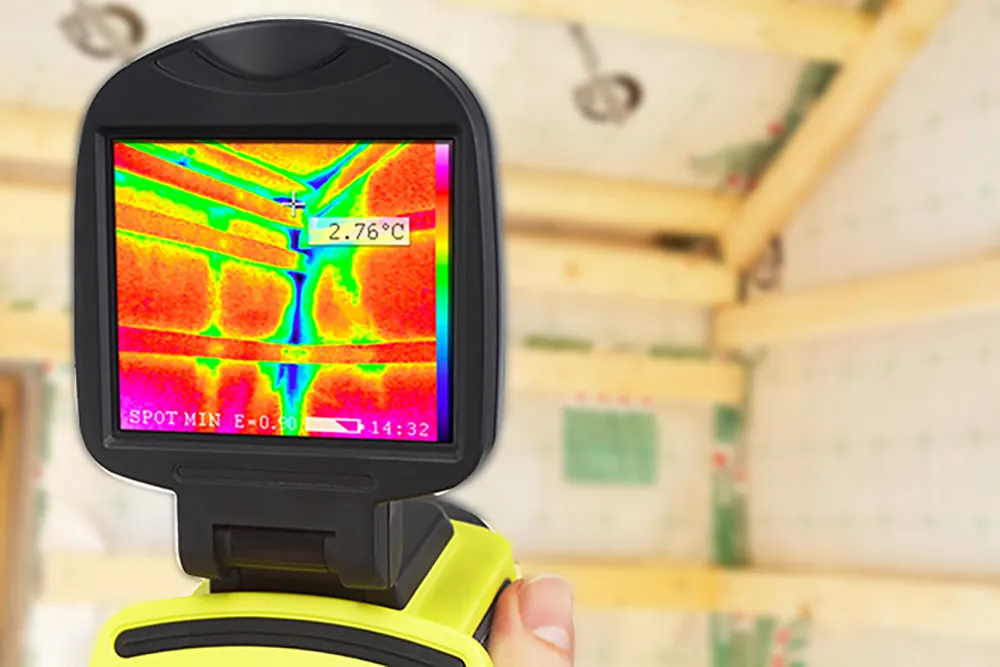
How a Thermal Imaging Camera Works

Heat gives off infrared light. Thermal cameras capture the infrared light and take a picture of that light, the same way your smart phone’s camera takes a picture of visible light.
The more heat in an area, the brighter that area appears in the resulting image. Though thermal cameras produce images in black and white, thermographers often use computer software to add colours to the images to make the subtle differences in temperature more pronounced.
Thermography has many applications outside of the roofing world. In particular, it’s used by firefighters to find lingering flames, and in night vision instruments to find people and animals. It is also used to map blood flow in humans to help diagnose cancer and other conditions.
How Thermal Imaging Roof Inspections Find Moisture
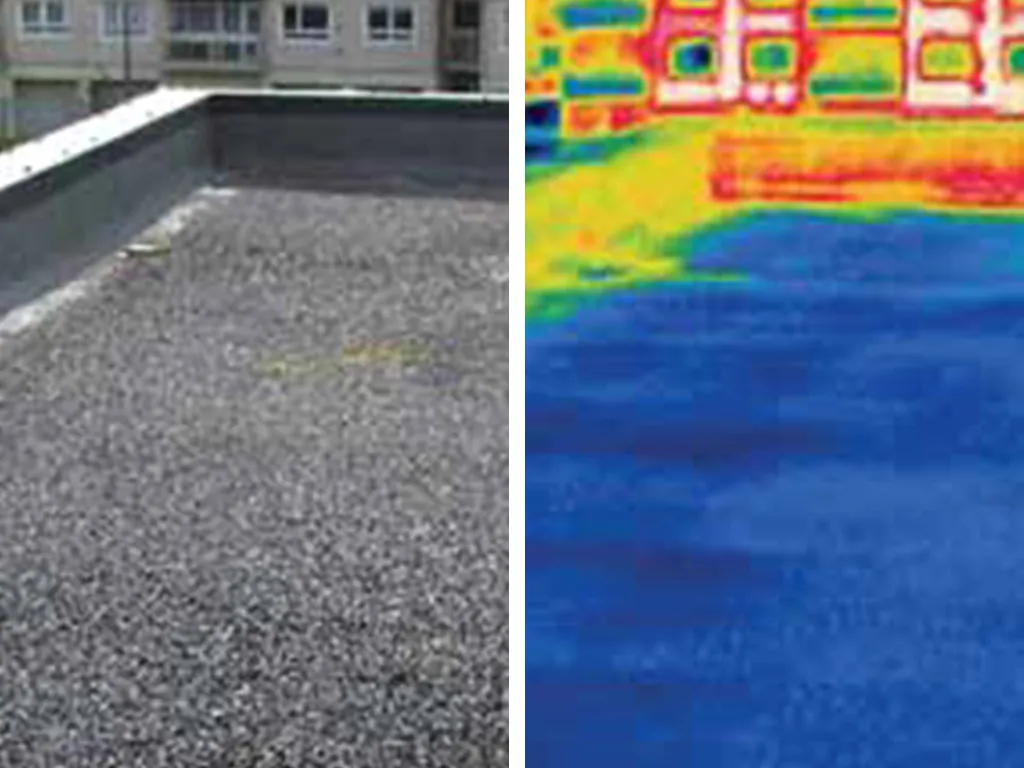
When using thermographic cameras to find moisture on roofs, certified thermographic professionals take advantage of the fact that water adds thermal mass to objects. Wet roofing insulation soaks up more heat from the sun during the day. At night, it releases this heat more slowly, appearing warmer in the thermal imaging.
The temperature difference between the wet roofing material and the dry may only be 2 to 4 degrees; so a thermal imaging camera used for this purpose must be very sensitive. There are also many elements on a roof that can appear warmer without being wet, such as HVAC equipment and wet flat-roof drains. A certified infrared professional is needed to determine where these warm elements are before the test and to ensure that the final images are interpreted properly. Reflective roofing materials may also appear to be wet on the thermal image; so it’s also necessary for your infrared professional to know precisely what materials have been used in the roof’s construction.
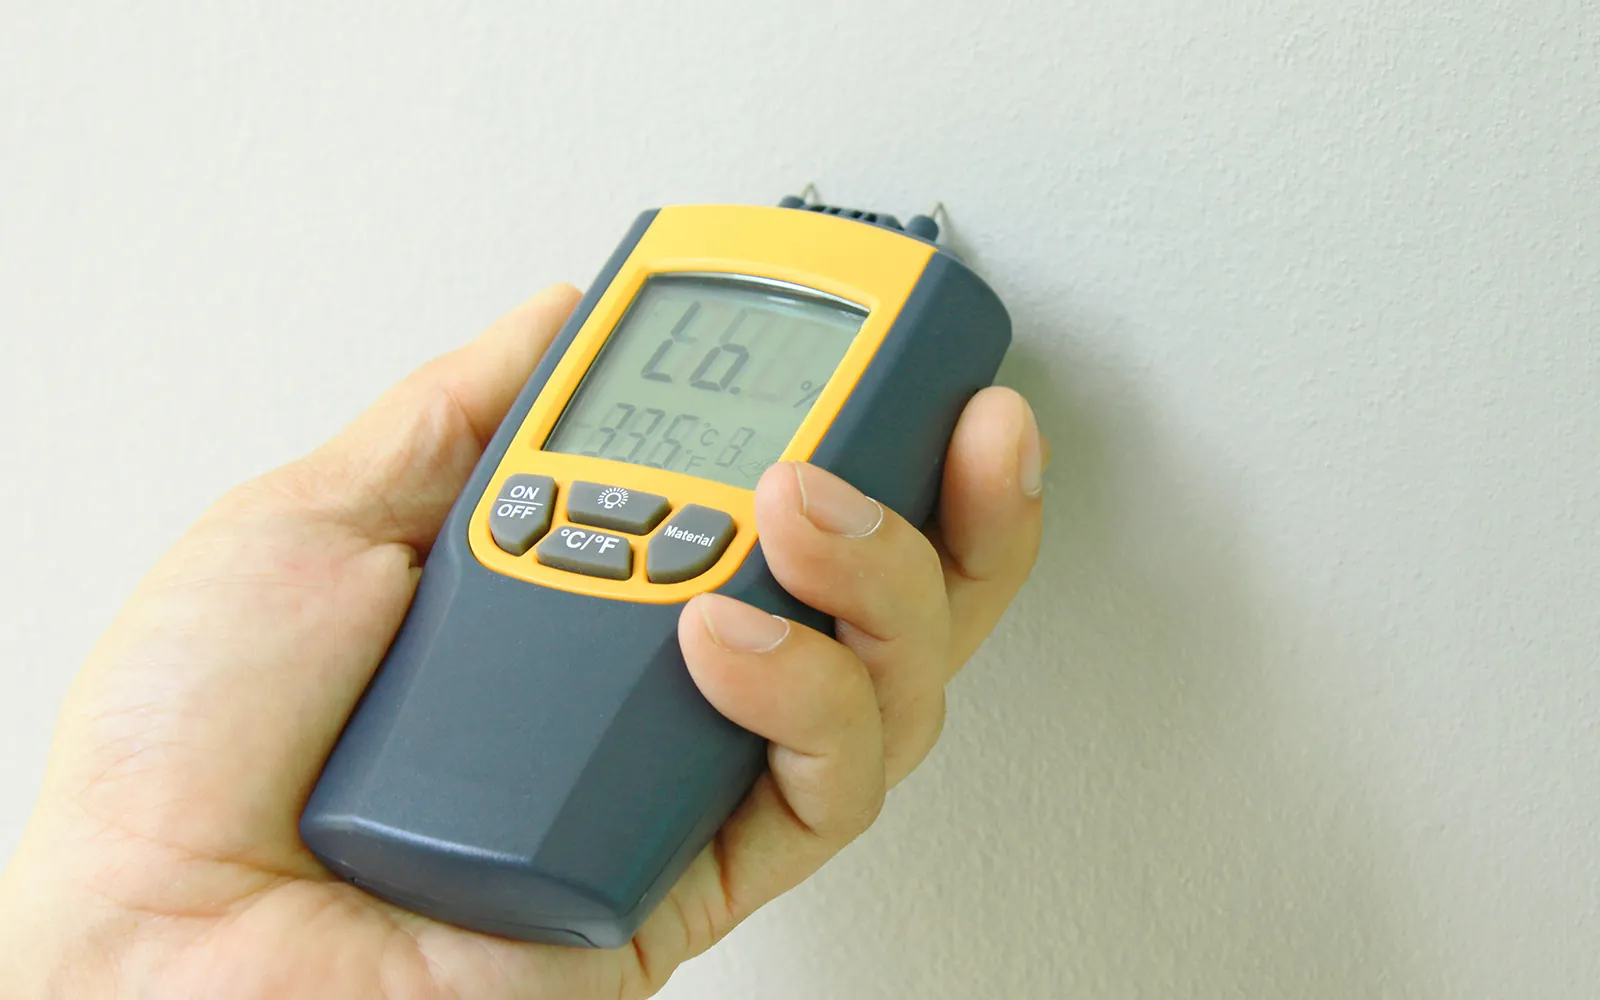
Further, because a thermal imaging camera detects the heat from excess moisture, the results of the imaging must be confirmed. Usually, this is done with a nonpenetrating moisture meter.
This tool is a probe that finds moisture in the roof without cutting into the membrane. Checking an entire commercial roof with this tool isn’t feasible because it would be very time-consuming. Instead, performing spot checks to confirm the findings of a thermal imaging scan can help prevent unnecessary replacement of roofing materials.
When Can a Thermal Imaging Scan be Performed on a Roof?
An infrared professional must wait for just the right conditions to scan the roof. Depending on the climate and current weather conditions, there are two options a thermographer may employ: a hot scan and a cold scan.
For a hot scan, outside temperatures must be above 10 degrees C (50 degrees F) and sunny. Without sufficient heat, or with too much cloud cover, the roof will not absorb enough heat during the day to show clear results on the scan. This heat absorption is called “solar loading.”
Additionally, it is not recommended to scan after a recent rain. If the roof is wet from rain, it will be challenging or impossible to tell if the moisture revealed on the scan is from the rain or from a leak. The same principle holds for dew. If the dew point is reached, and condensation forms on the outside of the roof, it will be hard to tell the dew from internal condensation.
As long as it is a warm, dry day, the scan can be performed in the early evening. As temperatures drop at night, the roof will begin to unload its heat; but the soaked areas will hold their heat longer, so they will appear brighter on the scan. The scan must be performed quickly. Depending on the rate of temperature change, even the wet areas of the roof can quickly lose the heat that the scan detects. Ideally, the scan will be completed before this happens; but, if not, it must be resumed again another night.
In cold climates, achieving these warm and dry conditions may not be possible. Instead, building owners in these areas can perform cold scans when the temperature is 10 degrees C (50 degrees F) or less. Instead of relying on the sun for solar loading, this method relies on the internal heat of the building to warm up the roof. It may be necessary to increase the temperature inside the building for a short period of time to make this difference more dramatic.
No matter your climate, an experienced thermographer can guide you to help choose the ideal conditions.
Thermal Cameras for Commercial Roofing
There are many applications for thermal imaging, and so there are many different types of cameras available on the market. For commercial roofing, the ideal thermal camera should be highly heat-sensitive and capable of detecting a single degree difference. It’s also best if the camera measures midwave arrays (3-5 micrometres) over longwave arrays (8 micrometres and more), as these waves are less likely to be distorted by any reflective materials on the roof or its insulation.
Also, a wide-angle lens and high spatial resolution are both important, so that the images show not just the moisture, but enough of the roof that roofing professionals can use them as a guide to find the exact location of the moisture.
How Roofing Material Affects Thermographic Scans
Thermal imaging technology is an incredibly useful tool, but it can only be used on certain commercial low-slope (flat) roof types, under specific weather conditions, and at specific times. Built‐up roofing systems and Heat welded membrane systems are usually ideal for infrared roof moisture scans. However, not all commercial roofing materials are ideal for thermographic scans. In fact, certain materials and roof systems make it next to impossible for infrared scanning to be useful.
Commercial roof systems and materials that are incompatible with most infrared roof moisture scan methods include:
- Roofs with concrete decks, especially lightweight insulating concrete with entrained moisture.
- Inverted or protected roof membrane assemblies.
- Certain insulation types, including foam glass and closed cell foam, such as polyurethane.
- Vegetative roofs.
- Heavily ballasted roofs.
- Metal roofs, especially those with reflective coatings.
- White roofs or those with foil-faced insulation assemblies, which are very challenging to scanners.
Any other “cold” roof assembly will make infrared roof moisture scans challenging. These roof types have insulation below the deck and a layer of ventilation that releases heat from under the metal. The only method that can capture moisture in the insulation of these roofs is the “under the roof” method we discuss later in this article.
Roof systems and materials that make infrared roof moisture scans more challenging, but not impossible, include:
- Foil‐faced insulation.
- PMA roofs – Protected Membrane Assemblies layer the insulation above the waterproofing membrane, as opposed to conventional roof systems.
- Roof systems that are white or lightly coloured in order to reflect heat.
Other elements of the roof or building that can affect the thermal scan include:
- Ponding on the surface of the roof.
- A great deal of ballast on the roof.
- Heat-producing equipment beneath the roof. (This equipment can simply be turned off a few hours before the scan.)
- Previous repair jobs if the material used was different than the material on the rest of the roof.
Conducting the Scan
There are four methods for conducting thermal scans of roofs.
1. Under the Roof Method
This scan is performed from inside of the building. First, you have to move obstructions out of the line of sight to the roof, including ceiling panels. This can be very labour-intensive, and so this method is rarely used unless no other option is available. This is the only method you can use for metal roofs.
Once the ceiling material has been removed, you simply point and shoot the thermal camera at the roof. The limited angle of view of this method means you’ll need to take multiple images and record their positions under the roof to find any revealed moisture later. Further, as your images don’t include roof landmarks, it’s hard for roofing professionals to use these images to guide their repair efforts when they are on top of the roof.
2. On-Roof Method
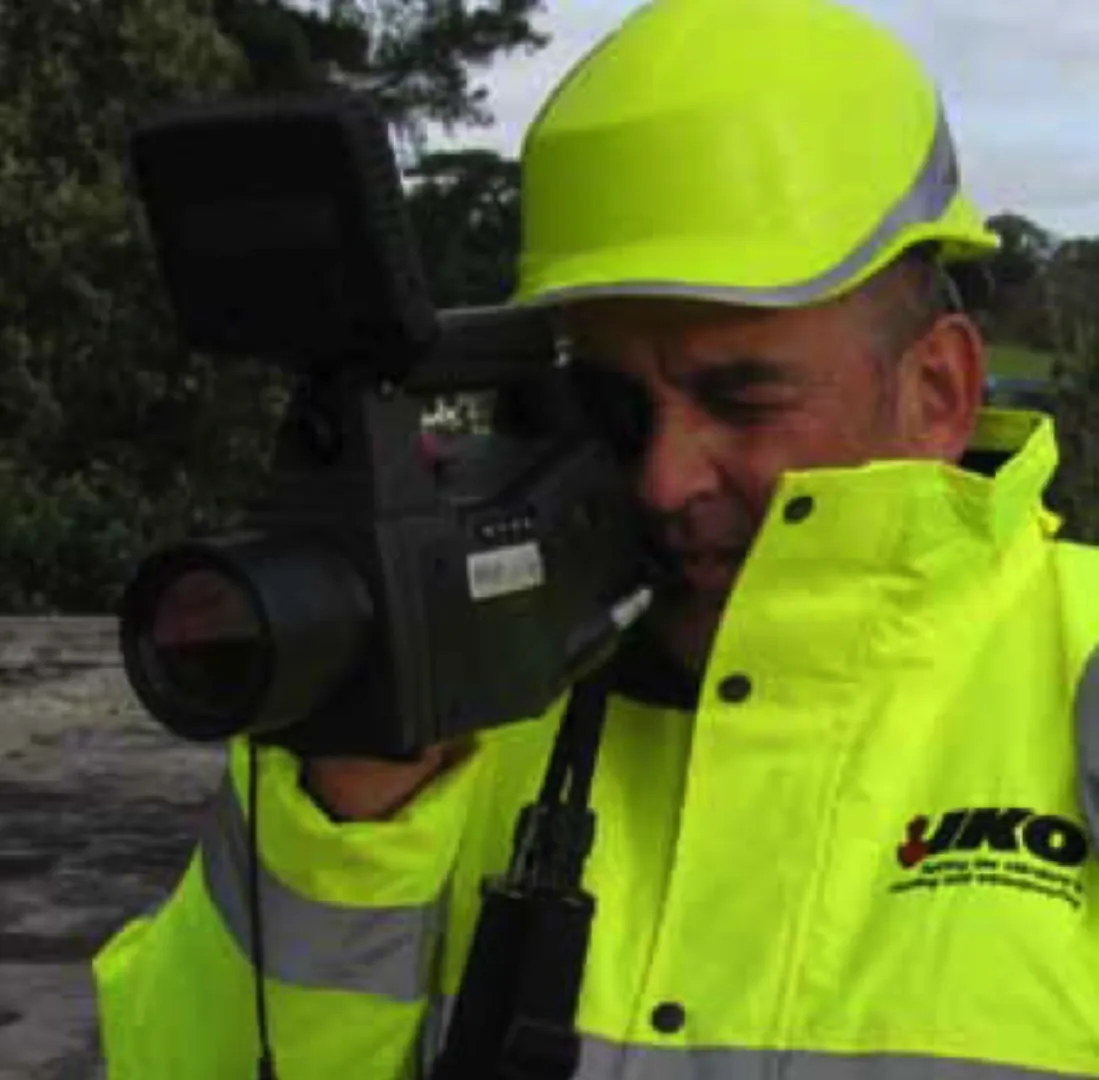
This scan method involves taking images while standing on top of the roof. Often with this method, the infrared professionals will mark any areas of moisture with paint so that it is easier to find them again later.
3. Elevated Vantage Point Method
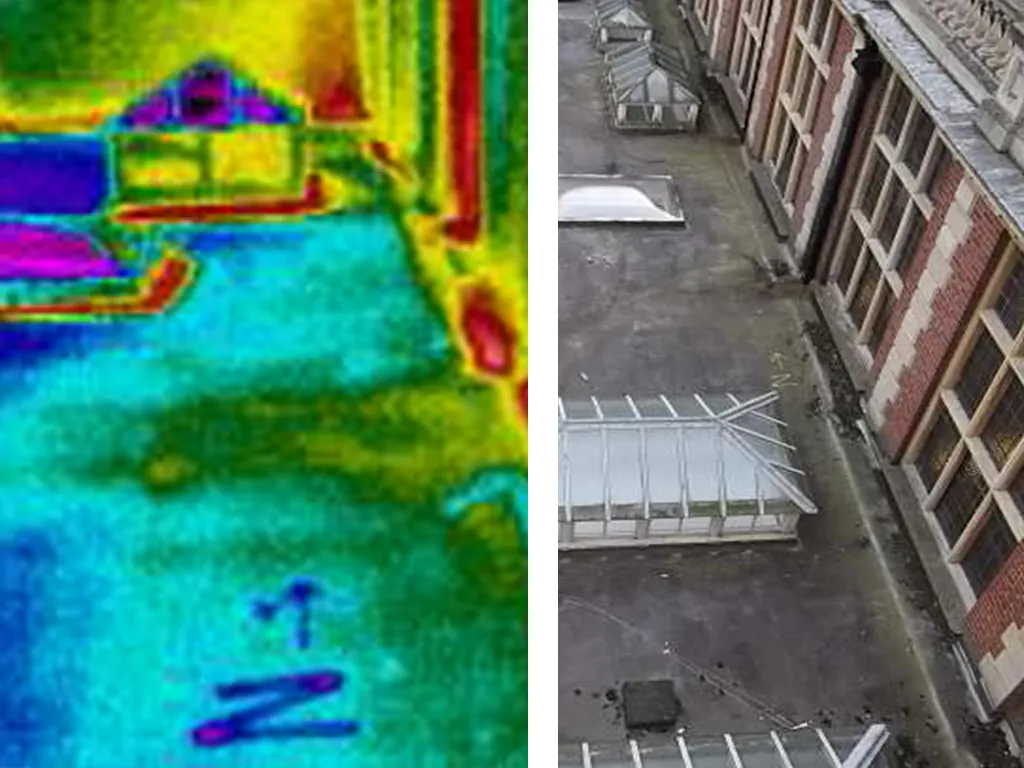
Taking thermographic images from an elevated position can make them easier to understand later as they will capture more of the roof’s surface, including any features that can be used as landmarks to guide the repair efforts. It’s a common mistake for thermographers to take pictures too close to the wet areas, and this method helps prevents that.
4. Aerial Method
Taking thermal footage from an aircraft or drone has many advantages. Using this method, the roofer can create a whole map of a roof, even a large one. With a high-resolution thermal camera, these maps can be very detailed. However, a very powerful camera is necessary, as the further you get from the roof’s surface, the more the heat dissipates, making readings more challenging.
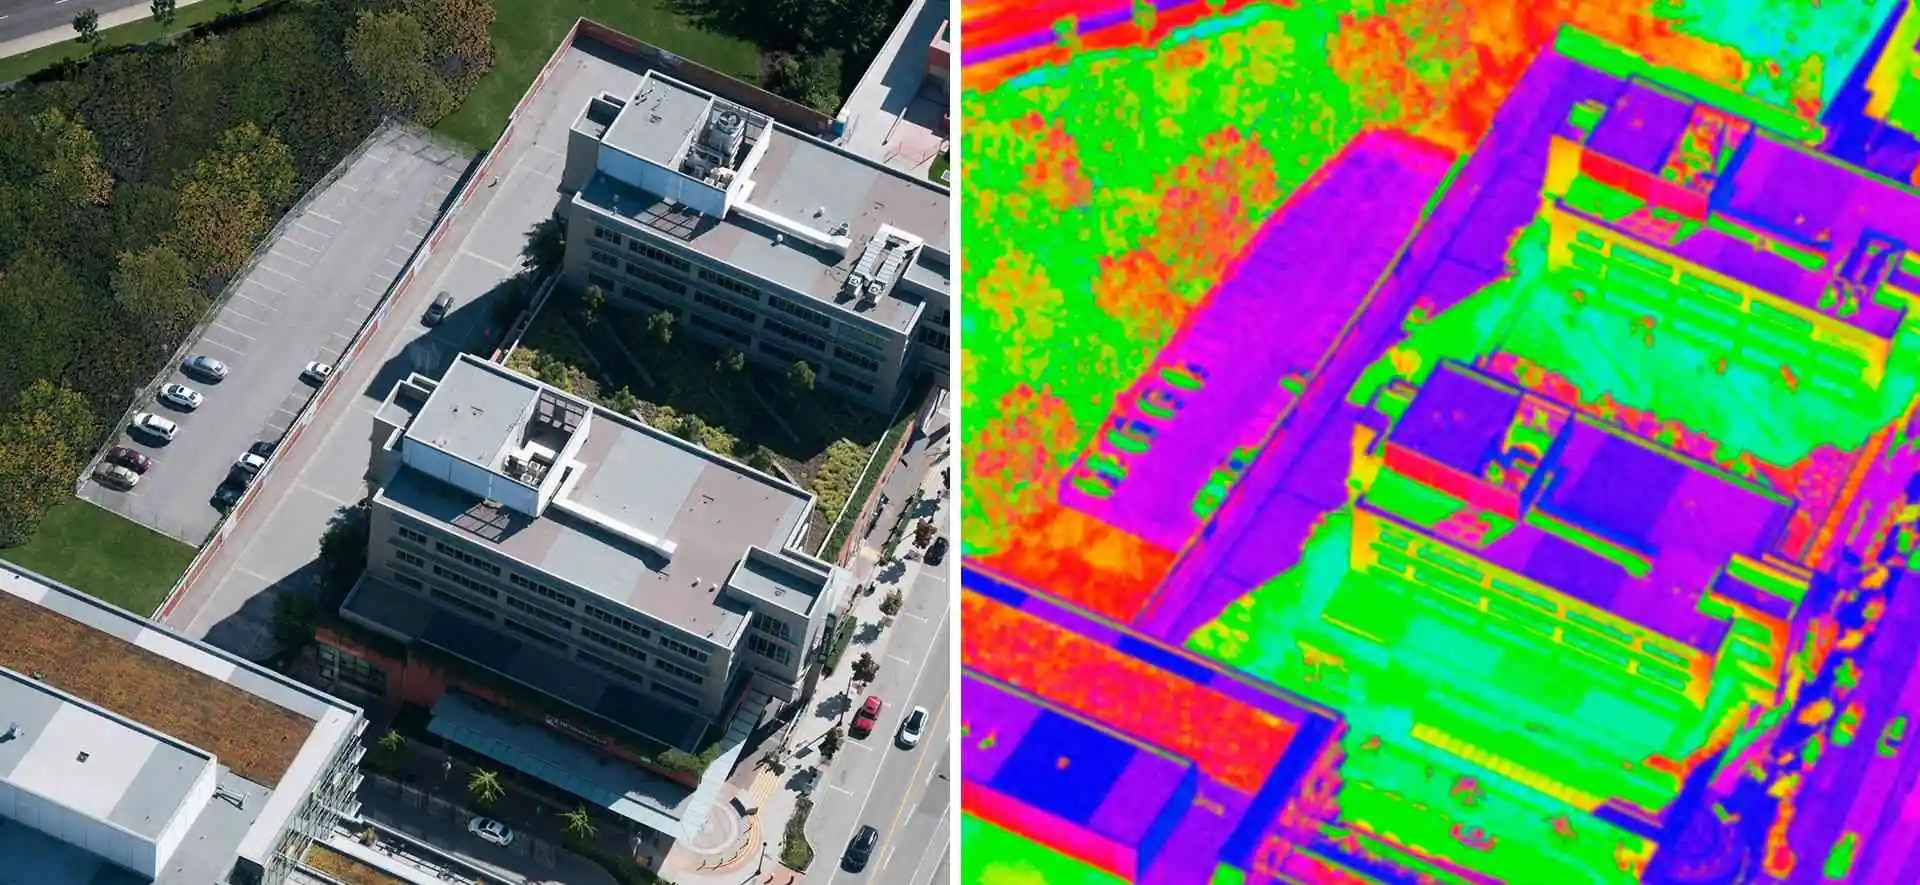
Aerial thermal roof measurements may be the only option for roofs that are inaccessible, dangerous or very large. From the roofer’s perspective, an aerial scan is convenient as they can do multiple roofs per night and don’t have to carry around their equipment. While previously this type of scanning would have been quite costly, drone technology has made it more accessible.
Before any of these scans are conducted, you or your thermal imaging professional should examine the roof for access points, sources of heat, flashing and penetration details, and any safety hazards. This will help the thermal professional to better interpret the final results and to stay safe while performing the scan.
After the Scan
After the thermal imaging is produced, you will need both a professional to interpret the results and a roofer to perform verification, find the exact source of any leaks and complete any necessary repairs.

What are the Benefits of Thermal Imaging on Commercial Roofs?
Building owners will benefit from regular thermal imaging roof inspections even if their roofs currently appear to function normally. Establishing a baseline thermal signature can aid in long-term maintenance planning and budgeting. Imaging can provide input into building heat/cooling projections and planning for long-term thermal differentials and loading. Conservationists can identify performing parts of a roof and restore R-values of insulations to original conditions.
Also, when done well, infrared roof moisture scans can detect very minor moisture problems. This will allow building owners to address these problems before they have a chance to become serious. A leak in a roof may not immediately enter into the building below. Instead, the insulation may soak up the water, becoming ineffective at insulating. It may also damage other layers of the roof by spreading the moisture.
Get Started With a Thermal Scan of Your Roof
An experienced thermographer can advise you as to whether or not your roof is a good candidate for thermal imaging, which kind of thermal scan would give you the best results and when you can expect the right conditions to conduct the scan. A thermographer is always recommended to interpret the results of a thermal imaging scan.
Though thermal imaging requires very specific conditions, it’s an extremely valuable tool to help commercial flat-roof property managers and owners, as well as roofers, cut costs and maintain their roof and its limited warranty, without unnecessary repairs. After you’ve had thermal imaging, you can contact an experienced roofer through our Contractor Locator to perform the necessary repairs.