How to Determine if a Roof Deck has Wood Rot and How to Replace Roof Sheathing
Table of Contents
- Why Is Rotted Roof Decking a Problem?
- How to Identify Wood Rot in a Roof Deck
- When Should I Check My Roof for Wood Rot?
- Why is My Roof Decking Damaged?
- How to Replace Rotted Roof Sheathing
- How to Replace Rotted Roof Decking
- What if My Roofer Didn’t Replace My Roof Decking After a Leak?
- Ask a Professional About the Condition of Your Roof Decking
Roof decking or sheathing refers to the thin boards of wood that span the trusses and support the rest of the roof. If your roof decking gets wet, it can develop wood rot and impact the performance of your whole roof. This problem can go unnoticed, as damaged roof decking hides beneath shingles and above the attic insulation. Sheathing isn’t normally visible, so it can be challenging for homeowners to find this problem before it becomes serious. However, you can easily avoid this problem if you know when to look for wood rot on your roof decking, how to identify the problem and how to fix it. This guide will tell you what you need to know to protect your roof and your home from wood rot.
Why is Rotted Roof Decking a Problem?
Most roof decking, also called sheathing, is plywood or oriented strand board (OSB). These thin sheets of wood absorb moisture when exposed to it through excess condensation or a roof leak. When sheathing is exposed to moisture frequently, there is always a chance it will decay or develop wood rot. While a single exposure to moisture is unlikely to lead to rot, routine water exposure may.
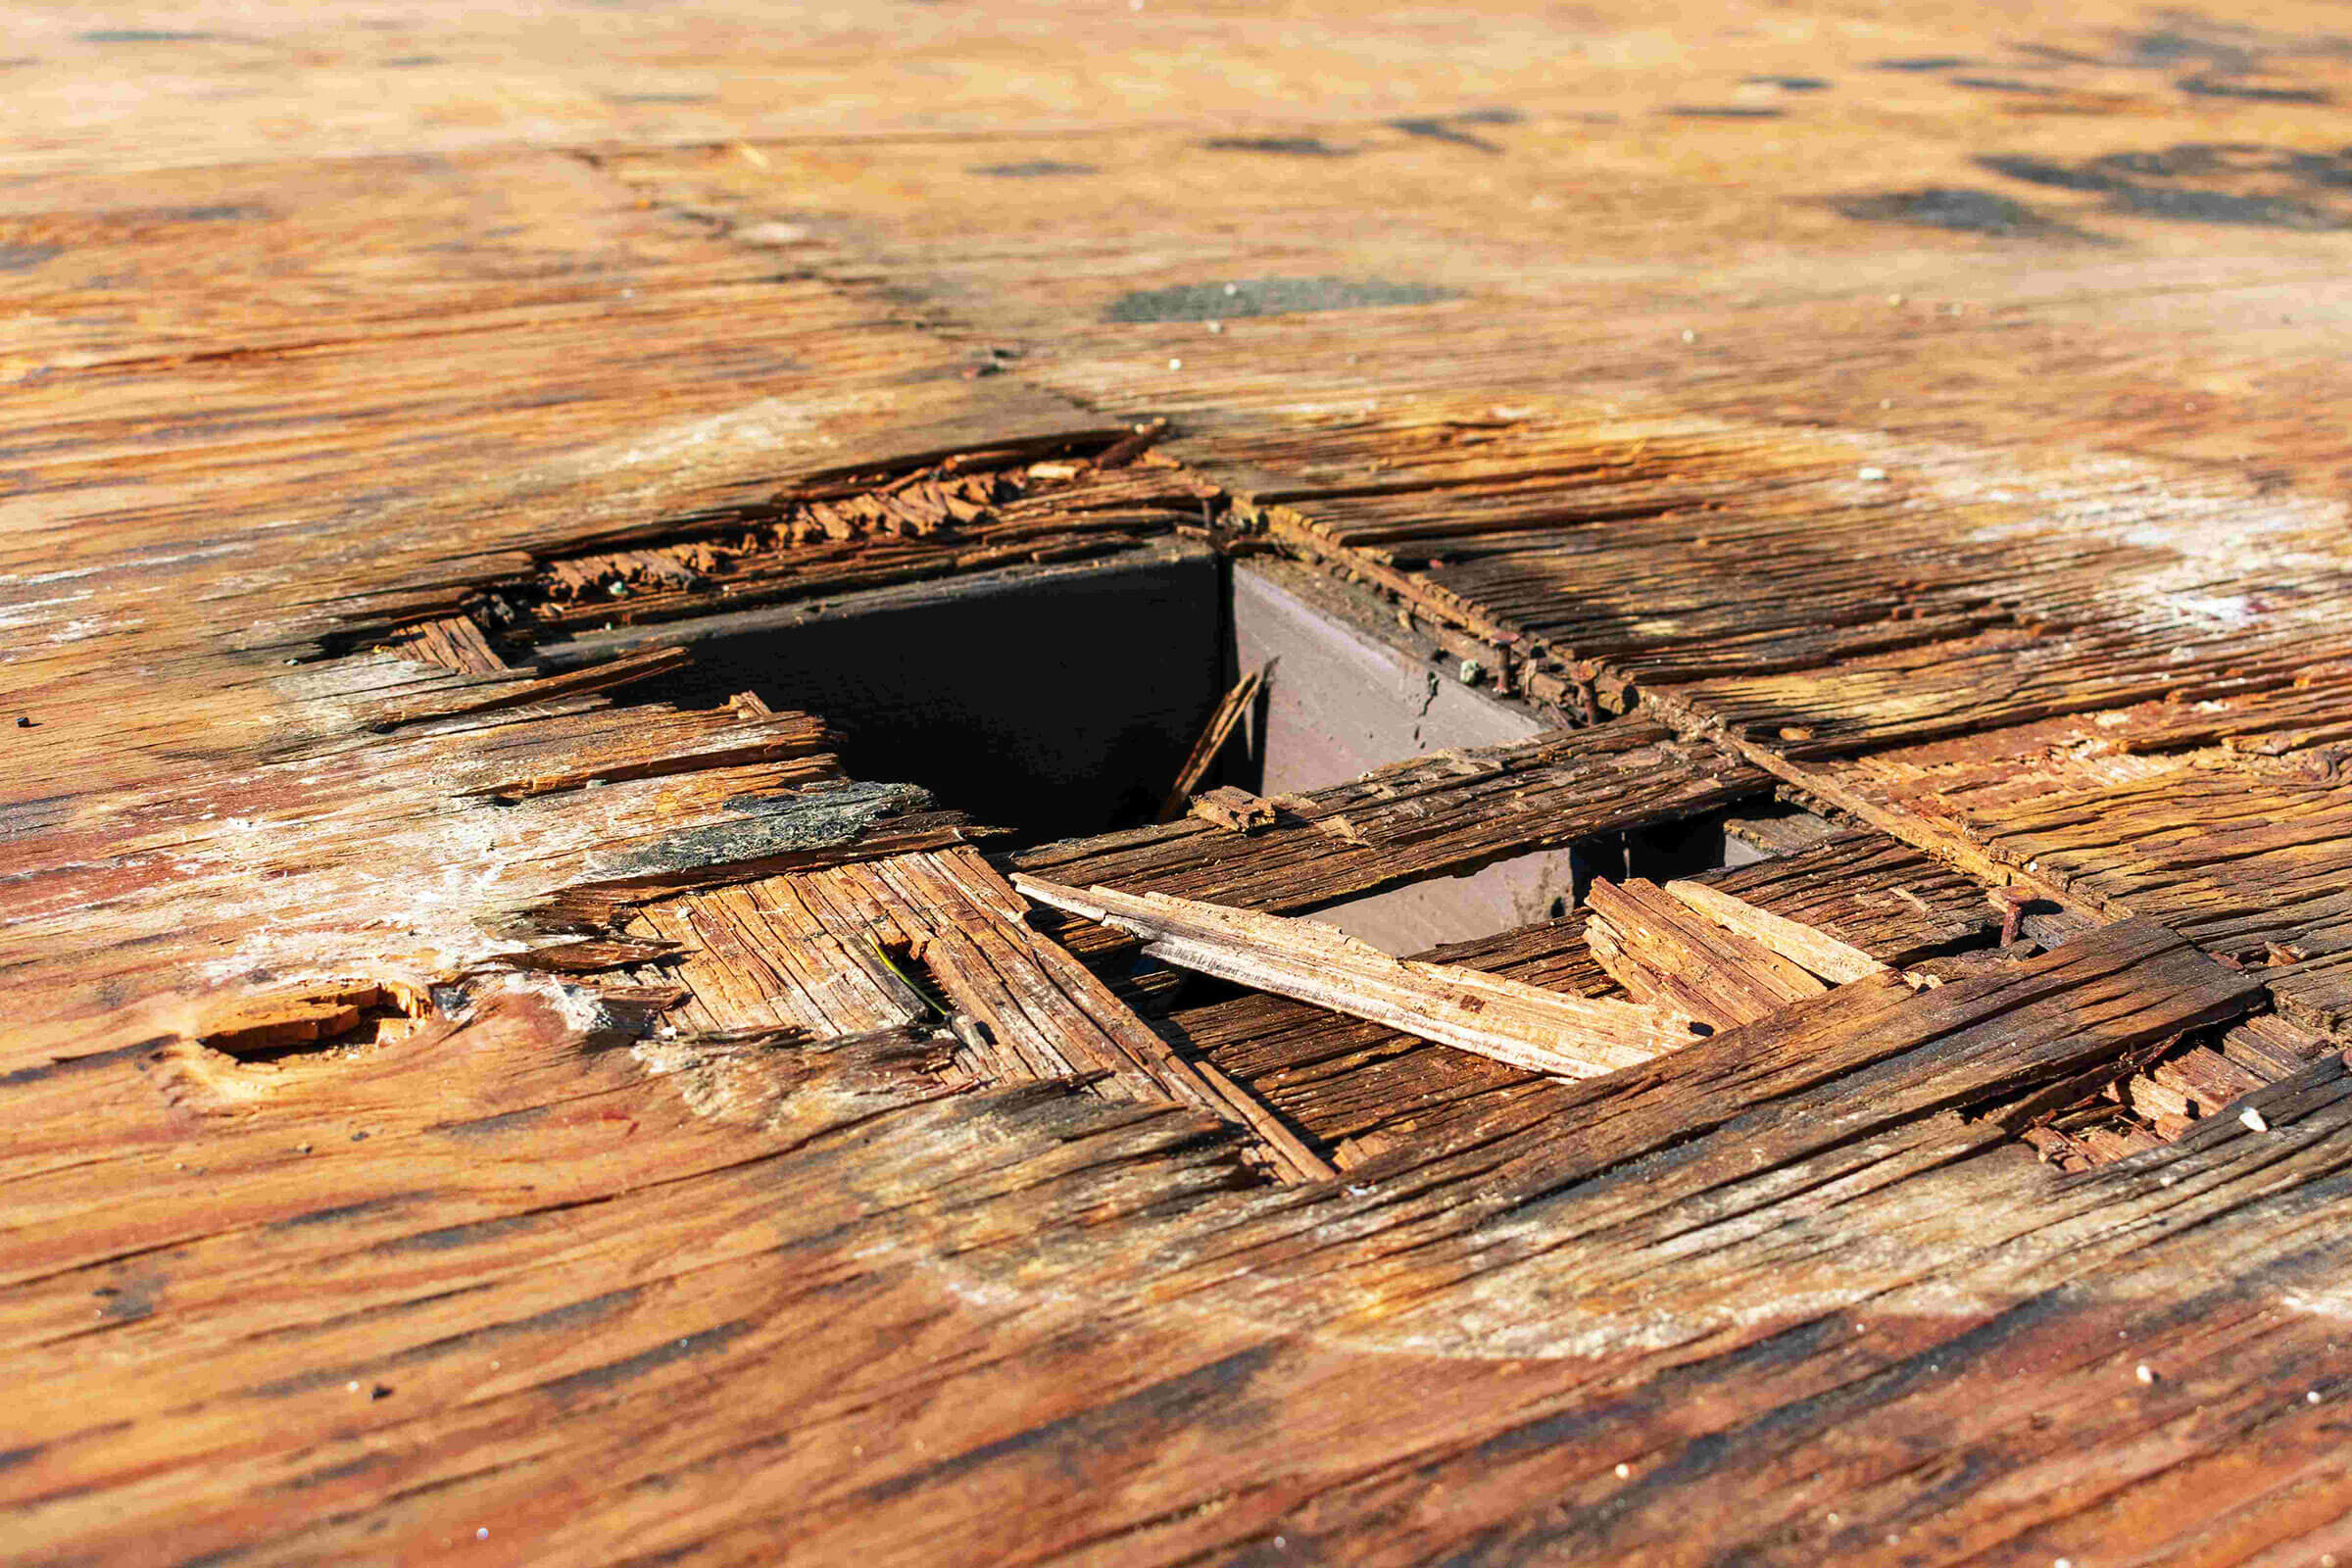
If your decking is rotting, it may or may not have developed a fungal growth that can ruin its stability by eating away at it. Whether or not there is a fungus, or just normal decay of wood due to moisture, rotting roof decking can cause several problems for your roof and your home, including:
- Bowing or bulging: Moisture and wood rot may cause your decking to sink in or swell up. From the outside, this looks like you have a bulging or bowing spot on your roof. The shingles above this spot may not function properly. Further, the decking can eventually fall in.
- More fungal and mold growth: Unchecked wood rot and moisture can lead to the growth of other fungi and mold. These can reduce the air quality of your home and may make the symptoms of certain respiratory conditions worse.
- Damage to insulation: Wood rot and moisture can damage your attic insulation, which is beneath your decking. This damage can reduce the energy efficiency of your home and cause you to spend more money heating or cooling it.
- Damage to other wood: Dry wood rot (one type of wood rot) can spread to other wood in your home, potentially even to structural wood. Replacing structural wood can be expensive, so it is best to stop dry wood rot as soon as you find it.
- Damage to other home systems: If the moisture issue that caused the wood rot goes unresolved, it may damage many other parts of your home, including the electrical system. Wet rot may also spread to other wood if the moisture is left unchecked.
How to Identify Wood Rot in a Roof Deck
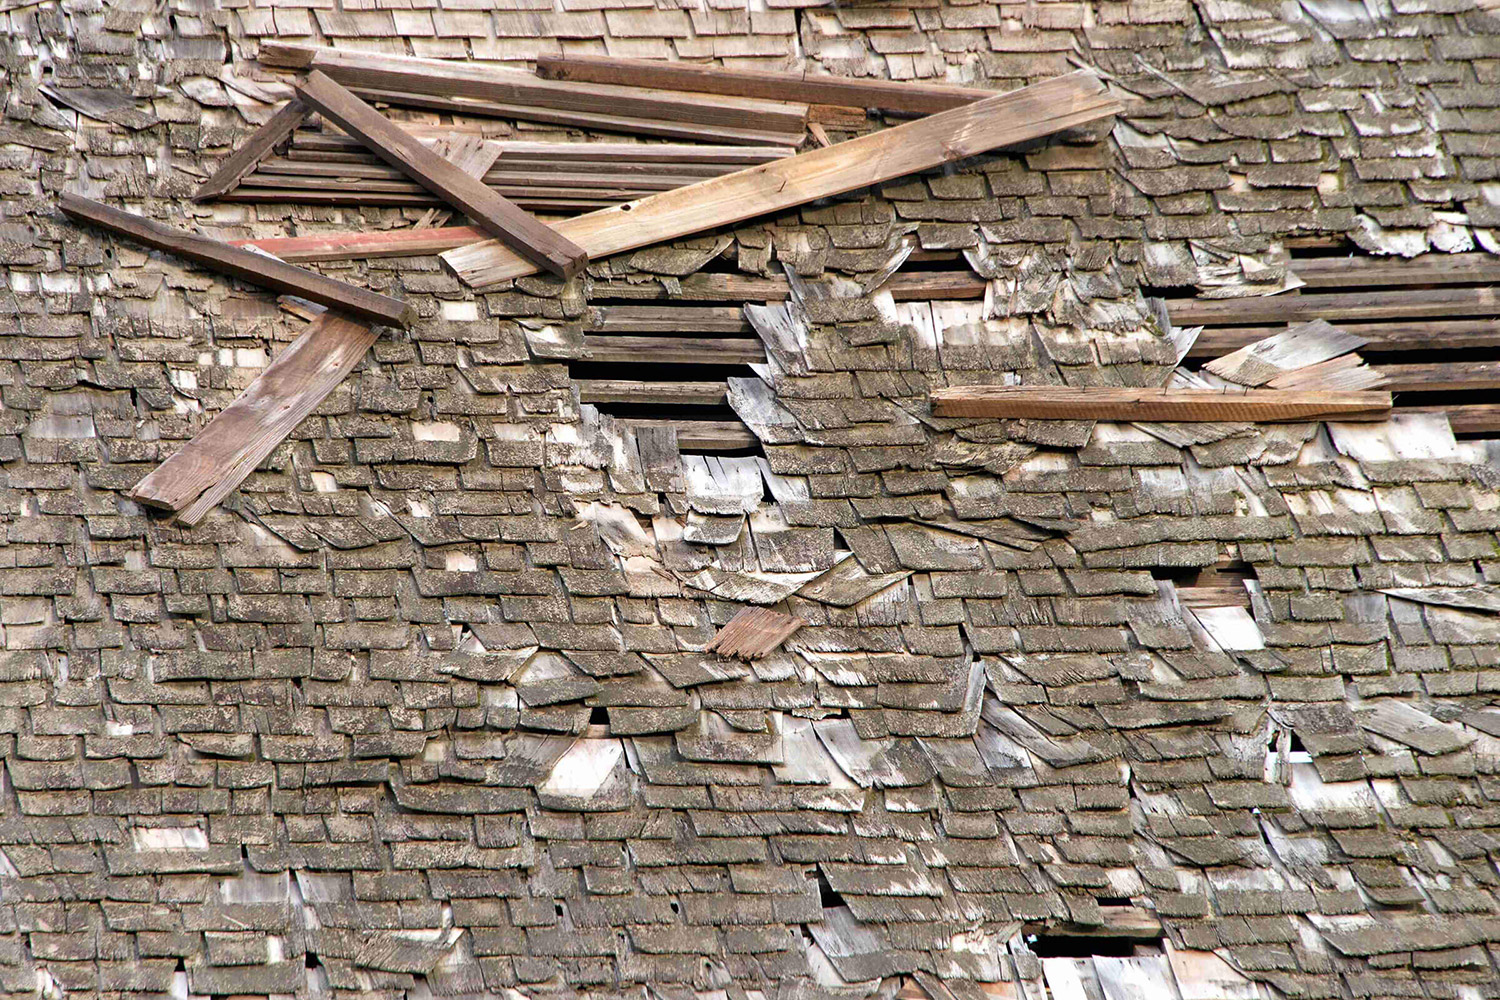
There are two main types of wood rot: dry rot and wet rot. There are also several subspecies of wood rot fungus. Therefore, every wood rot infestation may look different. Wet wood rot tends to look discolored or darker than the roof around it. Dry wood rot tends to look like a fungal growth, and it makes the wood cracked and dry.

Here are some more signs to help you identify wood rot in your roof:
- Wood is darker in spots.
- There are black, white, yellow, brown or grey growths and discoloration.
- The wood feels spongy and weak to the touch.
- The wood easily crumbles or cracks.
- There is a damp, musty smell.
An experienced roofer may suspect wood rot simply by stepping on the shingles above the rot and feeling it give more than normal.
Signs of dry wood rot include:
- There are grey, white or brown growths on the wood (may look like mushrooms or like pizza.)
- The wood has dried out and has long cracks in it.
- There is a musty smell.

When Should I Check My Roof for Wood Rot?
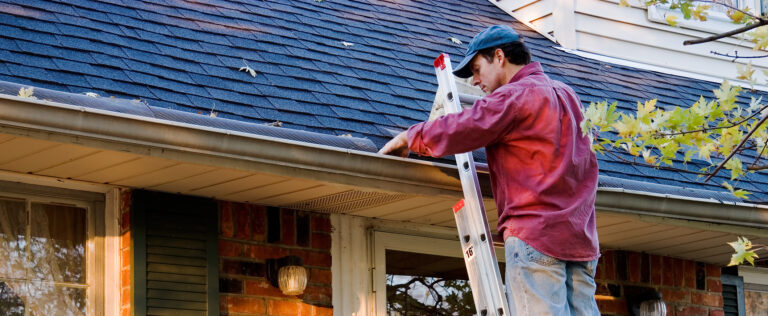
Tearing up a few shingles to look at the decking isn’t a normal home maintenance practice that you’d do on a monthly or yearly basis. You should look for wood rot either when you don’t know the condition of the deck (as in, you’re buying a new home) or when you suspect that moisture may have penetrated to the roof deck. You should ask a professional home inspector or roofer to check your decking for wood rot when:
- You’re about to sell your home and want to make sure your roof will boost your home value.
- You’re purchasing a new home and want to make sure its roof is in good condition.
- Your roof has had a leak, ice dam, tree damage or other potential damage.
- You’re doing a full roof replacement.
- Your attic has developed moisture issues.
- You are about to install new attic insulation or ventilation.
If your roofer has reason to suspect that your roof decking may not be in good condition, they may recommend you let them look at it. They may not have to remove shingles to do so. Instead, they may be able to spot the signs of decking rot from inside the attic.
Why is My Roof Decking Damaged?
Leaks and condensation are the two most common causes of a rotting wood deck. It makes sense to look for deck rot around notorious leak points, such as skylights, roof penetrations and anchor points for roof-mounted items. In order to fix the problem, you first need a professional roofer to resolve the underlying leak.
How to Replace Rotted Roof Sheathing
Once your professional roofers have fixed the underlying cause of the moisture, they will need to replace all the wood affected by the dry or wet rot. Here are the tools and materials they will use and a step-by-step guide on how they will complete the job.
Tools and Materials Required
Here are the tools and materials your roofers will need:
- New decking.
- Safety equipment.
- Crowbar or tool to remove shingles.
- Measuring tape.
- Saw.
- Roofing nails.
- Roofing hammer or nail gun.
- Other roofing material to cover the new decking.
How to Replace Rotted Roof Decking
- Step One: Estimate the extent of the damage. It will be impossible to know for sure how much of the roof decking has rot until your roofers can remove all the shingles above it. However, your roofers may give you an estimate of how much wood rot there could be to help you get a sense of the scale of the repair job. If this will be a costly project, they may have options to help you finance the roof repair.
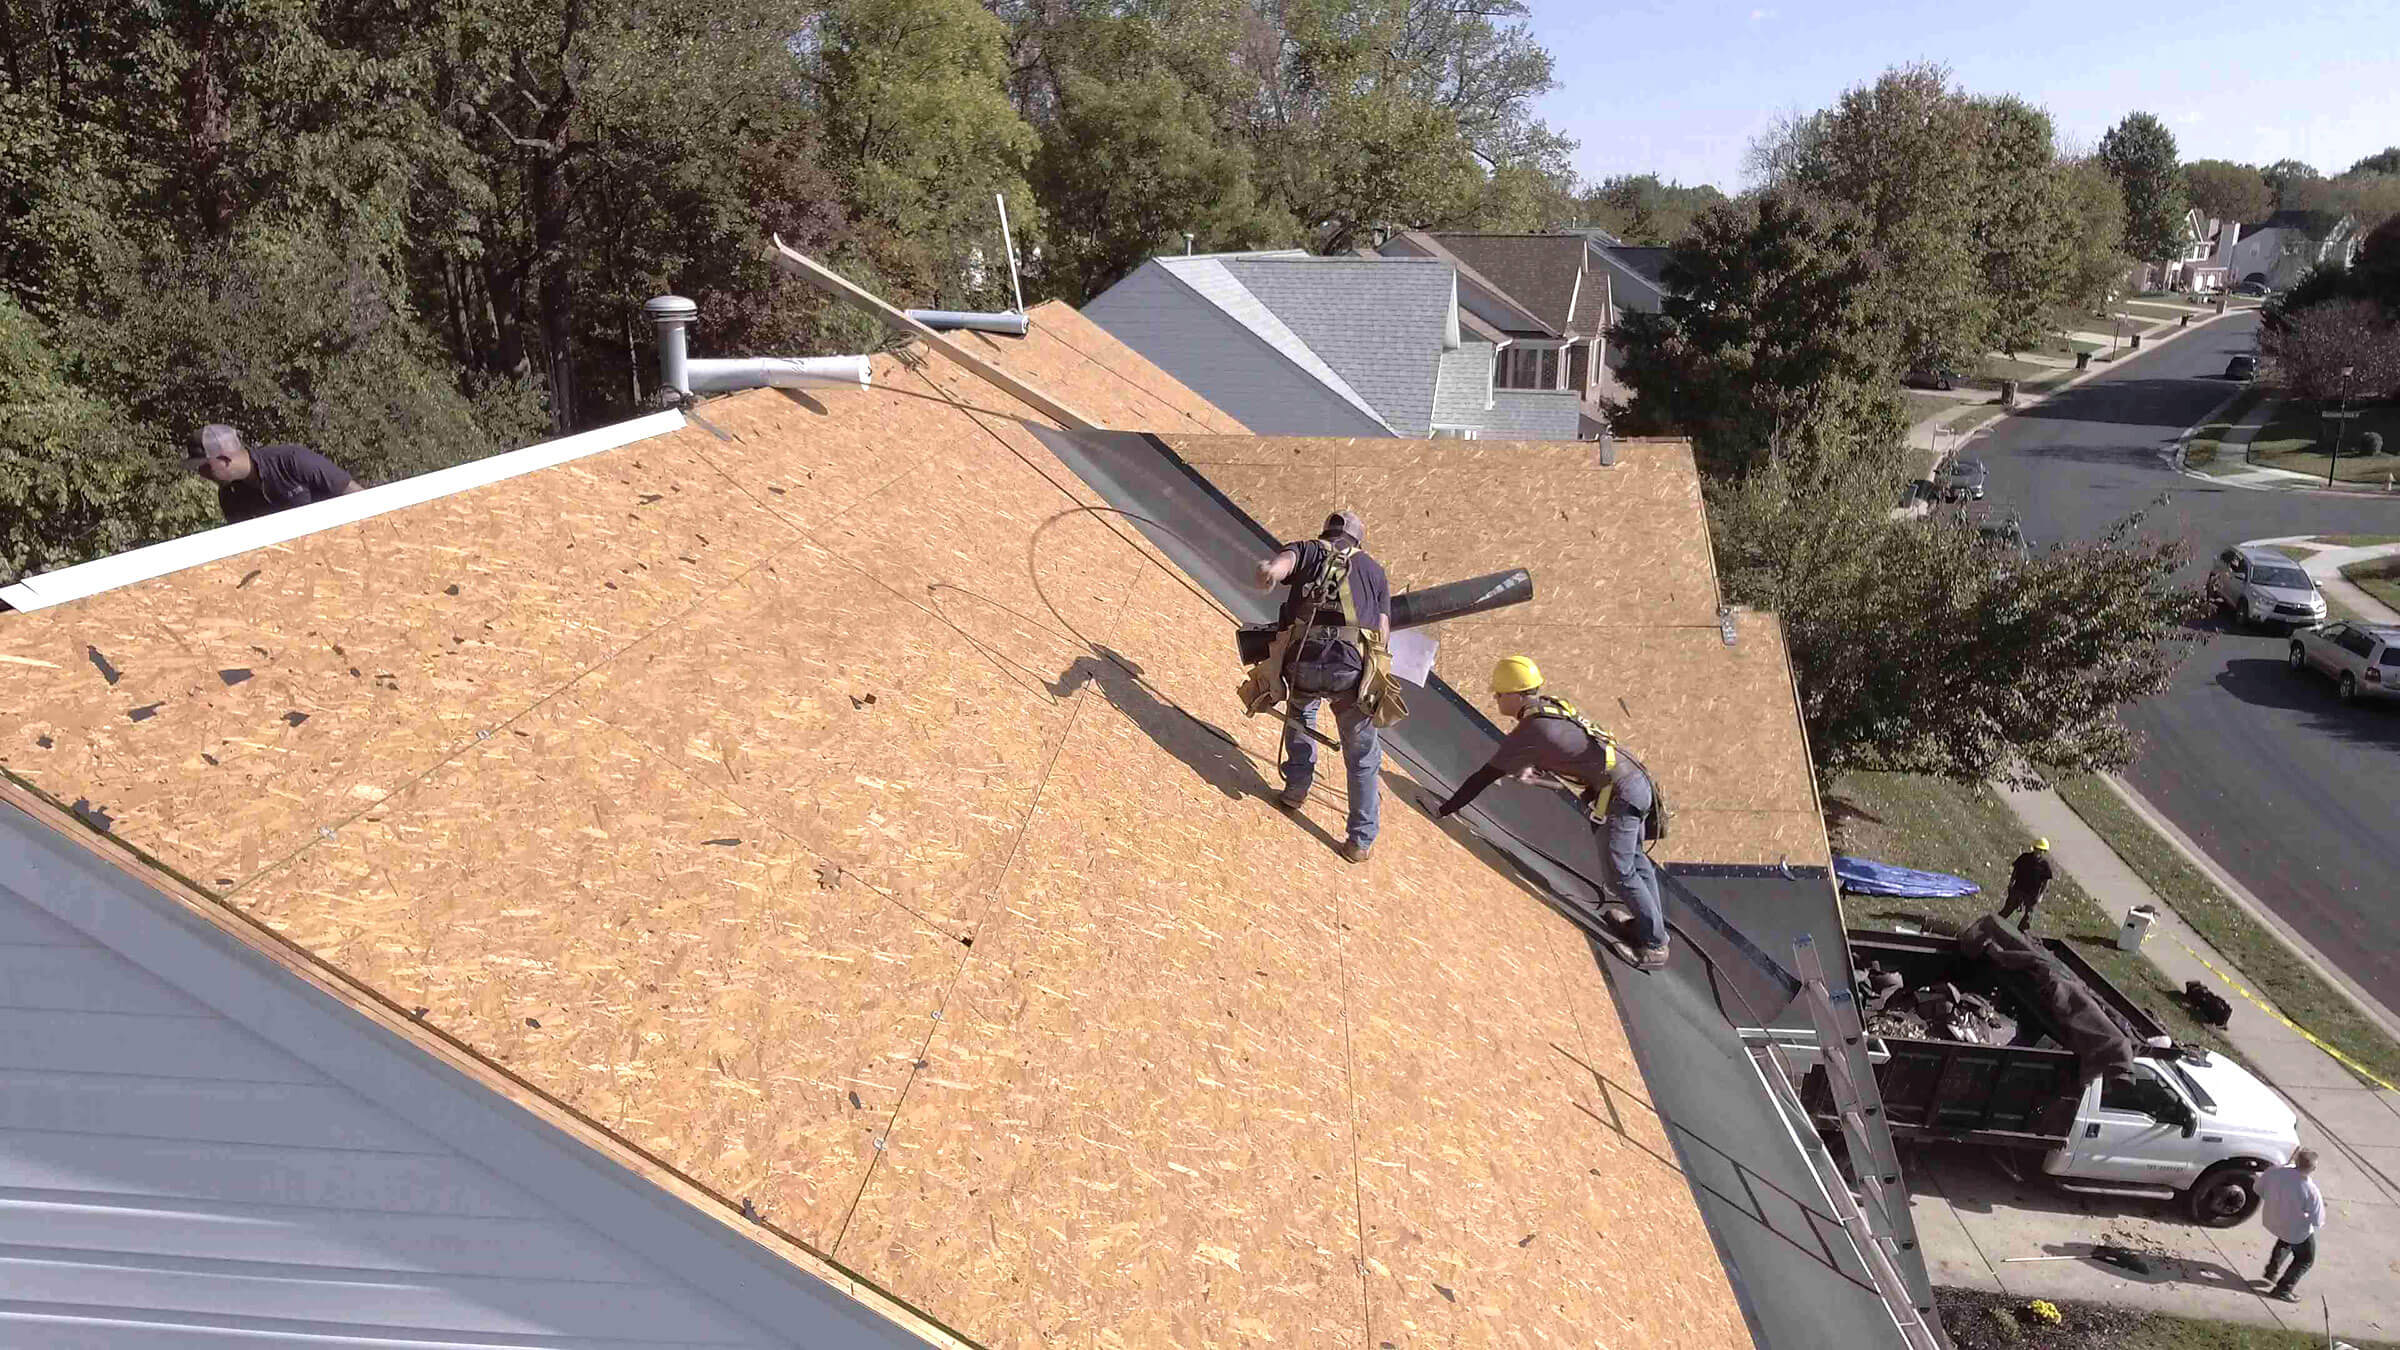
- Step Two: Remove the roofing. All the roofing in the affected area above the decking needs to be removed, including the shingles and underlayment. Depending on the location of the rot, your roofers may need to remove the flashing as well.
- Step Three: Measure the area. Your roofers will discover the extent of the wood rot and then measure out the areas that they need to replace.
- Step Four: Cut out rotted wood. Your roofers will use the saw of their choice to remove the rotted wood carefully, without cutting the rafters below. Every section that is cut should extend above a rafter. That way, when your roofers place the replacement boards in, at least one rafter supports them.
- Step Five: Cut the replacement decking to fit. Back on the ground, your roofers will cut out new decking material to fit the gaps. You can choose a new material as it is fine to mix plywood and OSB. However, the new decking should be the same thickness as the old, so that the shingles will lay flat.
- Step Six: Position the replacement. Your roofers will then position the replacement materials on the roof. They may need to make last-minute trims to ensure a proper fit.
- Step Seven: Secure the decking. Now, your roofers will secure the decking using nails or screws.
- Step Eight: Take optional additional measures. Depending on your roof’s unique circumstances, your roofers may choose to take some extra steps to protect your decking. They might seal nearby wood with treatments meant to resist wood rot, or they may apply waterproof tape to the edges where the new and old decking meet.
- Step Nine: Replace other roof materials. Now that they have taken care of the decking, your roofers will add in the rest of the roof. Ice and water protector, such as ArmourGard™, is especially important, as this membrane can help protect the decking from collecting moisture in the future. The new ice and water protector should overlap the old by a few inches. It’s also important to note that your roofers should replace and not reuse the original shingles they stripped off the roof. If the flashing may have contributed to the water intrusion, it should also be replaced.
What if My Roofer Didn’t Replace My Roof Decking After a Leak?
Homeowners may be concerned if they discover that although decking is routinely replaced as part of roof repair, the decking on their roof wasn’t. This may be a cause for concern, or it may not. Not all wet decking needs to be replaced. If only a small area of the decking was exposed to water, and it wasn’t exposed long enough to damage it significantly, your roofer may choose to leave it in place. However, your roofers may have also made a mistake by leaving behind decking that did need to be replaced. To start, ask your roofer why they chose not to replace your decking. If you’re not satisfied with their answer, reach out to another roofer for a second opinion.
Ask a Professional About the Condition of Your Roof Decking
Are you concerned that your roof deck may have wood rot? Getting a handle on it as soon as possible is best to protect the rest of your home. Reach out to a professional today through IKO’s Contractor Locator.