Table of Contents:
- The Types of Gutters
- Components of a Gutter System
- The Types of Gutter Fasteners
- Ferrules vs. Gutter Clips
- Hidden Hangers vs. Exposed Fasteners
- Materials and Sizes for Gutter Fasteners
- Should I Use Screws or Nails for My Gutter Fasteners?
- The Cause of Ice Buildup on Gutters
- Gutter Damage from Snow and Ice
- Do Gutters Cause Ice Dams?
- Will Removing Gutters Stop Ice Dams?
- When Do You Clean Gutters and how Often?
- Why Clean Gutters Before Winter and Before Spring?
- How Do You Clean Gutters?
- How to Seal Gutter Leaks
- How to Inspect Gutters for Structural Damage
- How to Realign Gutters
- How to Fix Sagging Gutters
- How Do You Prevent Gutters From Freezing?
- Do Gutter Guards Prevent Ice Dams?
- Should You Remove Gutter Guards in Winter?
- How to Install Gutter and Roof Heating Cables
- How to Get Rid of Ice Dams in Gutters?
- The Importance of Winter Maintenance for Your Gutters
Disclaimer: Always get an expert’s advice about an issue with your gutters. Be sure you know and abide by ladder safety principles when working on your gutters. Do not work on your gutters if they cannot be safely accessed using a 10 foot ladder. Do not use an extension ladder. Always have someone else spot you while you stand on a ladder. Never stand on your roof. Do not work on your gutters during cold, windy or wet weather.
If you live in a cold climate, you’ve likely seen an ice dam in your gutter. These chunks of ice may start in your gutter and slowly extend onto your roof. While ice and water protector can protect your roof from ice dams, there are also gutter solutions that can prevent them.
In this article, we’ll discuss which types of gutters are best for roofs in cold-weather climates and how you can clean your gutters before winter to prevent ice dams from forming. We’ll also discuss how to seal gutter leaks and fix sagging gutters. If your preventative measures fail, and your roof develops an ice dam anyway, we’ll also show you how to remove it without damaging your gutters or roof.
The Types of Gutters
Gutters are an essential component of your roof. There are a few things you need to know about them: their material, shape, size and whether they are seamless or not. We’ll go through your options for gutter type below.
There are three primary gutter shapes or styles:
Half-round gutters: These gutters look like round tubes cut in half. They were once a popular gutter shape, but they have since fallen out of favor. Half-round gutters are cheaper than other styles, but they are the least effective. In fact, they only hold half the water a K-style gutter can hold. However, you may still see half-round gutters on historic homes.
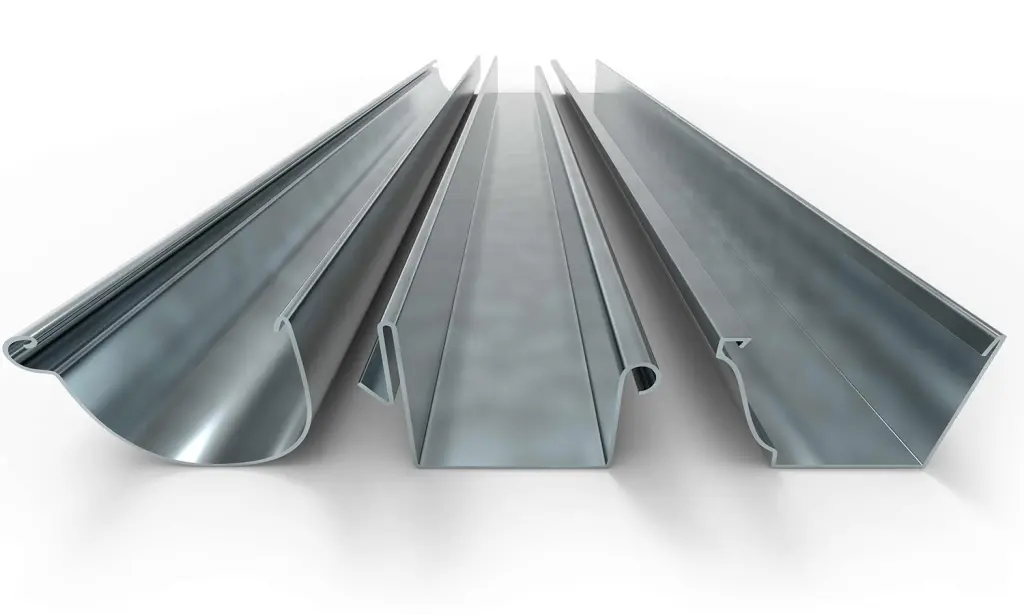
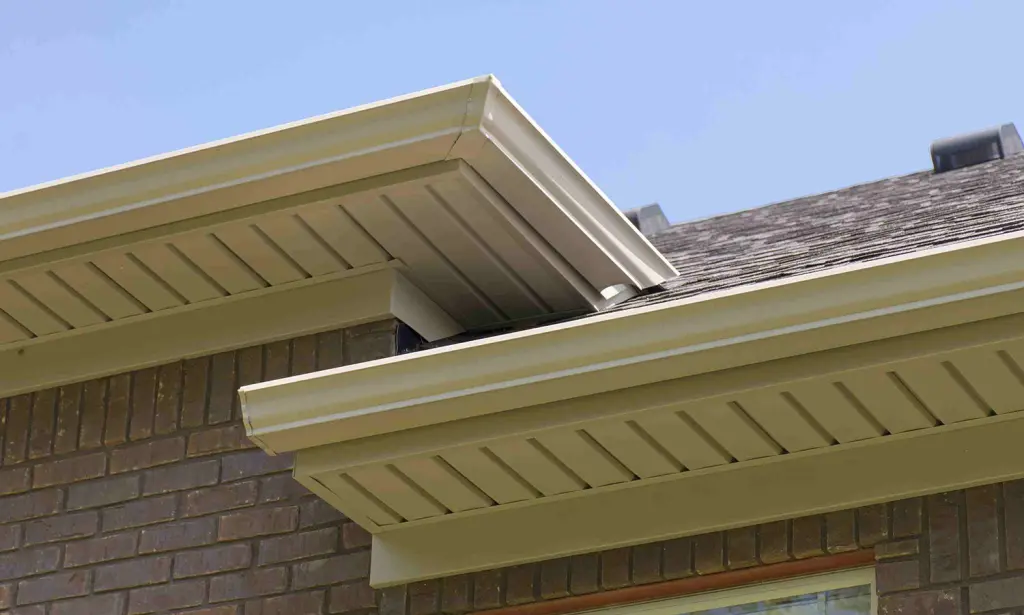
K-style gutters: K-style gutters have square bottoms, and one side flares out. From the outside, they look similar to crown molding. K-style gutters hold more water than half-round gutters and are therefore a better choice for homes in cold areas. They can be from 5 to 8 inches wide.
Fascia-style/wide-bottom gutters: Some home styles do not work well with K-style gutters. Fascia gutters have a similar flat bottom, but their outside edge is straight, mimicking the look of the flat fascia behind them. Plus, with a flat outer face, these gutters can be made narrower, so they stand out less. Fascia-style gutters are more common in cold-weather areas. However, they don’t necessarily perform better than K-style gutters in cold weather. Unless you see extreme storms or have an unusually large roof, wide bottom gutters are unnecessary.
Gutters also vary by construction:
Sectional gutters: Most homeowners are familiar with sectional gutters. They are shipped in short lengths and snapped together during installation. Each seam, where two gutter lengths join, is a weak point that will leak or sag in time. However, sectional gutters are faster and simpler to install.
Seamless gutters: These gutters are continuous and do not have seams. Instead, they are custom cut to the exact size the home requires. Corner pieces may be soldered or screwed together. As a result, there is no weak spot where a leak will inevitably develop. Seamless gutters are better in cold-weather areas, as leaking seams can freeze over and push the whole gutter apart. However, these gutters are more expensive and difficult to install.
Gutter manufacturers use several different materials to create their products, including:
Plastic/vinyl: Many homes have vinyl gutters because they are the least expensive and the easiest to install. However, vinyl has many drawbacks. It’s a weaker material that can’t take much force. You can’t prop your ladder up against vinyl, which could be a problem when it comes time to clean your gutters. Vinyl is sensitive to temperature. It contracts in cold weather, which makes it weaker and more liable to crack than other materials. Vinyl gutters are always sectional and their seams are particularly weak. They are also available in a very limited range of colors, although those colors may match your vinyl siding exactly. You will need to replace vinyl gutters roughly every 10 years, if you’re in a cold climate. You may have to replace your gutters more or less often based on how well they fare on your specific home in your specific climate. Still, their low cost may make that replacement worth it.
Aluminum: Aluminum gutters are a step up from vinyl gutters.
They are stronger and do not rust, but may corrode unless they are treated to prevent corrosion. In cold-weather climates, you’ll need a thicker gauge of aluminum gutters, 0.32 inches or 0.27 inches in order to stand up to the weight of snow. Plus, unlike vinyl, aluminum gutters may be seamless and can be painted. Aluminum gutters are versatile and can work with all styles of home exterior. Aluminum gutters can take more abuse than vinyl. Yet, they may still dent from ladders or other impacts, such as falling branches. Plus, they are a tad more expensive.
Steel: If you need a stronger gutter, steel is a good choice. You may prefer steel gutters if you live in an area where hurricanes might blow all kinds of debris against your home. Steel gutters must be galvanized to resist rusting in wet conditions. You may need to reapply a protective coating every five years if you’re in a very humid or salty area. Steel gutters are also more expensive than aluminum. They may be seamless. The corners are usually screwed together, not soldered.
Copper: Copper gutters are the strongest and more secure choice, but also the most expensive. They are always seamless, and the corners are soldered together. They do not rust, won’t sag and won’t bend under the pressure of your ladder. However, they may corrode. Most homeowners appreciate the look of copper gutters, but they may not work on some home styles. Further, they are expensive and their weight makes them difficult to install.

Wood: Wood is a traditional gutter material that few modern homes can benefit from. Not only are wood gutters expensive, but they are also quick to leak and rot. You may see wood gutters on historic properties.
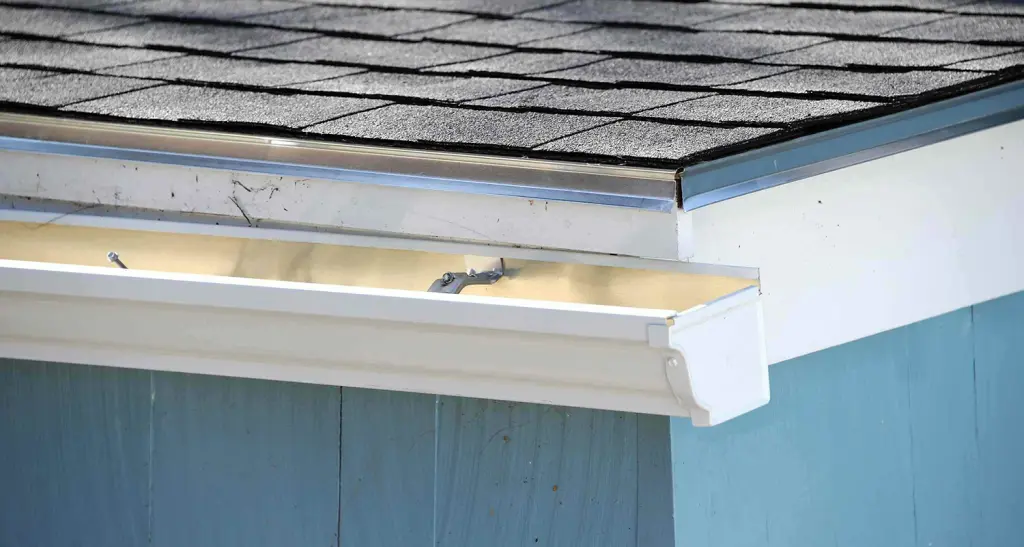
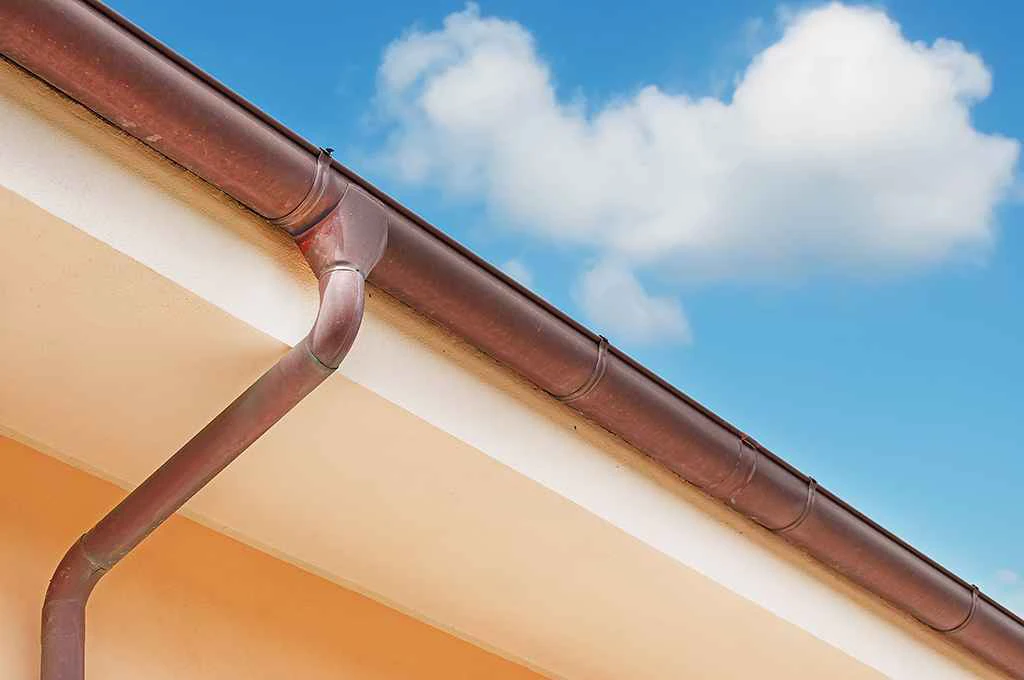
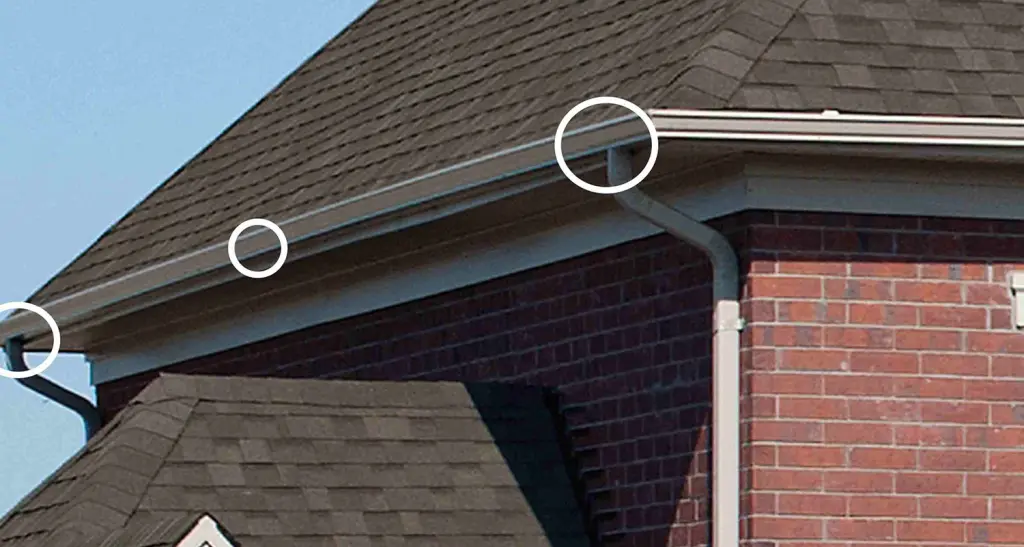
Components of a Gutter System
Gutters aren’t enough to direct water away from your home on their own. Instead, they are part of a system.
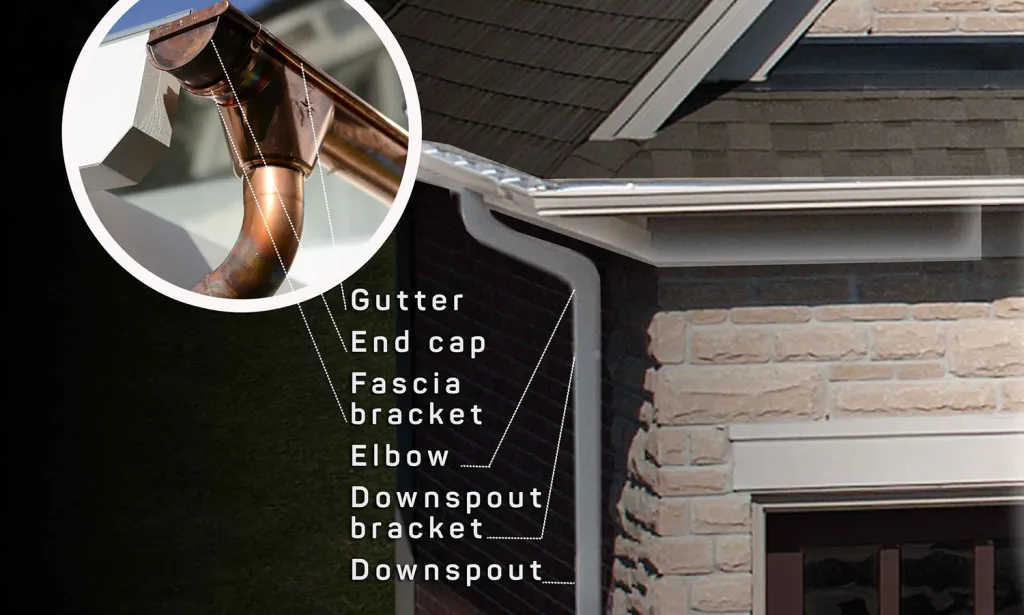
The parts of this system are:
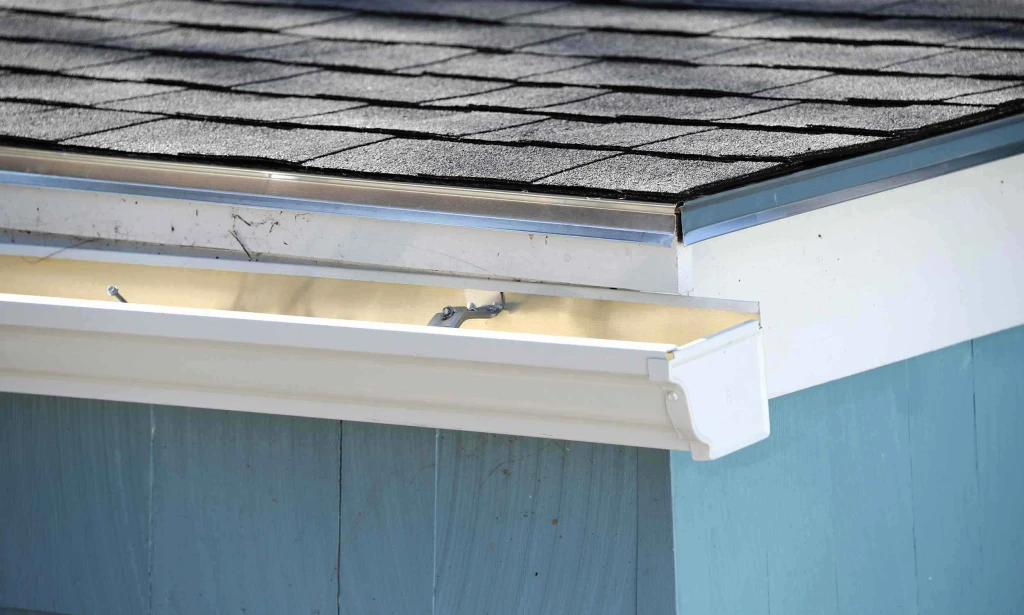
End caps: These flat caps stop water from flowing out of the gutters.
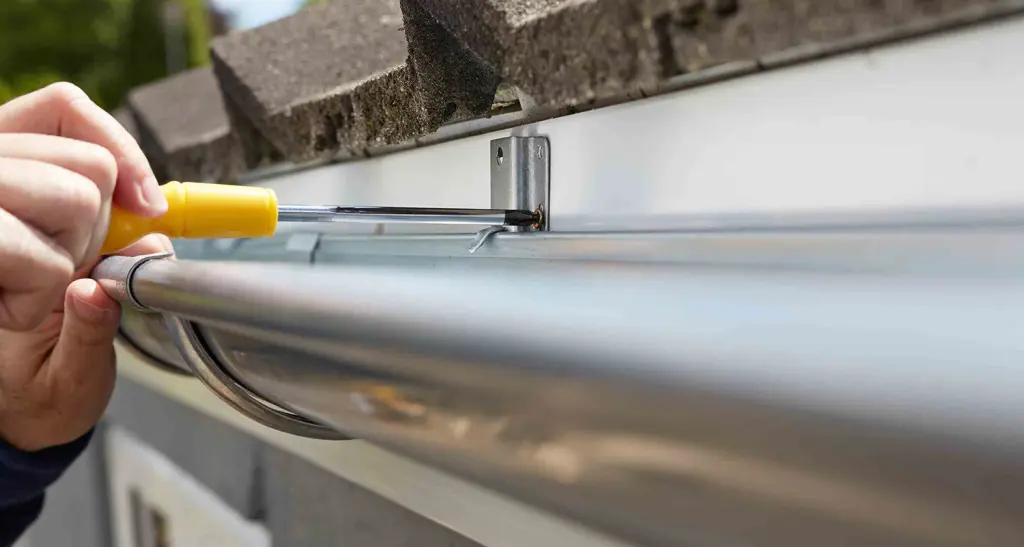
Gutter hangers: Also called fascia brackets, these hangers hold the gutter up to the wall. There are many different styles that work for different kinds of fascia or gutters. Some are nailed into the fascia or the side of the home and provide a platform for the gutter to rest on. Others hold the top edge of K-style gutters instead of wrapping beneath them. Read more about the types of gutter hangers later in this article.
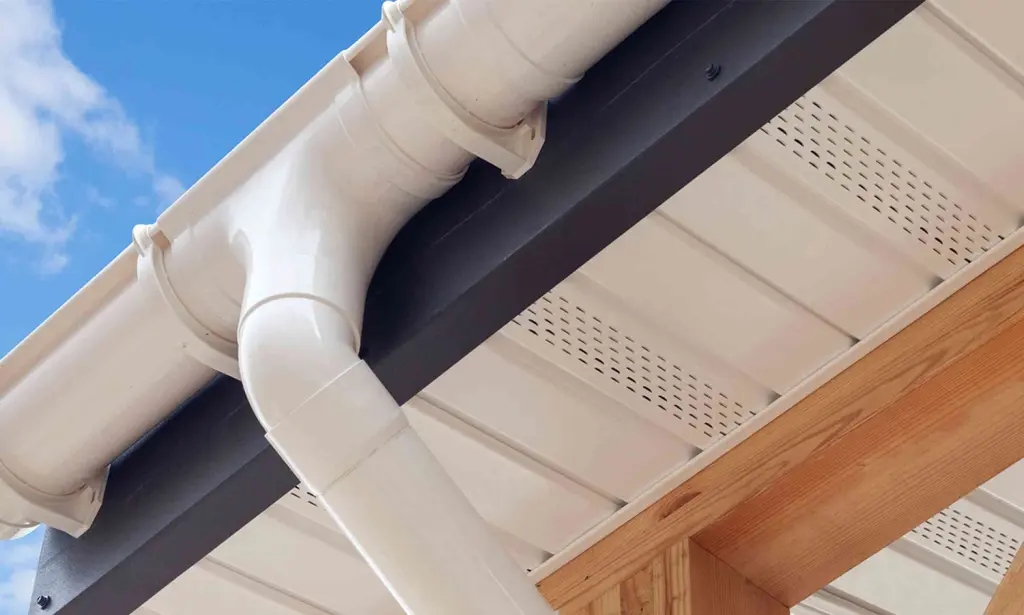
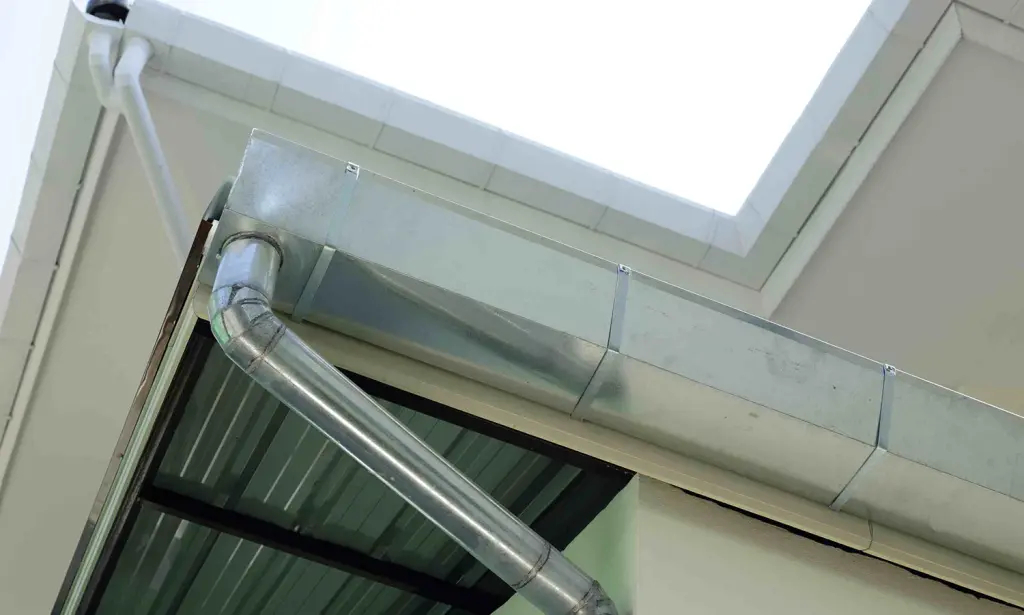
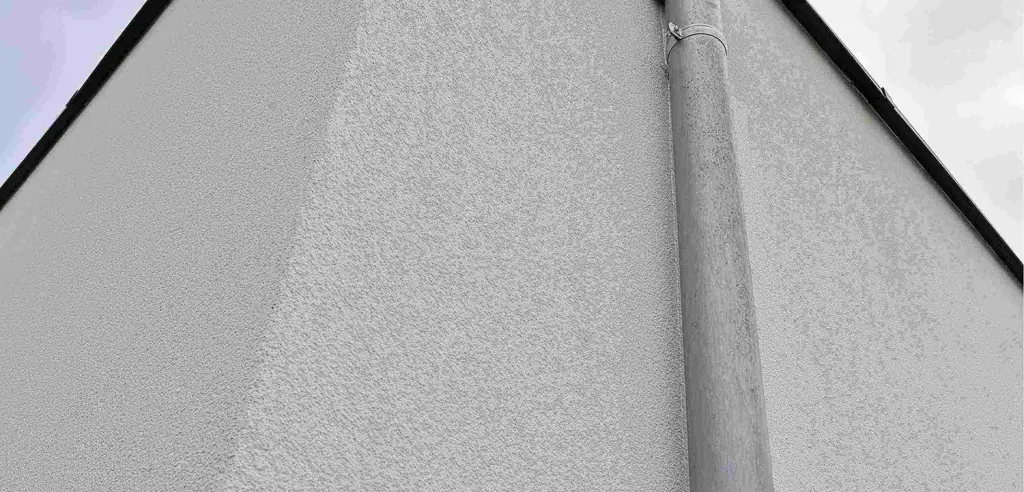
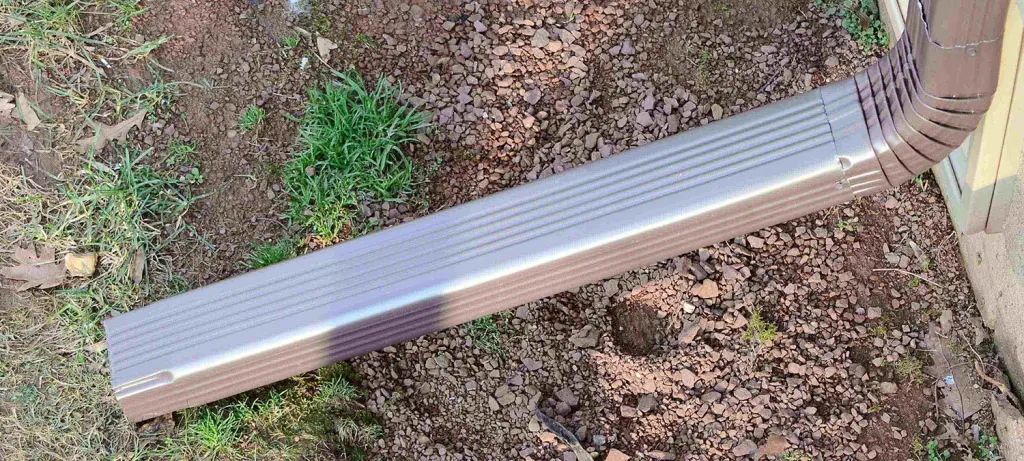
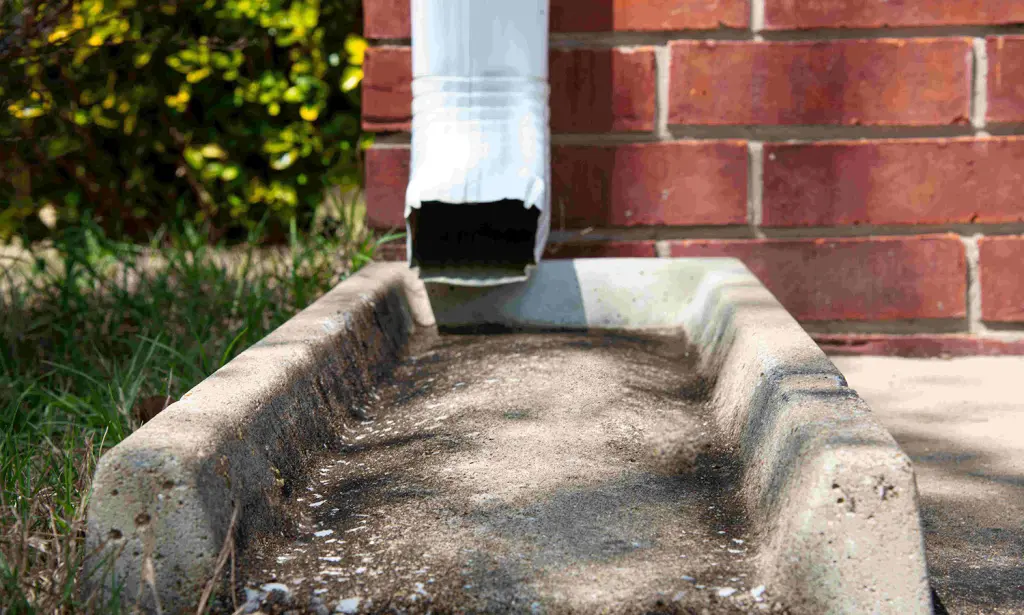
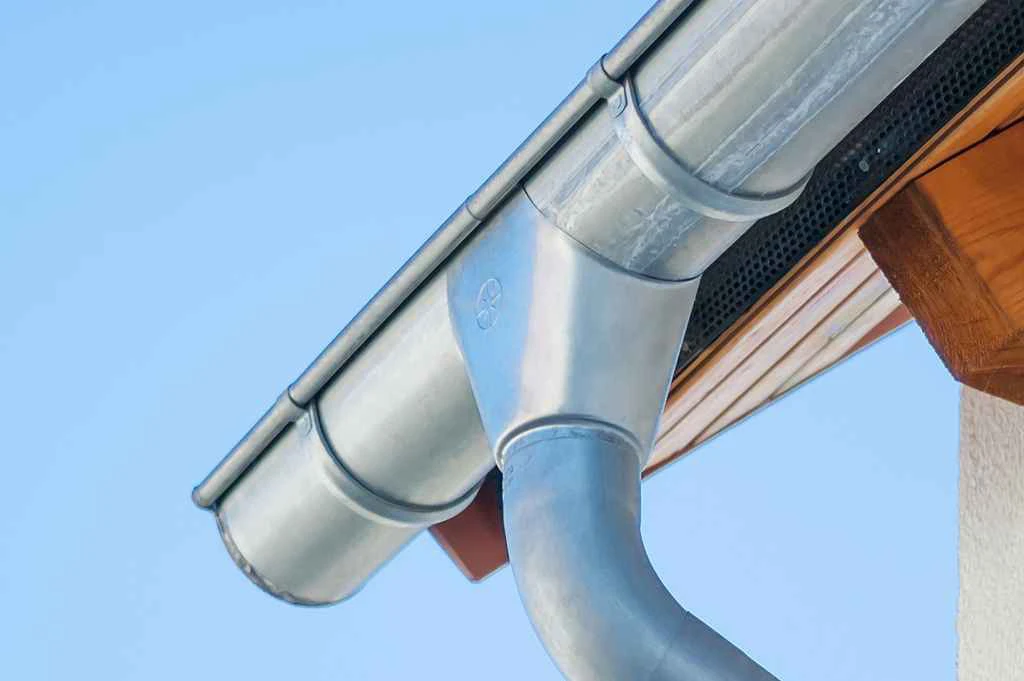
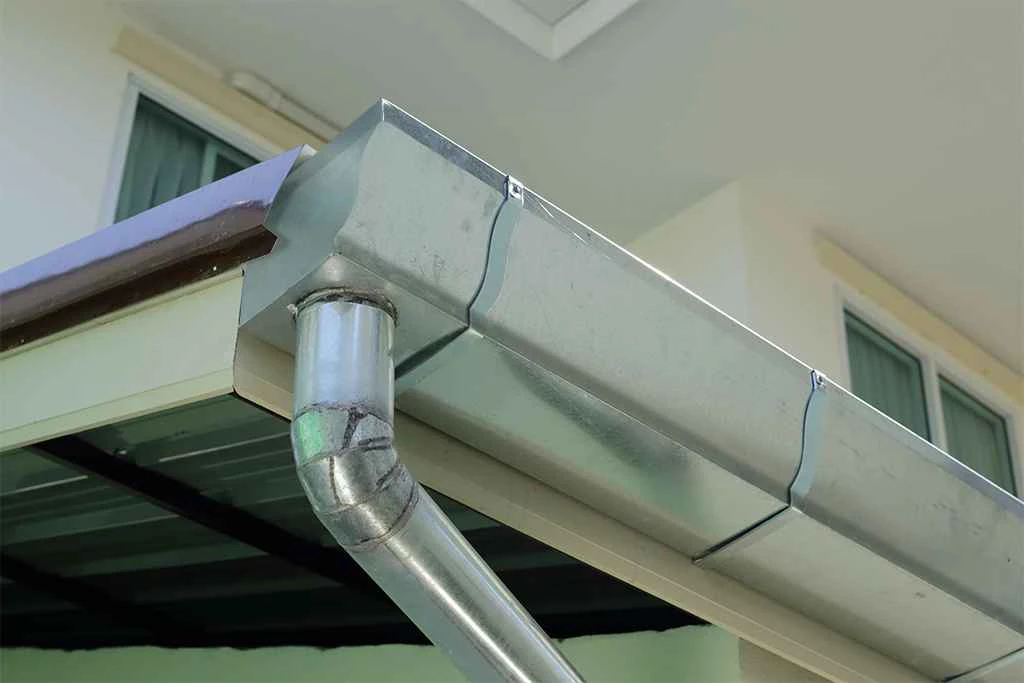
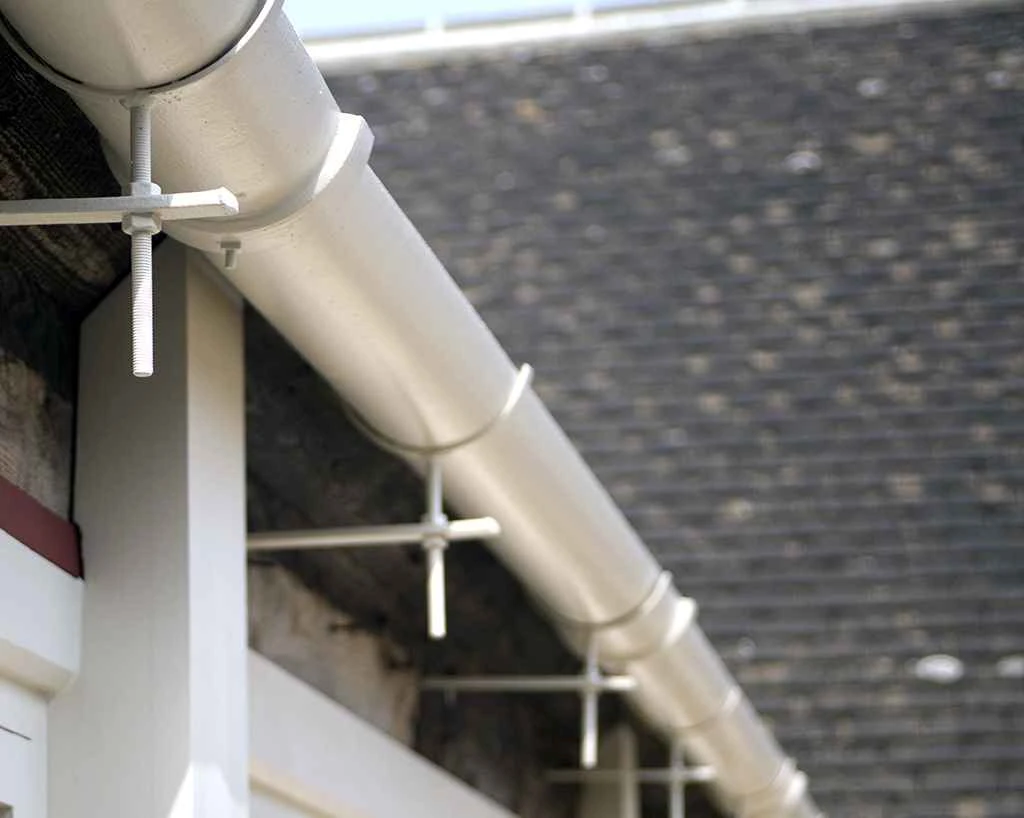
Downspout: Also called a leader, the downspout is a pipe that allows water to drain out of the gutter and onto the ground. Round downspouts are used for half-round gutters, while square downspouts match K-style gutters.
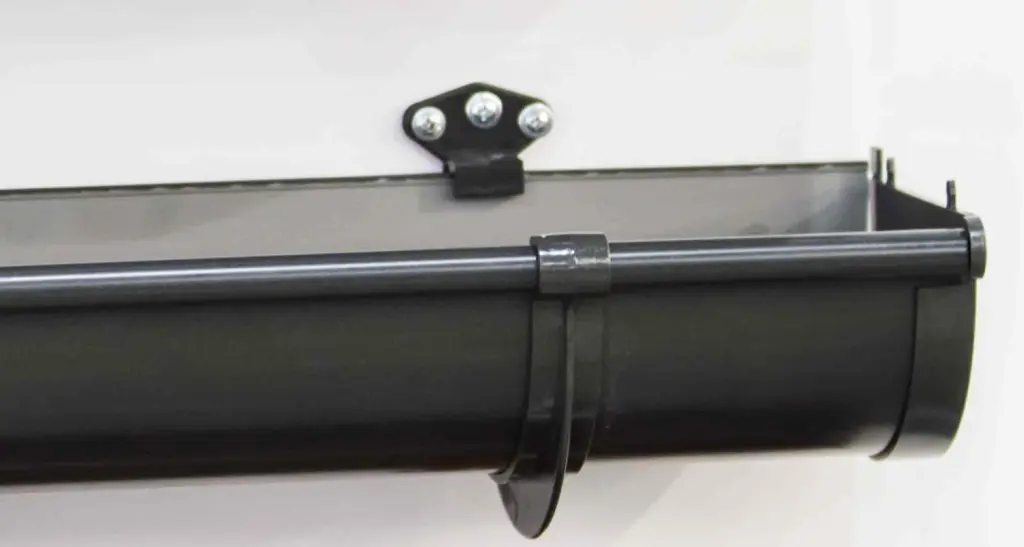
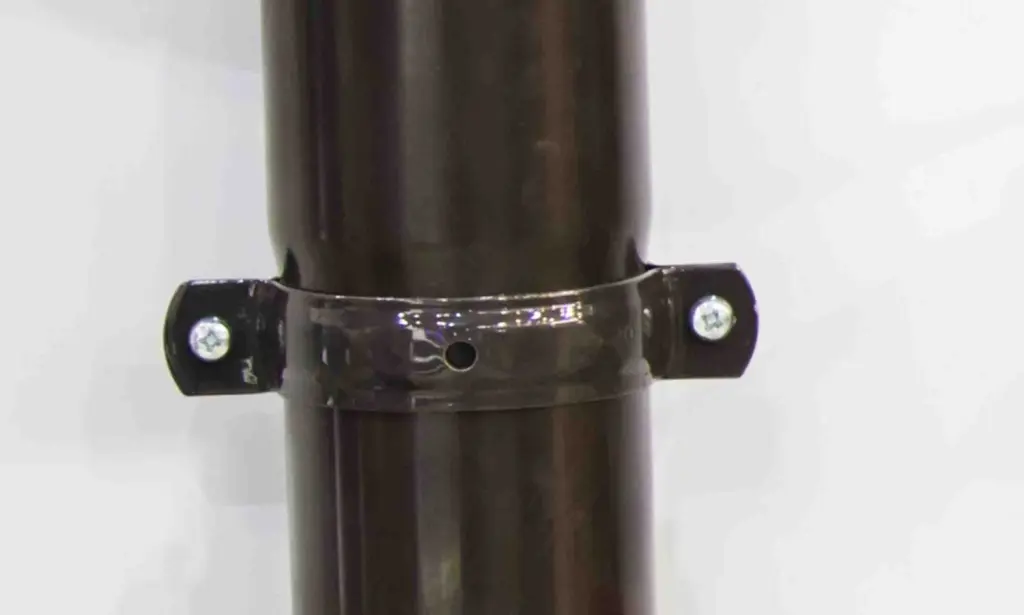
Downspout bracket: These are simple aluminum or metal brackets that wrap around the downspout to hold it securely to the side of a home. They may be decorative.
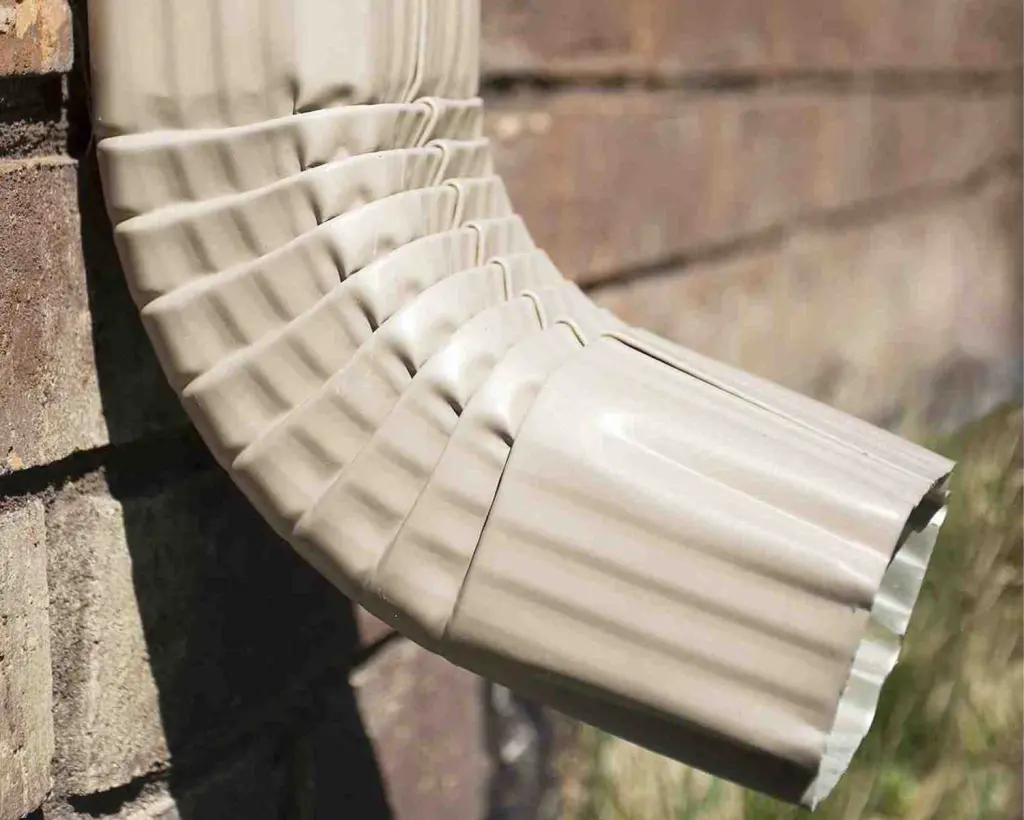
Elbow/Boot: At the end of the downspout is a short section of pipe that bends like an elbow (or that looks like a boot). This section of pipe is meant to direct water away from the foundation of the home. Gutter boots may also be decorative.
Downspout extension: The slope of a home, or the landscaping surrounding the home, may direct water back to the foundation. To avoid this problem, you may use a downspout extension to carry water further from the home and past troublesome slopes.
Gutter downspout diverter: During heavy rains, water may pour quite quickly out of downspouts, eroding the landscaping. To avoid this problem, you can place a downspout diverter directly under the boot. It’s a fan-shaped piece of plastic, concrete or metal that spreads out the water, so its impact isn’t as damaging.
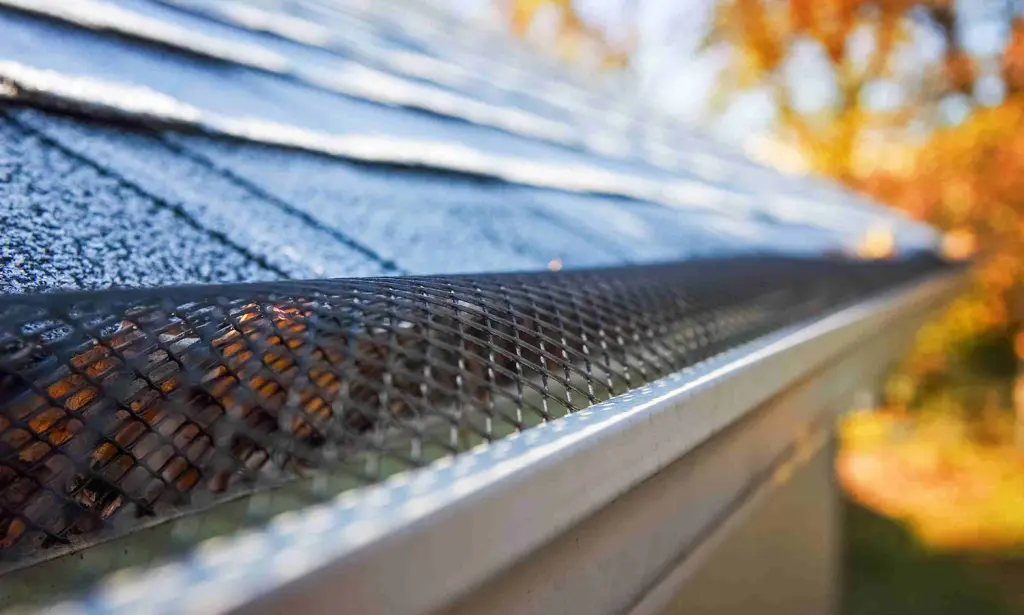
Gutter guards: Gutter guards are screens that sit on top of your gutter to prevent leaves and other debris from falling in. There are many different styles of gutter guards, including meshes and solid panels that leave only a little bit of room for water to enter the gutter.
The Types of Gutter Fasteners
Your gutters are only as strong as their fasteners. Further, different types of gutter fasteners give the roof different styles and can enhance your home’s curb appeal. Here is an explanation of all the types of gutter fasteners and a comparison between popular types to help you determine which is best for your gutters and roof.
The types of gutter fasteners are:
- Spikes and ferrules: This system has two components. The spikes are nails or long screws. The ferrules are thin metal tubes.
First, a roofer drills two holes through the top of the gutters and runs the tube through the holes. Then, the roofer drives the nail or screw through the tube and into the fascia of the roof. Spikes and ferrules are an older type of gutter fastener that has fallen out of favor both because the nail or screw head is visible from the outside and they tend to work loose over time. Spikes and ferrules can be used for half round or K-style gutters. - Exposed bracket and strap: An exposed bracket is simply one that is visible from the outside. The bracket in this system wraps around the base of the gutters. A connecting strap secures the fastener to the fascia. While this system has many advantages, one disadvantage is that the gutters can be knocked out of place when they are being cleaned.
- Wrap around hanger: This system is a version of the exposed bracket and strap system, but for K-style gutters. The part that wraps around the gutter must be molded into the K-style gutter shape to secure it to the fascia. Otherwise, the systems are the same.
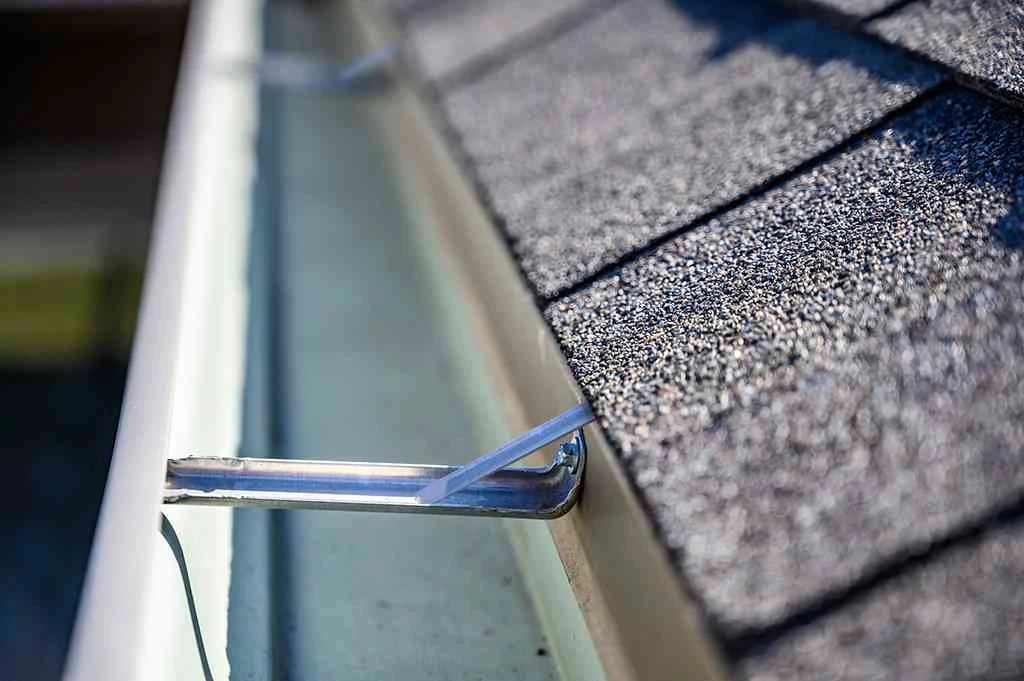
- Hidden hanger: These are also known as seamless gutter fasteners. If you enjoy the look of seamless gutters, you will likely prefer the hidden hanger gutter fastener. This system has a bar inside the gutter that clips onto the outer edge. The bar is connected to the fascia with nails or screws. These gutter fasteners are not visible from the outside.
- T-bar/T-strap: T-bars and T-strap gutter fasteners do not attach to the fascia. Instead, a roofer will connect them to the roof deck. The bar inside the gutter holds the gutter. This bar is suspended from a longer strap that ends on the roof. These gutter fasteners are intended for use on eaves, or on old homes where there is no fascia or where the fascia is decorative. Still, it is not ideal to use them, as they can interfere with the roof system if not installed properly.
- Rise and fall brackets: Instead of attaching to the roof deck or the fascia, these gutter fasteners are attached to brick walls. They must be driven in or mortared into the walls by a roofer or mason. Once that’s done, they can be adjusted up and down, allowing the roofer to install the gutters on the right angle.
Ferrules vs. Gutter Clips
Spike and ferrules are an old gutter fastener system that roofers typically do not prefer. Old spike and ferrule systems were vulnerable to the freeze and thaw cycle in the winter. Gutter materials may expand when it’s freezing out and shrink once it’s warmer. This motion slowly pulls the nails from the fascia. However, you can now get gutter ferrule screws that withstand this pressure better.
Still, most roofers now prefer a fastener that uses gutter clips, as they tend to be more secure, especially in colder climates. The clip attaches to the inside of the gutter, on the outer gutter edge, which allows for most modern styles of gutter fasteners, including hidden hangers.
Hidden Hangers vs. Exposed Fasteners
Should you choose hidden hangers or exposed fasteners? The question is mainly an aesthetic one. Many homeowners prefer the look of hidden hangers and seamless gutters. However, some historical homes or architectural styles may call for exposed fasteners that show off expensive materials, like copper, or decorative engravings. Unless your roofer has some wisdom about which fastener type might work better in your specific circumstances, choose what you think looks best.
Materials and Sizes for Gutter Fasteners
Once you have settled on a gutter fastener type, you will need to select the right size and material. Choosing the right size should be simple, as gutter fasteners will tell you which size of gutter they are meant to be used with. This is especially important for K-style gutters, as their complex shape means that a slightly different size fastener will not fit.
As for fastener material, it should match your gutter material. If you have steel gutters, use steel fasteners, and copper gutters should have copper fasteners. Mixing metals may result in galvanic corrosion. One metal will slowly wear away, which may mean you have to replace your gutters sooner than you expect.
Should I Use Screws or Nails for My Gutter Fasteners?
While some gutter fasteners come with screws or nails intended to be used with them, others do not. If you have a choice between nails and screws, which should you use? In general, roofers tend to use screws to attach gutters instead of nails. Screws have extra grip that helps them stay in place longer and resist pressure from heavy gutters.
Specifically, choose wood screws if you are attaching your gutters to a wooden fascia. You want the screw to be long enough to be secure in the wood, but not so long that it pops out the other side. Specific styles, such as spike fastener gutters, may require extra long screws.
Before you make your final choice, you should refer to your roofer for his or her professional opinion on which you should use. Sometimes nails are a better choice, such as when you are using rise and fall brackets.
The Cause of Ice Buildup on Gutters
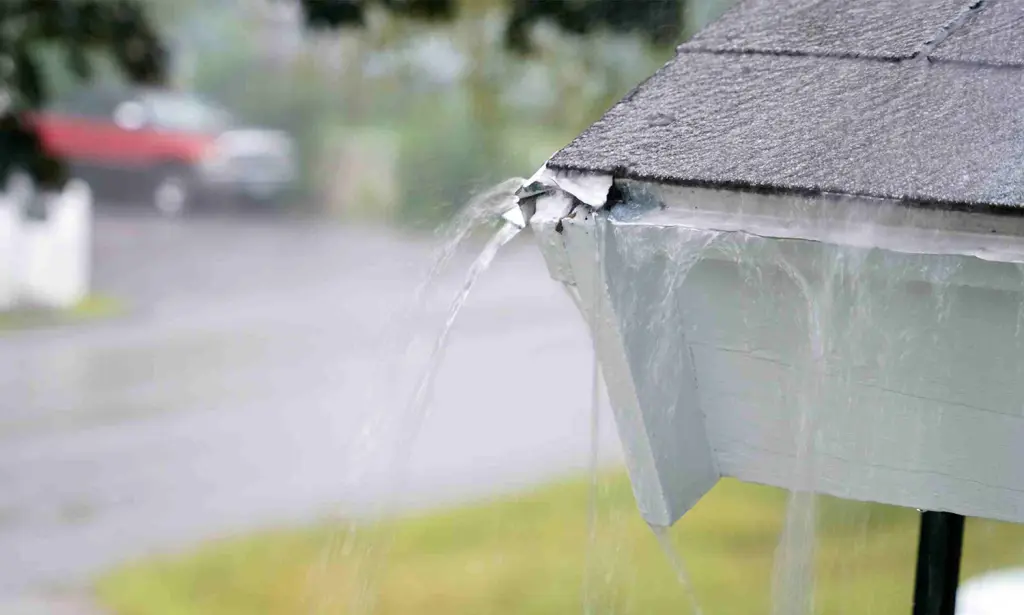
Slow-running or clogged gutters cause ice buildup. The reason is simple. Have you ever left your tap running, just a bit, to keep the water in your pipes from freezing during unusually cold weather? We do this because it takes much lower temperatures to freeze running water than it takes to freeze standing water. Normally, water is running through your gutters and therefore very rarely freezes until it’s on the ground.
However, if your gutters are draining slowly, they are more likely to freeze. If there’s standing water in your gutters, as a result of a clog, that water will freeze as soon as temperatures drop below the freezing point.
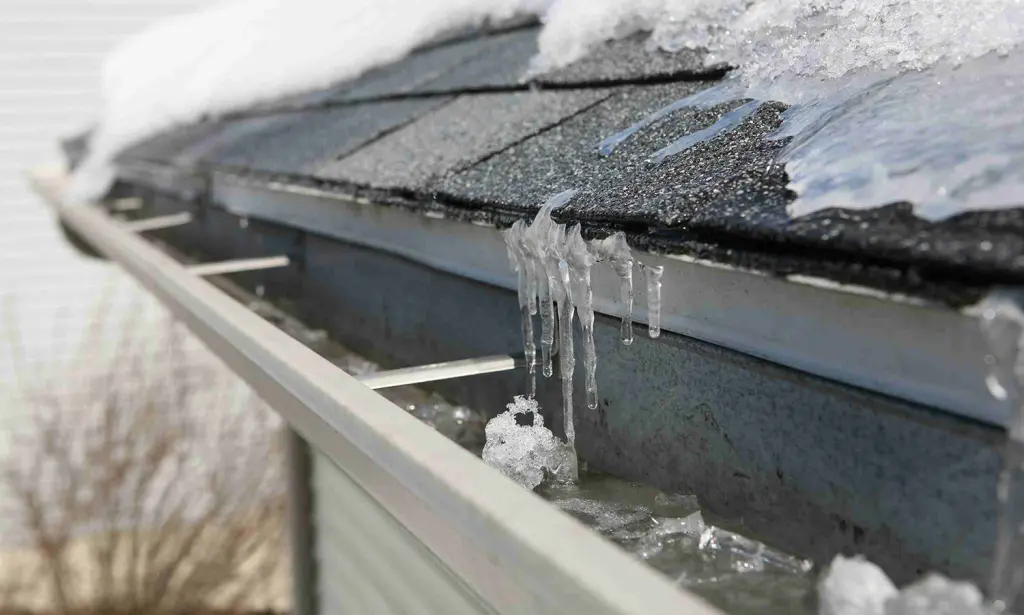
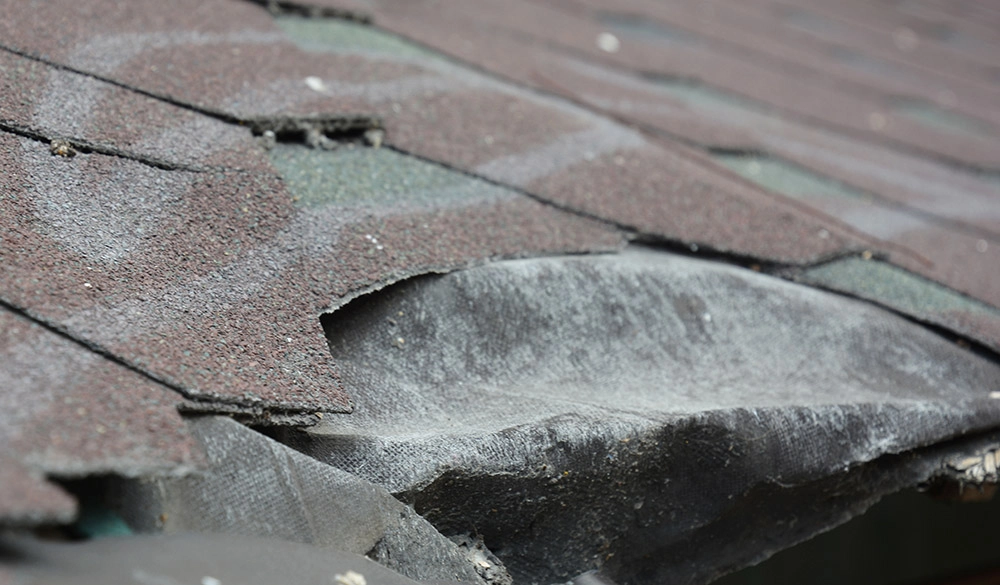
Gutter Damage from Snow and Ice
Water expands when it freezes, so it can push open the seams of sectional gutters and create other cracks. Ice and snow are heavy, and excess weight from either can cause gutters to sag, gutter brackets to give in and the whole gutter system to collapse. Even a small change in the gutter’s slope can cause more drainage problems. Plus, sagging or iced-over gutters are unattractive and can harm your property value.
Gutter corners and connections are especially vulnerable to damage from snow and ice.
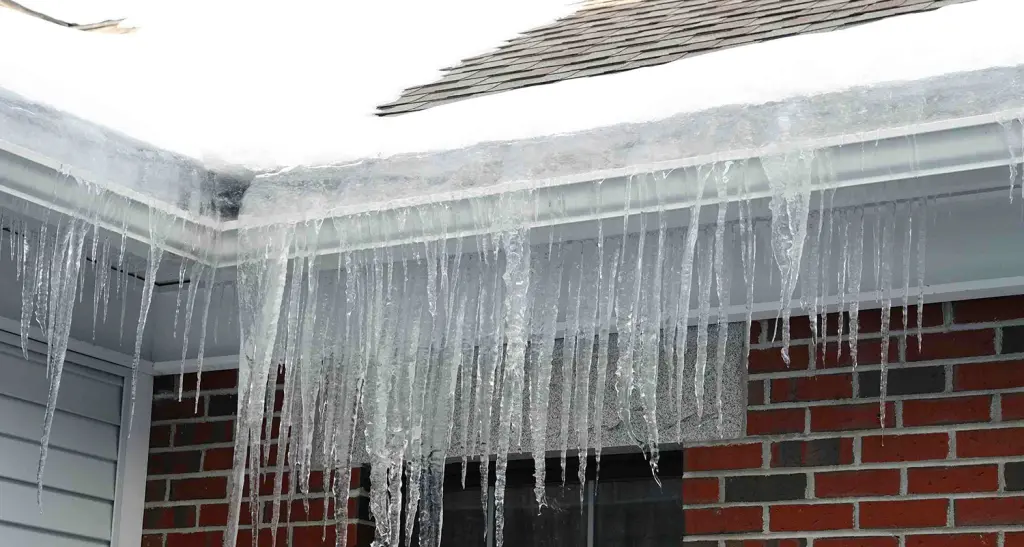
Do Gutters Cause Ice Dams?
It’s easy to see how gutters might cause an ice dam. After your clogged or slow-draining gutters freeze over, water can no longer drain properly off the roof. As a result, more and more water gathers on your rooftop, and it may freeze when it reaches the ice dam, making the problem worse.
However, most ice dams are caused by improper attic ventilation and insulation. Poorly draining gutters just exacerbate the issue.
Will Removing Gutters Stop Ice Dams?
It depends. If your iced-over gutters are the only cause of your ice dam, removing them may help. However, it is mandatory to have gutters in most jurisdictions of North America. It may be wiser to replace your old gutters with those that are better suited to your climate. K-style steel gutters in a high gauge are a good choice.
Besides, gutters are rarely the cause of your ice dam problem. Installing proper attic ventilation is usually your best option to prevent ice dams.
There are a few other things you can do to stop ice dams, including:
- Installing ice and water protector to minimize damage.
- Cleaning your gutters properly and regularly.
- Sloping your gutters properly so they will not have standing water.
When Do You Clean Gutters and How Often?
Generally, you should clean your gutters twice yearly. Once in the spring and again in late fall, just after the trees have shed their leaves.
Why Clean Gutters Before Winter and Before Spring?
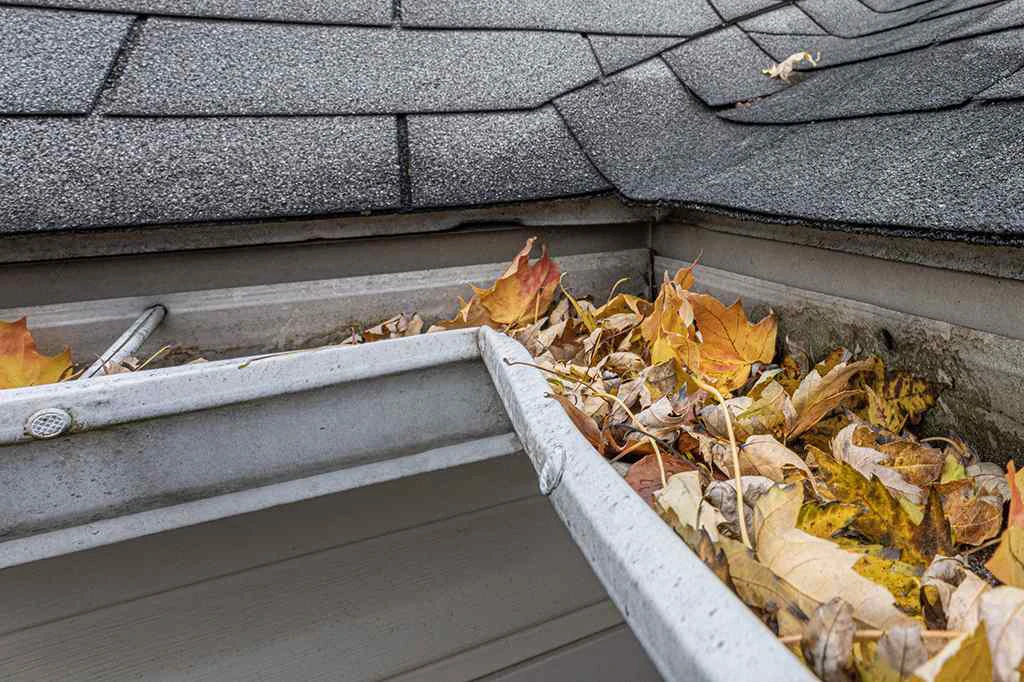
In cold-weather climates, leaves will fall in autumn. Some will land in your gutters. These leaves are very likely to cause a clog. If not, they will still decrease the speed of water draining out of your downspouts. Both problems will encourage ice dams in the winter. It’s much easier to clean the gutters out before winter than to try to melt an ice dam after it has formed.
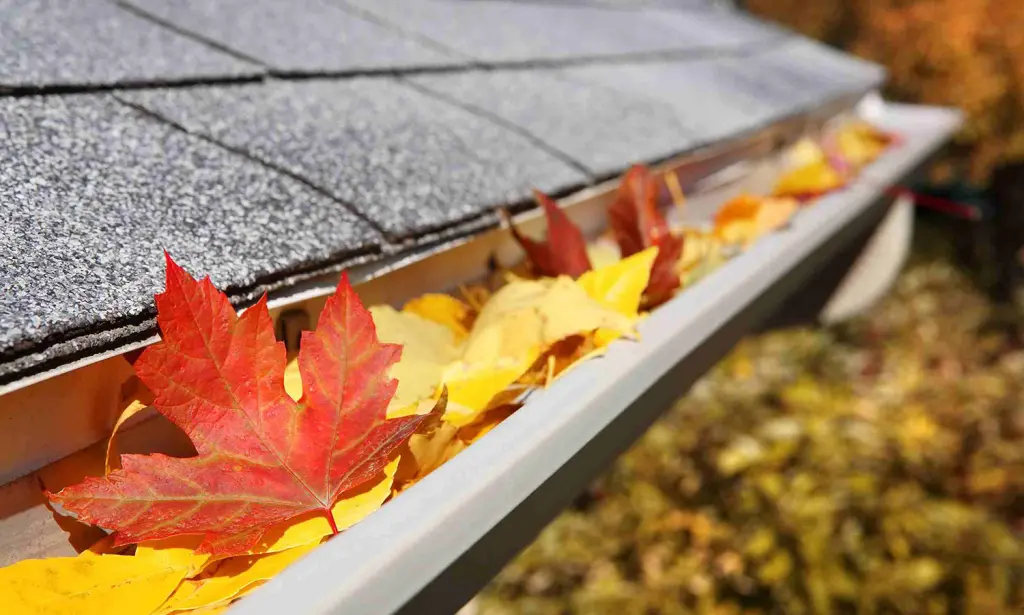
Most homeowners in areas that experience snowfall clean their gutters before spring to ensure their gutter system can handle the heavy rains it will experience over the next few weeks. In fact, for those in warm-weather climates, it is recommended to clean your gutters before hurricane season so the gutter system has the best chance to handle the extreme weather. Of course, you’ll also want to clean them afterwards to remove any debris the high winds carry into the gutters.
In spring, dirty gutters may develop mold or host bug and animal life through the summer. Water may even back up from the gutters onto the roof, potentially causing a leak or rotting the wooden fascia behind the gutters.
There are a few other circumstances where it is wise to clean your gutters more regularly:
- You own tall trees, especially evergreens that drop needles into the gutters throughout the year.
- You find your system becomes clogged easily.
- Your gutters are leaking or overflowing.
If you want to clean your gutters less often, you can trim back your trees, install a gutter system made of a more weather-resistant material, such as steel or copper, or install gutter guards.
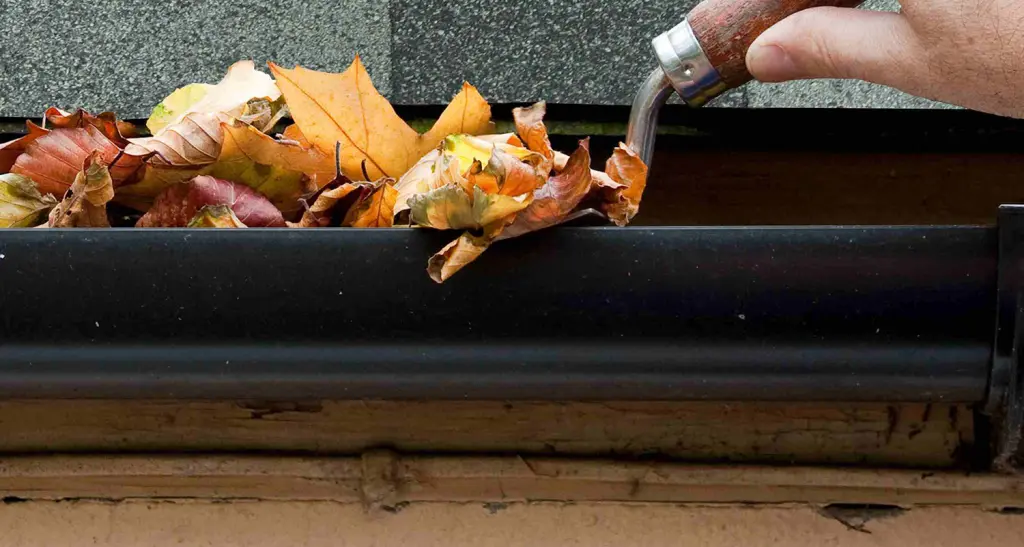
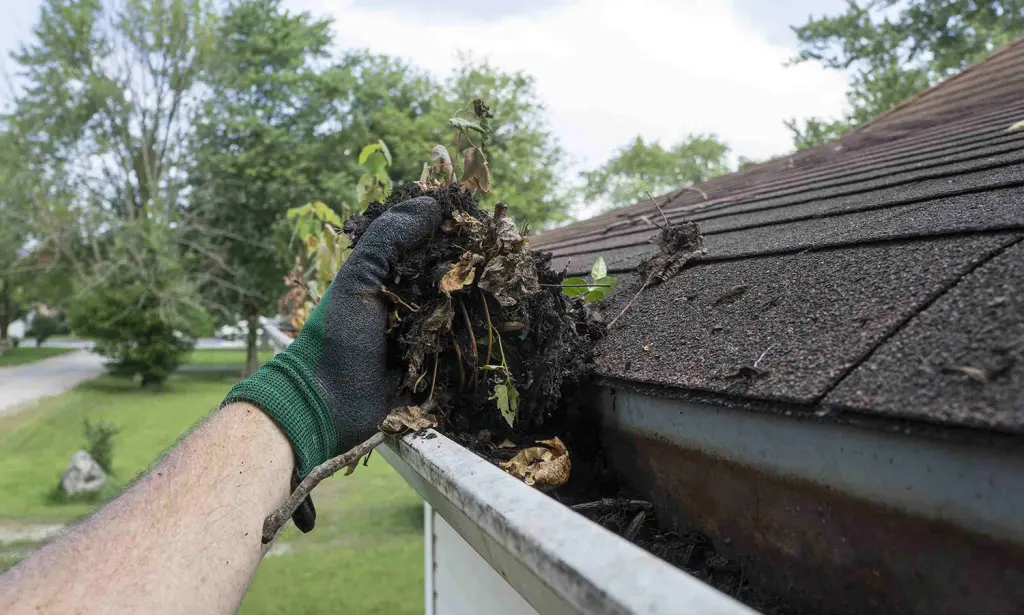
How Do You Clean Gutters?
Here is how to clean gutters:
1. Remove Leaves and Debris
You’ll need a ladder, gloves and a way to capture the debris. Some people use a bucket while others lay out a tarp beside the house and toss the debris onto it. Before you begin familiarize yourself with ladder safety.
If you prefer to stay on the ground, you can use an extendable gutter cleaner, or a leaf blower with a gutter cleaning attachment. However, if you want to inspect the condition of the gutters, you will need to use a ladder.
While most people find that using their hands is the most efficient way to clean the gutter, there are a few different tools you can use if you prefer. A plastic spatula or scoop works well. If you find debris that’s stuck in a clog, get an expert to clean it out, as it’s possible to break your gutters when removing a clog.
2. Clean Mold and Algae
Slow-draining or clogged gutters may develop mold because they are wet all of the time. Mold may wear away at the protective coating on your gutters, or it may find a way into the house; so it’s best to clean it off. Algae restricts water flow. Use a bleach solution and a sponge to scrub out any visible mold and algae. Any household cleaner with a bleach base will do. Be sure you keep your gloves on for this step!
3. Remove Rust
If there is any rust on the exterior of your gutter system, you may be able to remove it with a scouring pad or a rust-removing cleaner. Rust is not just an aesthetic issue. It may weaken your gutters. Eventually, you will have to replace the gutter sections where rust has developed. When you do so, it may be best to choose a less corrosive gutter material, such as aluminum or copper.
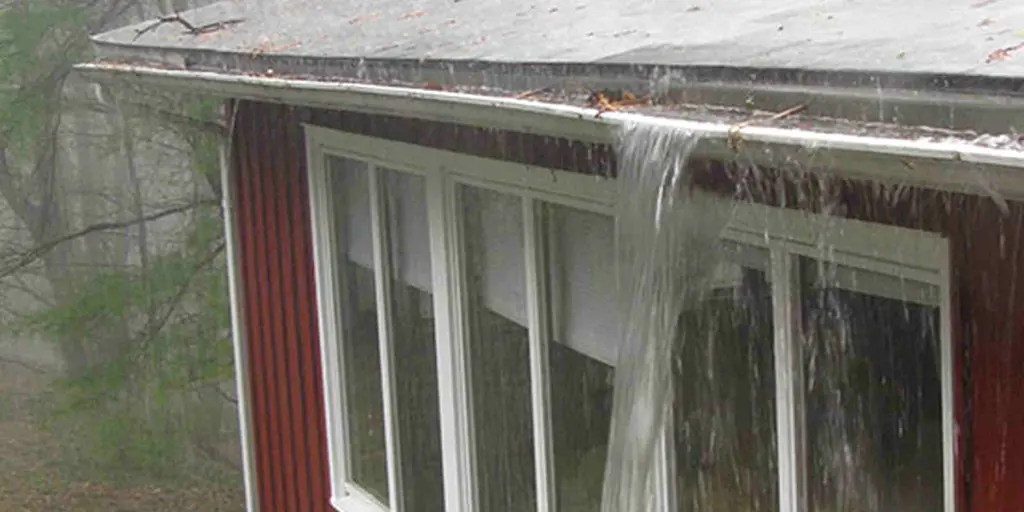
4. Check Performance and Find Leaks
Now that your gutters are free of debris, mold and rust, they should run cleanly. Take your garden hose and pour water into the gutters. Make sure that the water runs freely out of each downspout. Also, it’s simple to check for leaks while you do this. Check the entire gutter system. Pay special attention to the seams on sectional gutters. Mark the leaky spots with high visibility tape.
Now that you know where the leaks are, you need to seal them. If there are a handful of leaks it may be time to replace your gutter system outright. But you can deal with small leaks, especially those at seams and end caps.
How to Seal Gutter Leaks
Here is how you fix gutter leaks:
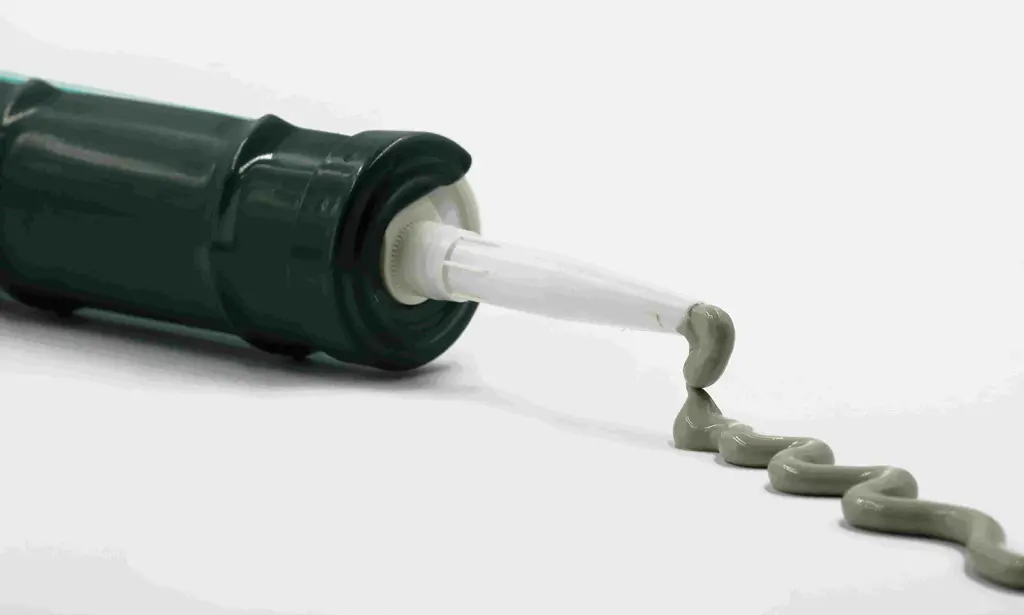
1. Choose Your Material
In order to seal vinyl, aluminum or steel gutters you will need caulking, ideally a type that is explicitly designed for gutters, so that you can paint over the caulking to match the gutters afterwards. Avoid silicone caulking, which cannot be painted or reapplied. Instead, consider butyl rubber, urethane or polymer-based caulking.
If you have copper gutters, it is wiser to have a professional repair them. Copper gutters are a long-term investment, and putting caulking in them is only a short-term solution. A professional can solder copper gutters to seal joints and fix holes.
2. Clean Gutters and Allow to Dry
Clean your gutters to remove any debris near the leaks. Then, you’ll need to wait for the gutters to dry before you attempt to seal the leaks, or the caulking may not apply well or dry correctly. For the same reason, wait for sunny weather.
3. Clean Old Sealant
You’ll need to clean off the old caulking near the leak, especially if the leak is at a seam. Spray a caulk remover on the old caulk and wait for it to soften. Then, scrape it off with a utility knife or other sharp tool. You may also need to use a bleach solution to remove nearby mold or debris.
4. Apply Caulking
Trim the tip of the caulking tube. Place the tube in a caulking gun and apply it to the hole. If working at a seam, apply the caulking in the seam first, then around it. Attempt to cover the seam or hole in one, straight sweep. Try to apply only as much as is necessary to cover the leaky area. However, be sure to read and abide by the instructions from your caulk manufacturer about the minimum diameter of caulking you need to apply.
How to Inspect Gutters for Structural Damage
Debris and rust aren’t the only things that can impact gutter performance. Structural damage can do harm as well. Here is how to inspect your gutters for structural problems:
1. Look for Sagging
Walk around your home and look for any areas of the gutter that seem to sag down. Sagging normally occurs at seams, where the bottom of the seam pulls apart. Not only do sagging gutters look bad, but they may also develop clogs or have a poor slope that prevents water from draining properly.
2. Look for Dents
Walk around your home again, this time looking for indents in the gutter. Dents lower your gutter system’s capacity and make them more susceptible to damage in the future. You will have to repair or replace gutter segments that have been dented.

3. Measure Gutter Angle or Slope
Gutters may look perfectly level, but they actually slope slightly towards the downspout, so that they will never hold standing water. The highest point of your gutters should be just 5/8 of an inch higher than its lowest point, which should be where it connects to the downspout. This slight grade is almost impossible for you to see, so you have to measure. Use a string to measure the slope as a guide. If you’re not sure how to do this, we go into detail below. Just remember that each section of gutter should slope down to the nearest downspout. Be sure to check your work with an adjustable level.
How to Realign Gutters
If you find that your gutters are level, or otherwise not appropriately sloped, they will need to be realigned. It is best to have a professional do this job, as it involves using power tools at height. Still, you may be curious about the process, so here is how the professional will realign your gutters:
1. Create a Guide
The professional will first create a chalk line as a guide to show the angle your gutters should be on. To do this, they may attach a string to what should be the highest point of where the gutter will be attached to the fascia, which should be the end cap that is furthest from the downspout.
If you have a section of gutter that feeds into two downspouts, as shown in the image below, the professional will start their measurement in the direct middle (also shown). They will slope the right side down to the right downspout, and the left side down to the left downspout. That way each downspout will be used.
They will extend the string all the way to the downspout and lower the string by 5/8 of an inch. Once this line is secure they can snap a chalk line. Using this method, they will map out the whole gutter system.
Your roofer will need to use an adjustab