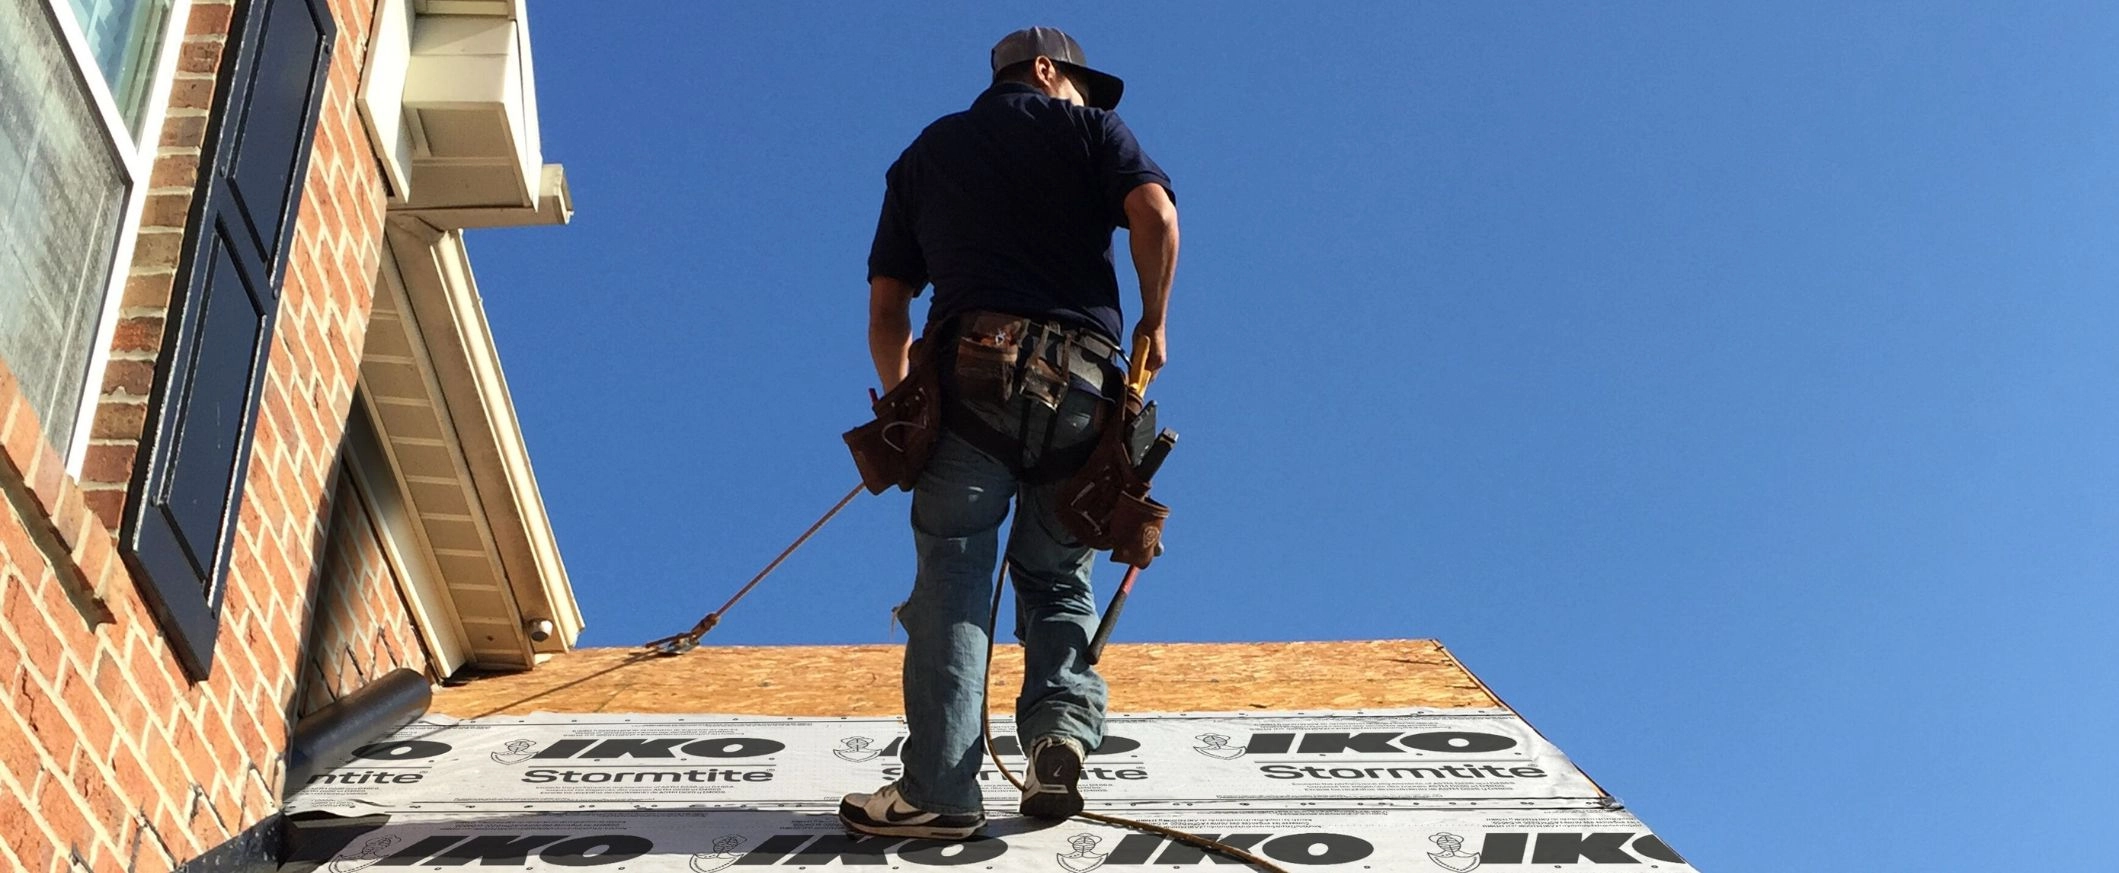
Balanced attic ventilation allowing unobstructed airflow is critical to the optimum performance of an asphalt shingle roof system and is a requirement for full coverage under IKO’s limited warranty. To provide air intake to the space below the roof deck, the most common practice is to install continuous soffit venting.rnrn In this video, we will focus on the installation of the most common exhaust vents installed higher on the roof, such as roof vents and ridge vents. Always follow the vent manufacturer’s specific installation instructions for the vent system you’re using. Here are some general guidelines you may find helpful. To install a new roof vent, the hole you cut in the roof should be the same size as the vent hole. Ideally, center a three-foot-by-three-foot section of an IKO Ice and Water Protector over the hole and cut away any membrane that now covers it up. Shingle up to the bottom of the vent opening and remove any shingle material that may be covering the hole. Apply asphalt plastic cement around the edges and nail the vents securely in place. Continue shingling, cutting to fit around the vent, each cut shingle should be laid in a bead of cement. A dab of asphalt plastic cement over the exposed nails is recommended to avoid leakage. Several manufacturers now supply specialized ridge vents. Just be sure that the ridge vent size is compatible with the ridge cap shingles you plan to use. rnrnIn preparation for the vent installation, cut away the roof decking to reveal approximately one inch of space on both sides of the ridge joist. At both ends of the ridge, apply ridge cap shingles to cover at least 12 inches of the ridge. Center the ridge vent over the ridge and overlap the top course of field shingles so that the nails and ceiling strip are covered. Nail to the deck using the nailing marks supplied by the vent manufacturer. Beginning from the end of the ridge opposite the direction of the prevailing winds, apply ridge cap shingles over the ridge vent, exposing each piece as required. Nail the caps to the ridge vent following the nailing guide on the vent, as provided by the vent manufacturer. For rapid ridge vents, measure the length of the ridge and cut the fabric to size. Center the vent over the slot on one end with the nail line spacing up and fasten it with two nails. Roll out along the entire ridge, pull out the slack and fasten with two nails at the opposite end. Install cap shingles similar to the process for rigid ridge vent installation, taking care to allow the vent fabric to function properly. Now that the job is done, you and the new roof and your happy homeowner can breathe easier.
Table of Contents
- Installing Roof Vents: What You Need To Know
- Advantages Of Proper Roofing Ventilation
- How To Calculate The Amount Of Ventilation You Need
- How to Install Roof Vents
- Intake Vents
- How to Install Soffit Vents
- Drip Edge Vents
- How to Install A Drip Edge Vent
- Exhaust Vents
- Ridge Vents
- How to Install A Ridge Vent
- Static Vent
- How to Install A Static Vent
- Gable Vents
- How to Install A Gable-End Vent
- Turbine Vent
- How to Install Turbine Vents
- Powered Vent
- How to Install Powered Vents
- A Note About Bathroom And Kitchen Exhaust Vents
- The Lasting Benefits Of Ventilation
Installing Roof Vents: What You Need To Know
Please note:The below information and instructions are for the general information and are not intended to be relied upon as specific advice for a particular roof.
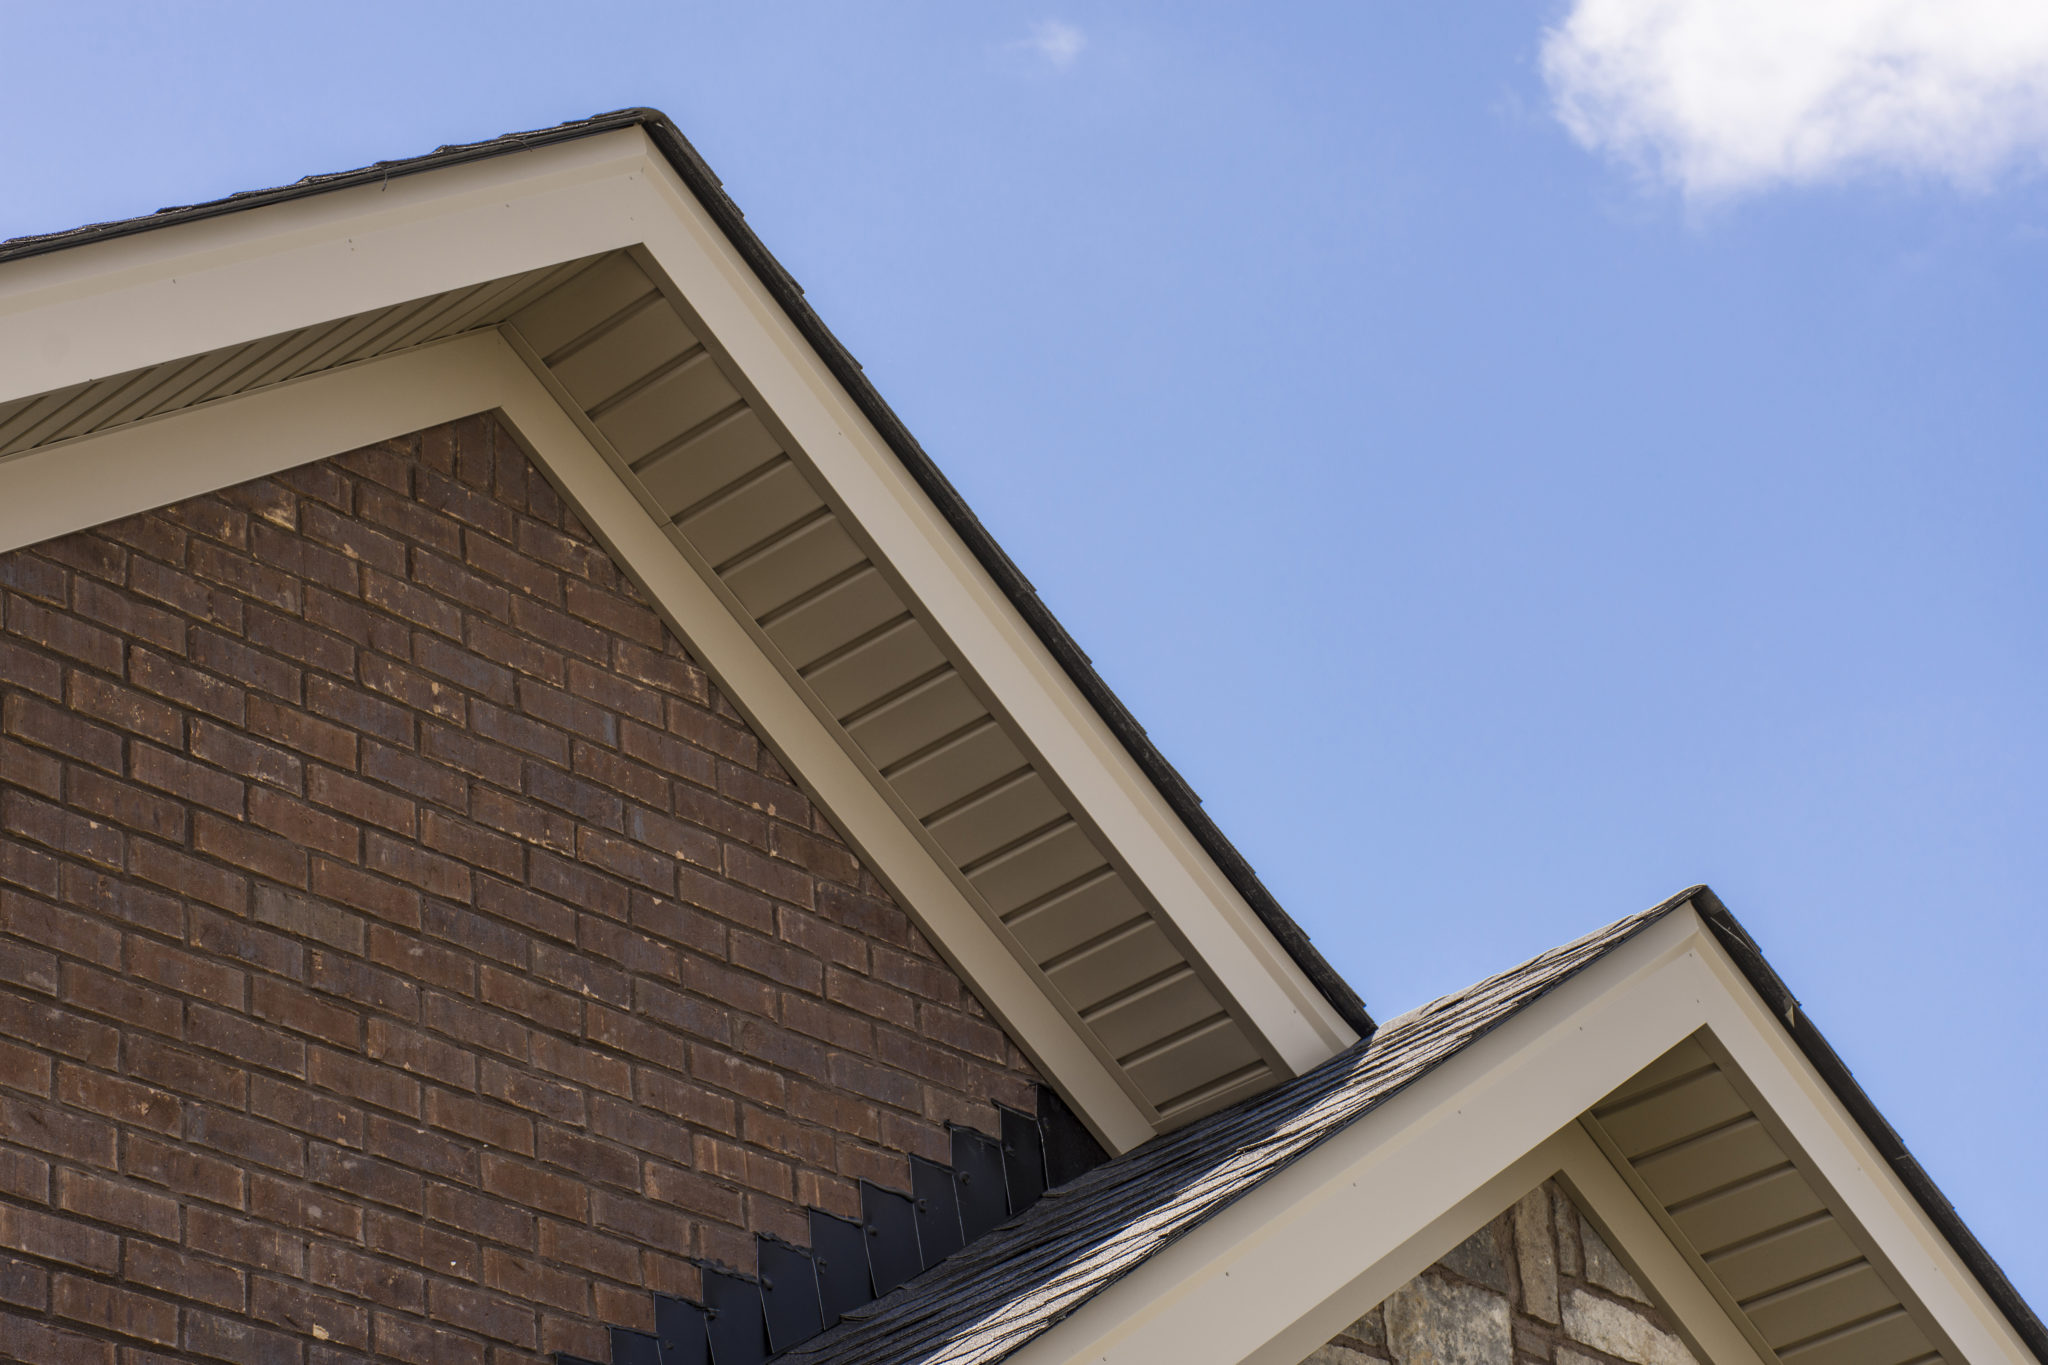
An important part of a healthy home, and a complete roofing system, is roof vents.
The installation of roof vents is a crucial part of roof design because it allows for proper attic ventilation, which may help prevent condensation and early aging of your roofing materials.
Advantages Of Proper Roofing Ventilation
Although there are many different types of roof vents to choose from, ensuring you have the right number of both intake and exhaust vents is a central part of roof design. Proper attic ventilation offers numerous advantages to the homeowner:
- As the ventilation helps moderate the temperatures in the attic, this may also help moderate the temperature in the rest of the home
- It helps prevent moisture buildup in your attic, which, during colder months, can help prevent condensation issues that can affect the materials in the attic space, especially insulation.
- By preventing excess heat buildup, proper ventilation promotes energy efficiency in the home, so your heating costs may be lower
- It helps protect the life of the roofing materials (condensation is a leading cause of damage to roofing materials, such as asphalt roofing shingles)
- It helps you remain compliant with most local building codes, which often require proper attic ventilation in homes
(Sources: Air Vent, NRCA, Professional Roofing.)
How To Calculate The Amount Of Ventilation You Need
Please note: the following provides advice for homes with ventilated attics. There are some styles of vaulted ceiling homes or flat roof homes that have ventilation spaces within the roof itself, and no attic. These ventilation needs are calculated differently.
The key to proper ventilation of your roof and attic is balance: the amount of space you devote to intake must be equal to the amount you allow for exhaust, and these must be calculated according to the size of your attic and slope of your roof.
You can calculate attic ventilation requirements by determining the square footage of your attic floor (its width times its length), and compare that to the total required “net free area” (NFA). Vents are rated by their net free area, or the amount of space for air to flow in or out. This helps make it easy to calculate how many vents you need for your attic, once you’ve determined your requirements.
If your attic floor has a vapor barrier, you will need one square foot of NFA per every 300 square feet of attic floor area (half of that will be intake, half for exhaust). If there is no vapor barrier, double it to one square foot of NFA for every 150 square feet of attic floor space (half for intake, half for exhaust). These are broad guidelines, so be sure to check with your local building code.
(Source: NRCA, Stanley Complete Roofs and Siding, AirVent.com.)
Also, the NFA will be calculated differently if your roof slope is greater than average. If the slope of your roof is greater than 6:12 you will need more ventilation to reflect the extra volume of attic space: Calculate 20 per cent more for 7:12 to 10:12 pitches, and 30 per cent more for a pitch that is 11:12 or greater.
(Source: Asphalt Roofing and NRCA.)
Then, you can begin choosing the style and type of roof vents you want for your home.
It’s important to remember that it’s better to have too much intake ventilation than too little – and many homes often undercalculate the amount of intake needed — so worry less about having too much intake and err on the side of having more.
(Source: House Logic and ARCA.)
The most popular way to ventilate an attic is to take advantage of buoyancy, or warm, moist air’s natural tendency to rise, especially when pushed by cold air beneath it. Homes are naturally filled with warm moist air on a daily basis thanks to human physiology and activities such as cooking and showering.
To take full advantage of this effect, a roofer will generally install intake roof vents for houses lower on the roof (closer to the eaves) while placing exhaust vents higher (near the peak), to let the cold air push the hot air out more easily.
(Source: NRCA.)
How to Install Roof Vents
Before a roofer gets to work installing your roof vents, they will need to determine what type of vents your home needs (or which you prefer) and how many you require according to the calculations above.
Below we describe the different types of roof vents, which will vary according to the needs and architecture of your home, the geography and weather patterns of your region, and your roof structure.
These are general guidelines, as most manufacturers will offer instructions on how to best install roof vents and what measures are required to meet the limited warranty specifications.
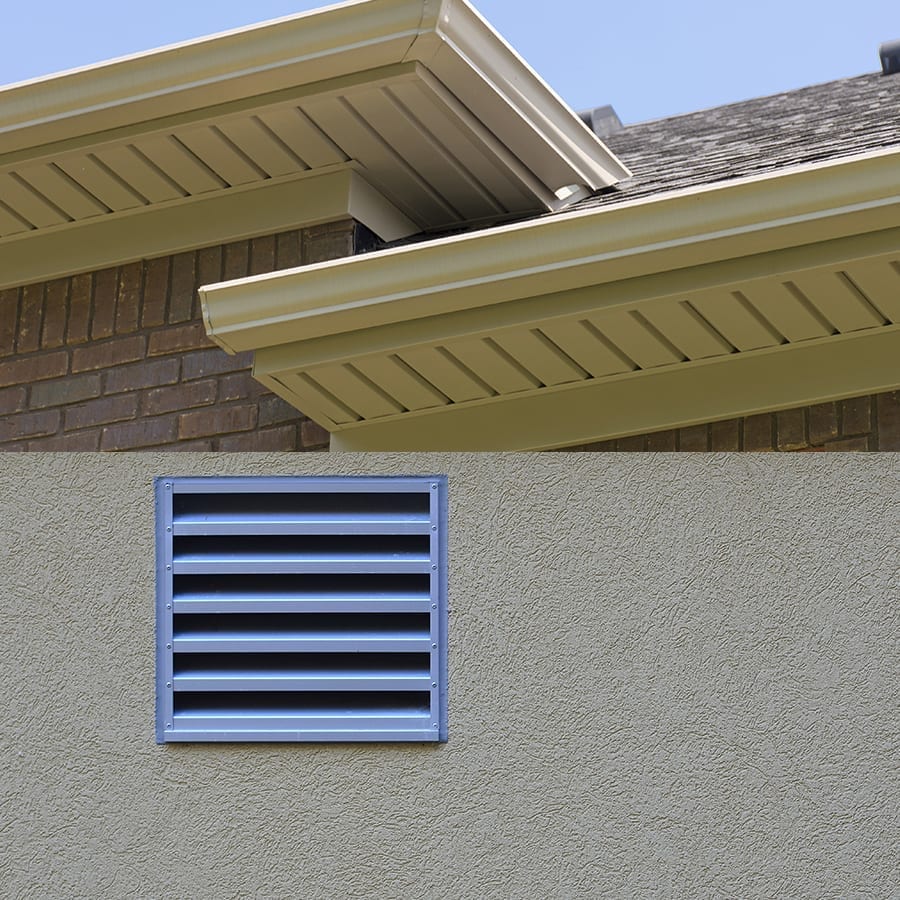
Intake Vents
Continuous or Individual Soffits
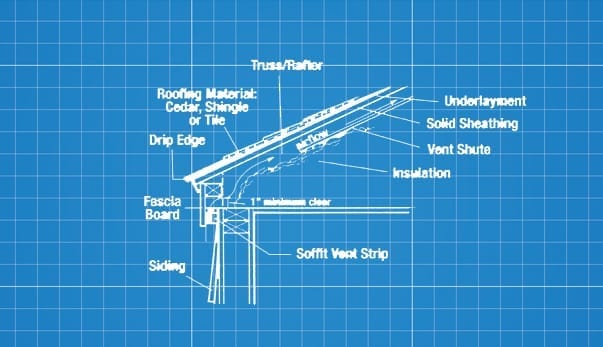
Soffit vents are one of the most popular intake vent styles: they are easy to install under the roof’s overhang (which is known as the soffit), are generally hidden from sight and provide excellent protection from weather, outdoor debris and pests, while still allowing air to flow into the attic.
Soffit vents are commonly made of aluminum or vinyl and are installed into your soffit, the surface under the eave of the roof. Soffit vents are recognizable for the narrow slits that provide open space into which air can flow. There are a number of different types and styles of soffit vents. Always be sure to check with your manufacturer that the vent you choose has sufficient NFA for your project.
No matter which style you choose, it’s essential soffit vents remain clear of buildup or debris so air can continuously flow freely though the openings.
Homeowners also need to ensure their attic insulation isn’t blocking the flow of air. Check that the insulation is pulled back, away from the vents, or ask your roofer to install attic ventilation baffles to prevent the insulation from creeping over the edge of the soffit.
(Source: Professional Roofing)
How to Install Soffit Vents
Note: Always ask a licensed professional to install your roofing materials.
Working from under the soffit, your roofing professional will mark the size of the vent and then cut a hole slightly smaller than the unit (about two inches shorter and narrower), between the rafters. They will then install using screws, according to manufacturer specifications.
(Source: NRHA.)

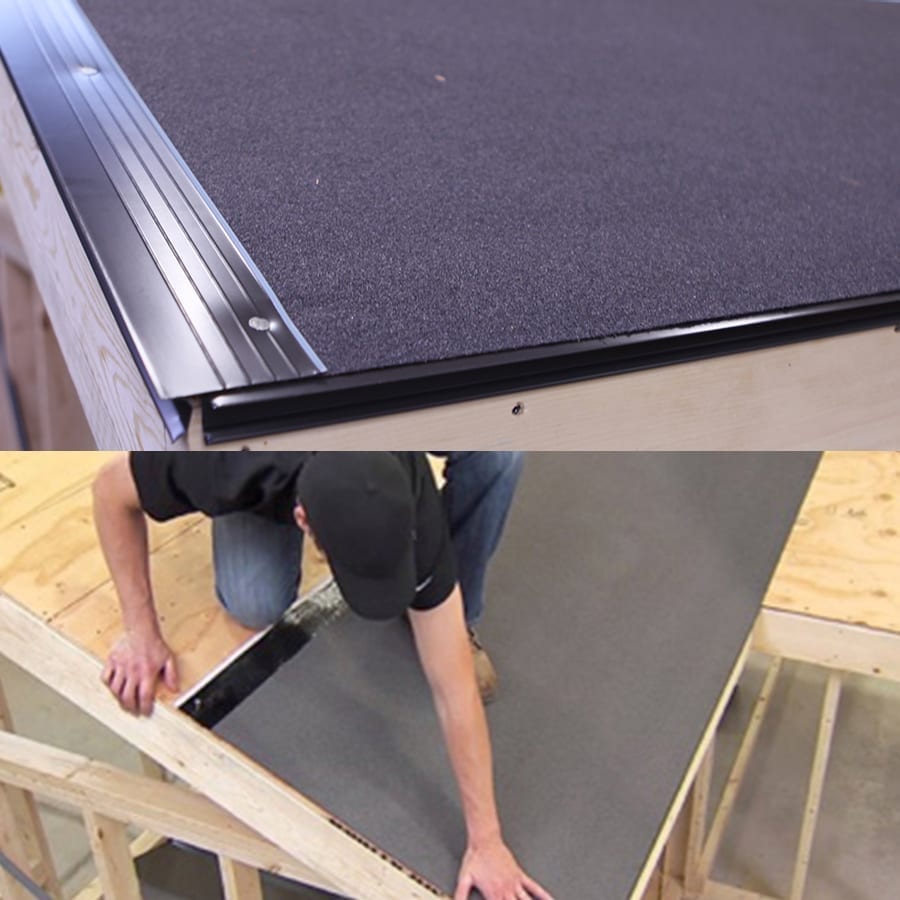
Drip Edge Vent
If you don’t have soffits, or your roof style doesn’t allow for soffit vents, some homeowners will consider a drip edge vent. Drip edge vents are a two-in-one installation that promote water shedding at the eaves and rakes of a roof, while also allowing for ventilation into the attic. A drip edge vent is made of a corrosive-resistant material that sticks out about three inches back from the roof edge and then bends downward over them. Slits in the product allow for air to flow into the attic.
Organizations such as the NRCA recommend against this roof vent style in cold climates because it can promote ice dams. So, only use this if soffit vents aren’t an option. This style should also not be used with gutters.
How to Install A Drip Edge Vent
Just like a drip edge, the drip edge vent is applied along the eaves, the underlayment or waterproofing membrane is installed on top, and then the gable end drip edge can be applied on top. This sequence will help promote waterproofing.
Exhaust Vents
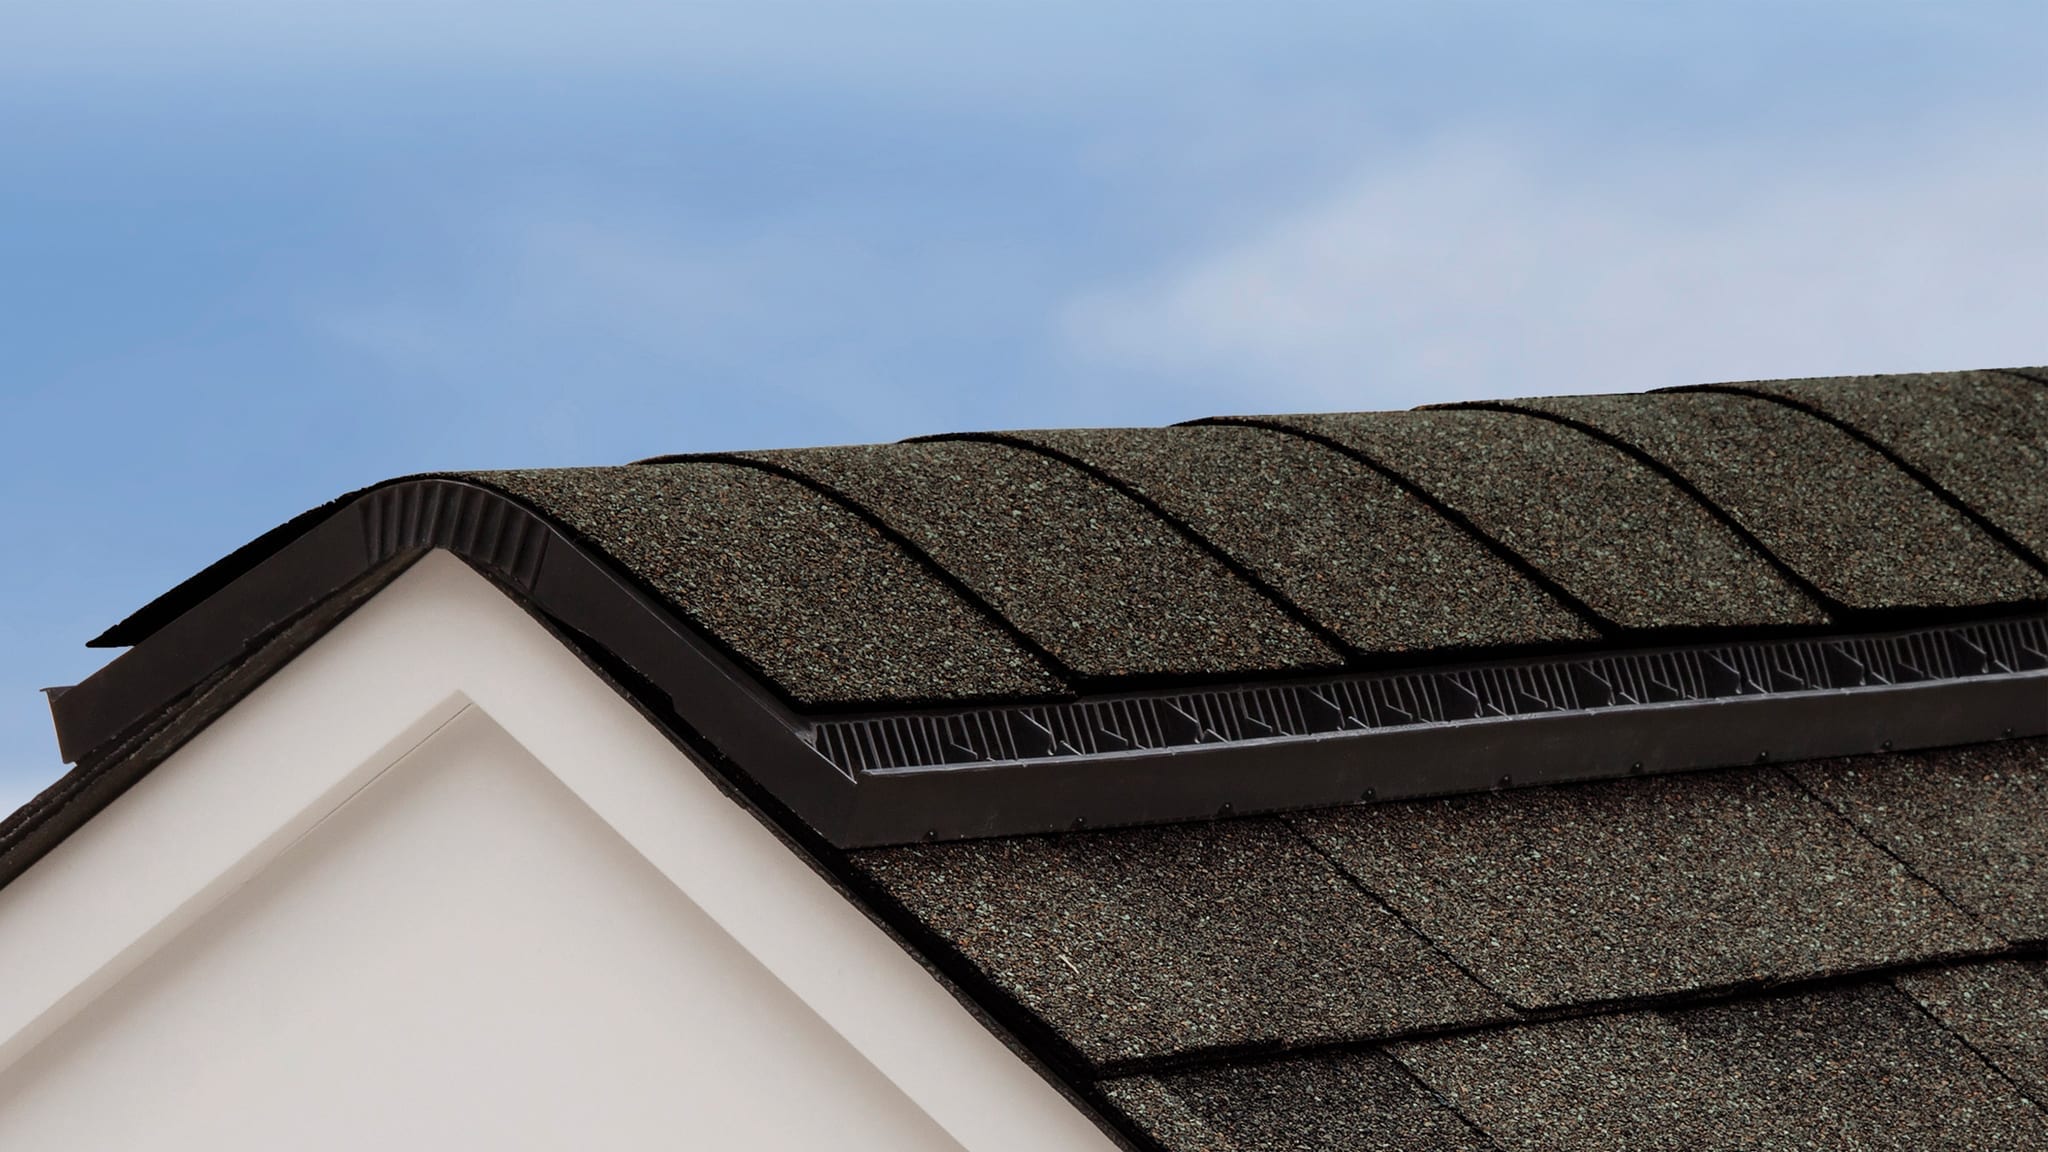
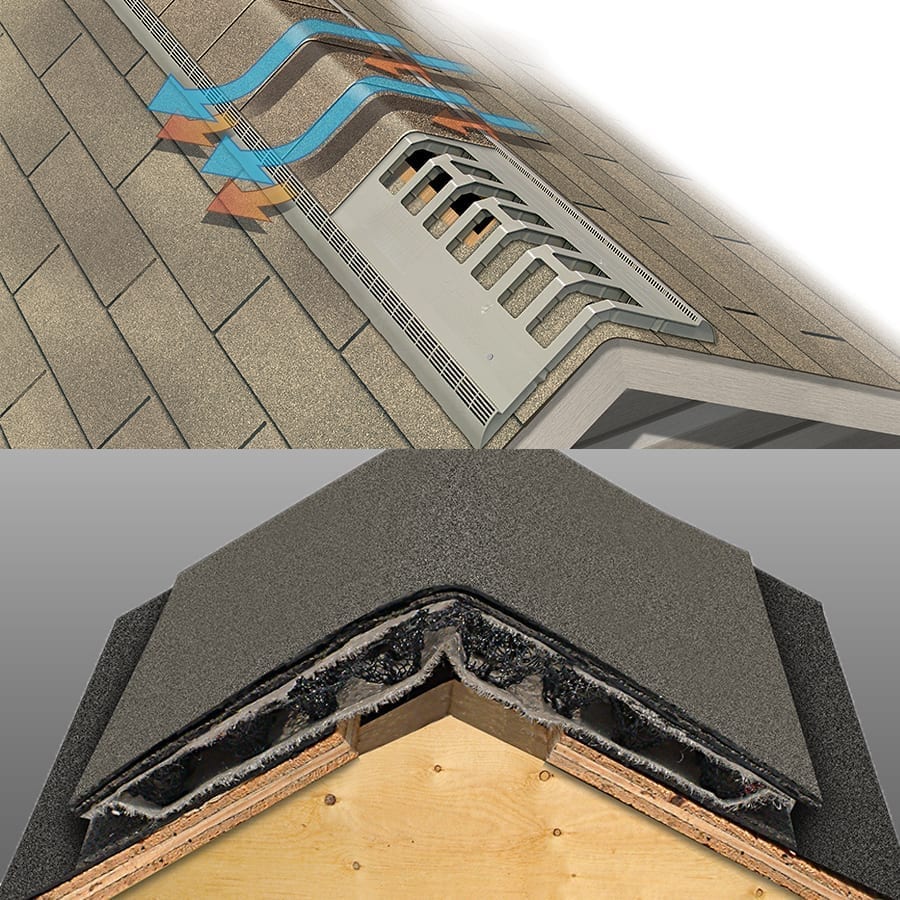
Ridge Vents
These vents are laid along the ridge of the roof and can come as a series of separate pieces or one long piece.
Because the vent material will look different than the shingles, some homeowners may choose to have their roofer shingle over the ridge vent once it’s installed.
These exhaust vents provide a reliable open area for warm air to escape the attic, providing essential outward ventilation across the entire length of the attic (versus a few isolated areas from other smaller vents). However, some pros recommend against this style because along with increased openings for air also comes the possibility for blowing snow or rain to enter. Newer styles of ridge vents have curved channels to reduce this risk or are comprised of a mesh like material.
(Source: Winnipeg Free Press, Fine Homebuilding)
How to Install A Ridge Vent
First, the roofer should remove any cap shingles along the ridge.
Next, they will outline the area using chalk and use a circular saw to cut away sheathing about one or 1.5 inches down on either side of the ridge, stopping three inches from the end of the roof on either side (or according to how far from the end the manufacturer recommends).
The roofer will be careful not to cut into the trusses or ridge board. They will then remove sheathing and install the ridge vent by securing one piece of vent at a time and attaching the next piece into it, nailing each piece as he goes. The ends should be capped or sealed. If it’s a newer style of shingle-over vent, it may be one continuous piece of aluminum or vinyl, or made of a single fibrous material that’s rolled out over the ridge hole.
The final piece may need to be cut to the right length with a hacksaw at the end of the roof.
Finally, the roofer will secure and weatherproof according to manufacturer instructions (which will generally recommend different materials for different styles). If it’s a shingle-over roof vent, ridge cap shingles will be applied over the vent and secured with two-inch nails.
(Source: Home Guides, NRHA, Fine Homebuilding, Stanley Complete Roofs and Siding)
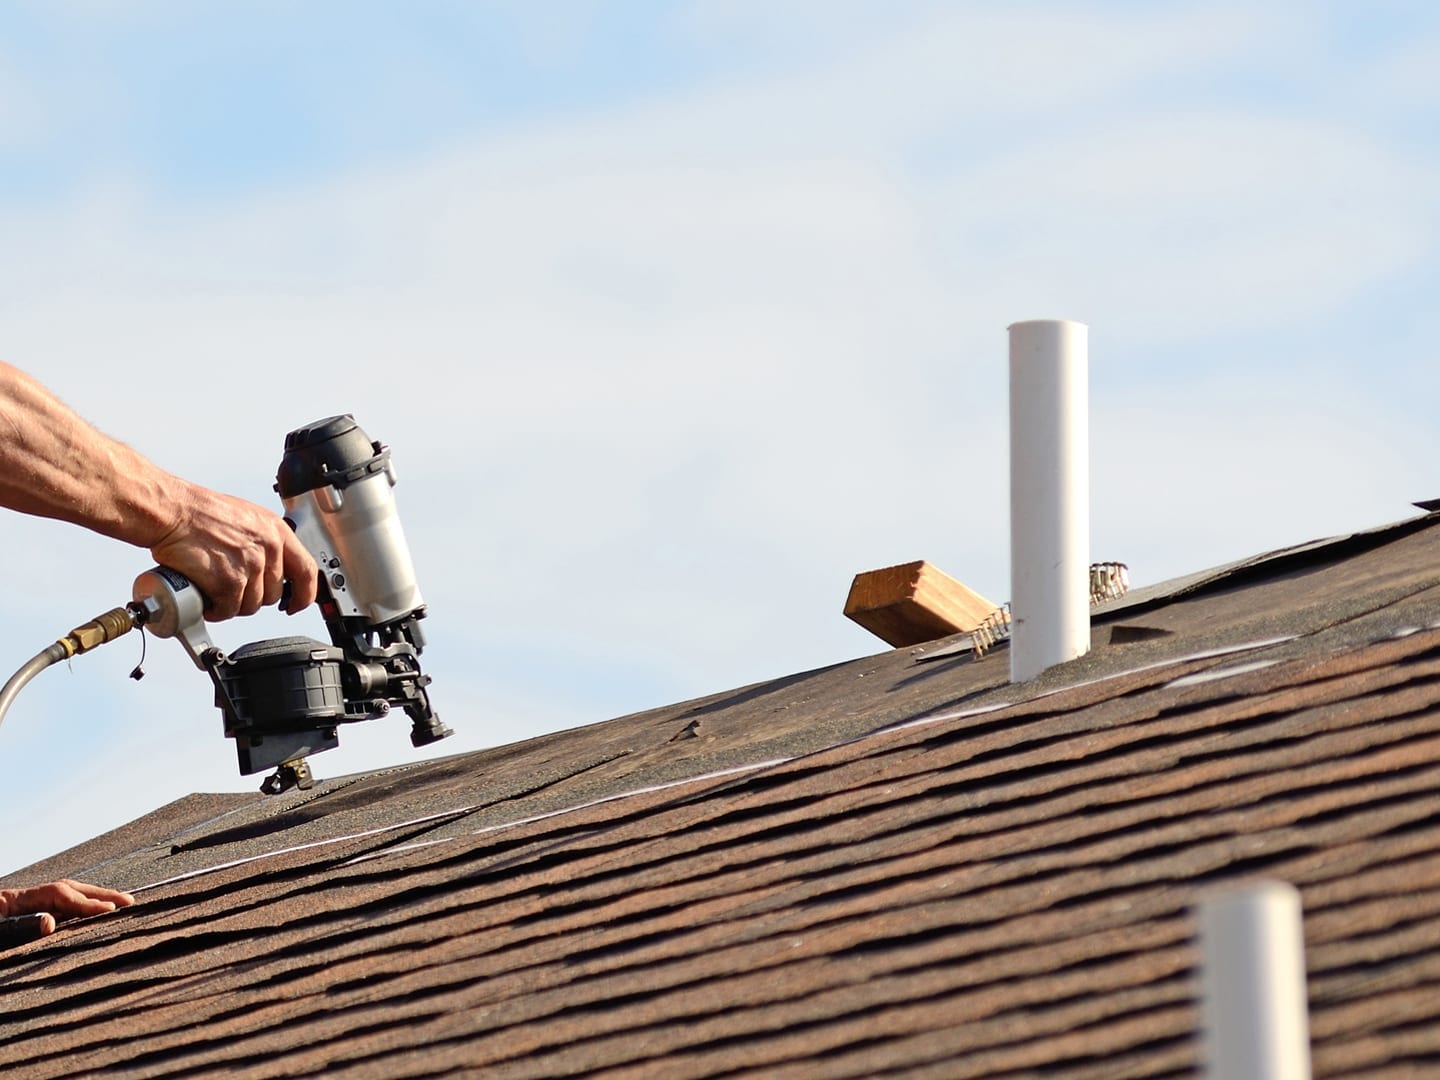
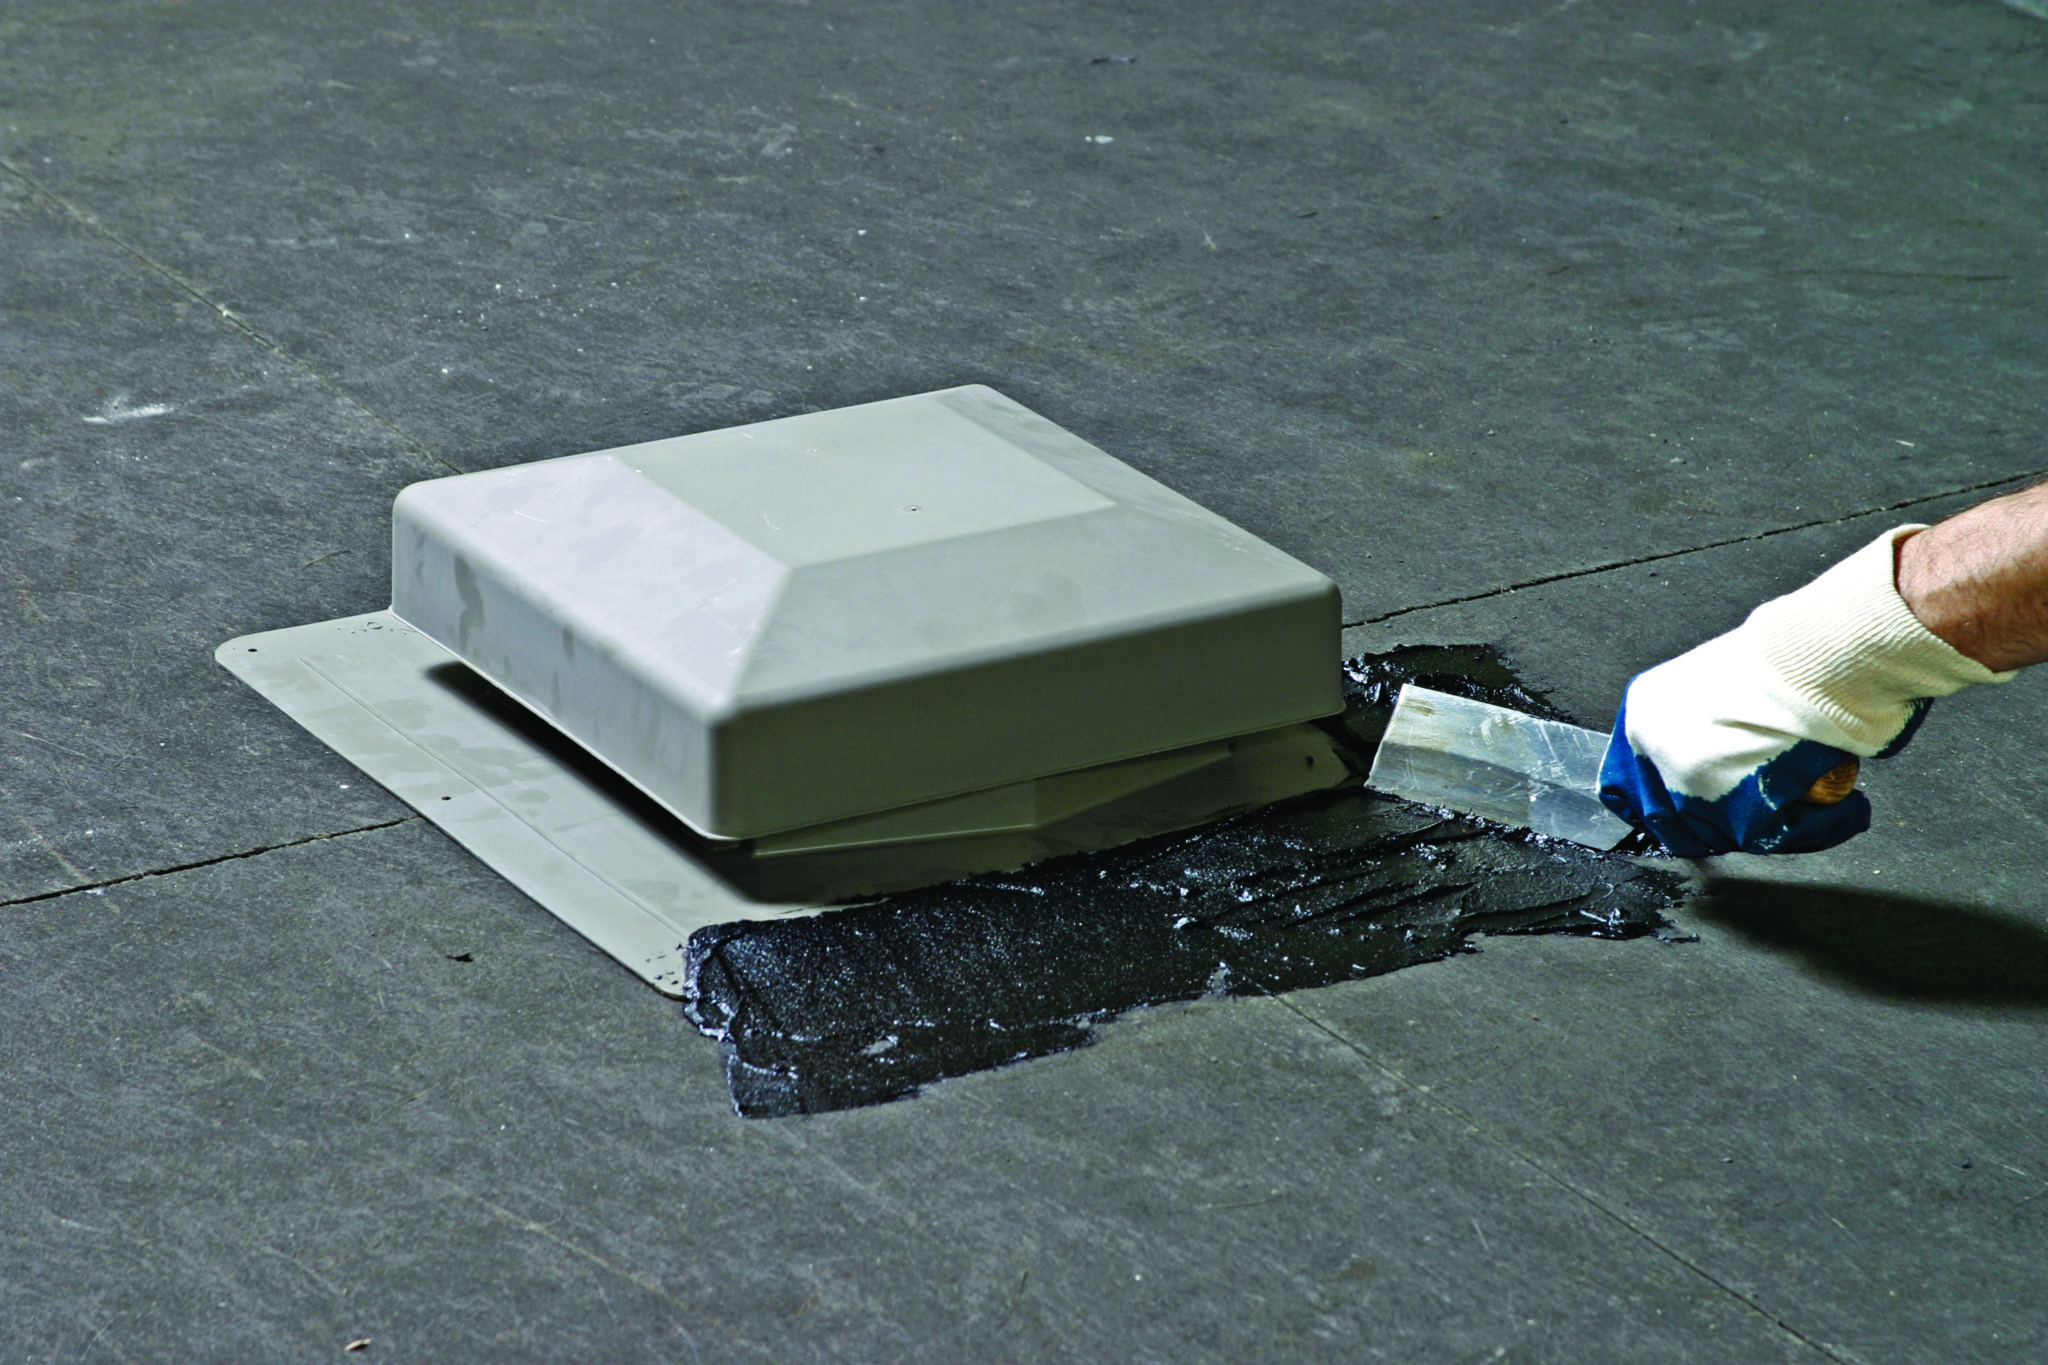
Static Vent
Static vents come in a variety of different styles and sizes, but are all non-motorized vents installed near the roof ridge to allow for unobstructed flow of air from the attic. If there are more than one, they are centered between the rafters and installed at regular intervals in a horizontal line along the roof.
How to Install A Static Vent
First, from inside the attic, your roofer will drive a nail through the roof structure to mark spots for the vents. (The nail will either drive directly through the roof or pop a shingle that’s easy to spot) on the topside of the roof. The roofer will mark these spots between the rafters evenly along the roof. From the roof they will then draw a guide hole the size the diameter of each vent. These holes will likely be installed closer to the ridge but manufacturer instructions should always be followed.
From the roof, the roofer will remove shingles around the guide hole and about one inch back on the upper side of the hole. They will use a saber saw to cut through the underlayment and decking of each marked hole.
To install the vent, the roofer slips the flange (the metal lip of the vent) under shingles at the upper part of the hole and rests the flange on top of the shingles at the down-slope part of the hole.
To secure, your roofer will (following manufacturer instructions) likely use roofing nails, ensuring these are long enough to penetrate through the unit, the shingles and the decking.
The final step is waterproofing the vent, which will be done by applying manufacturer-recommended material (such as caulking) around the flange.
(Source: Air Vent.)

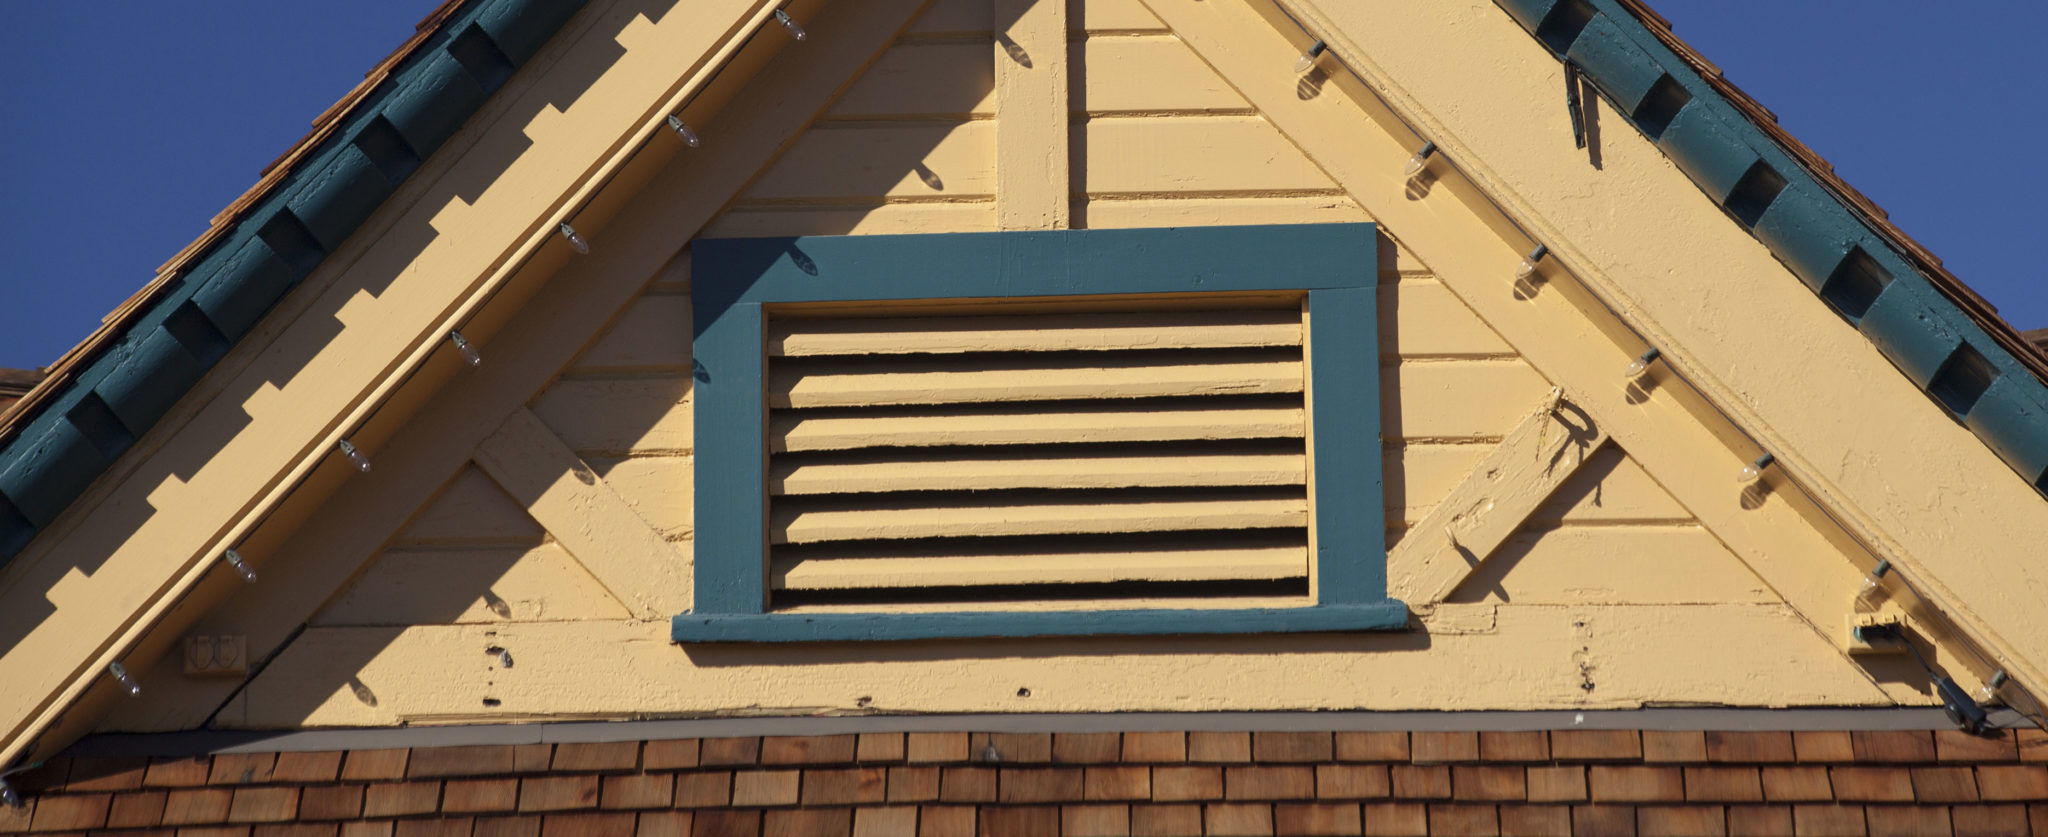
Gable Vents
A gable vent is a slotted piece of wood or siding that’s installed into the side of a home near the gable ( where two roof pitches meet in a triangle). Gable vents can function as both intake and exhaust, but rely on strong winds to be effective, so they are recommended to be used in conjunction with additional intake soffit vents near the bottom of the roof. Also, roofing professionals usually recommend against installing a gable vent if that side of the home is subject to driving rain on a regular basis.
(Source: Stanley Complete Roofs and Siding.)
How to Install A Gable-End Vent
Rather than being installed on the roof, gable vents are installed on the exterior side wall of the home, near the roof ridge. Installation first requires a wood frame, made of 2X4s, installed from the attic between two studs. Your roofer will build this frame just a little larger than size of the vent (leaving 1/8 inch of extra room on each side). Your roofer will secure the frame from inside the attic then drill holes in each corner of the frame right to the exterior of the house.Working from the outside he will use these four holes as a marker to create a rough hole of where the vent is to be installed. He will cut through the siding and sheathing to create the hole for the vent. He will add felt paper around to hole to add a layer of water proofing, lapping it over the existing felt paper. Then he will install the flashing to the frame, or directly to the vent, and insert the vent into the wood frame, securing with screws and/or applying caulking or sealant recommended by the manufacturer.
(Sources: Home Addition Plus, Do It Yourself, Home Advisor, Homes Guide.)
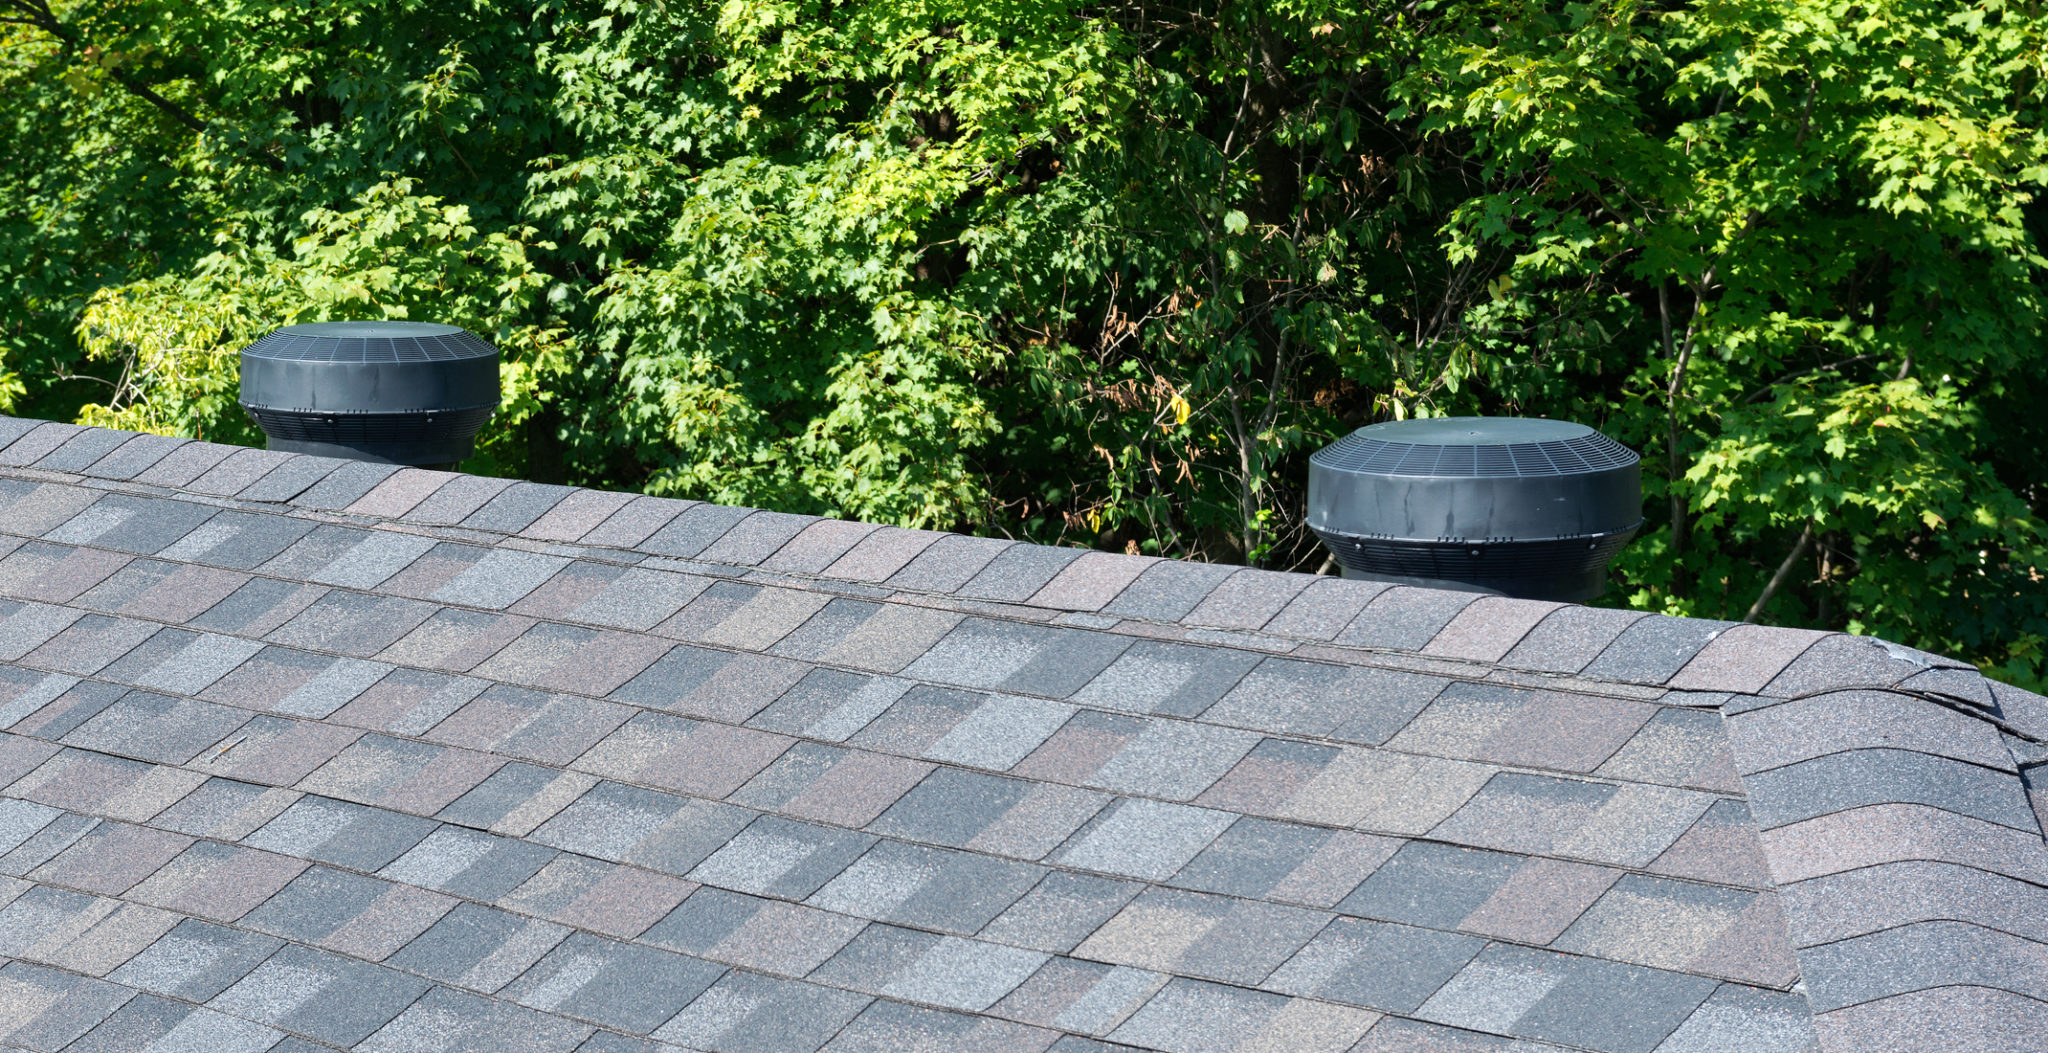
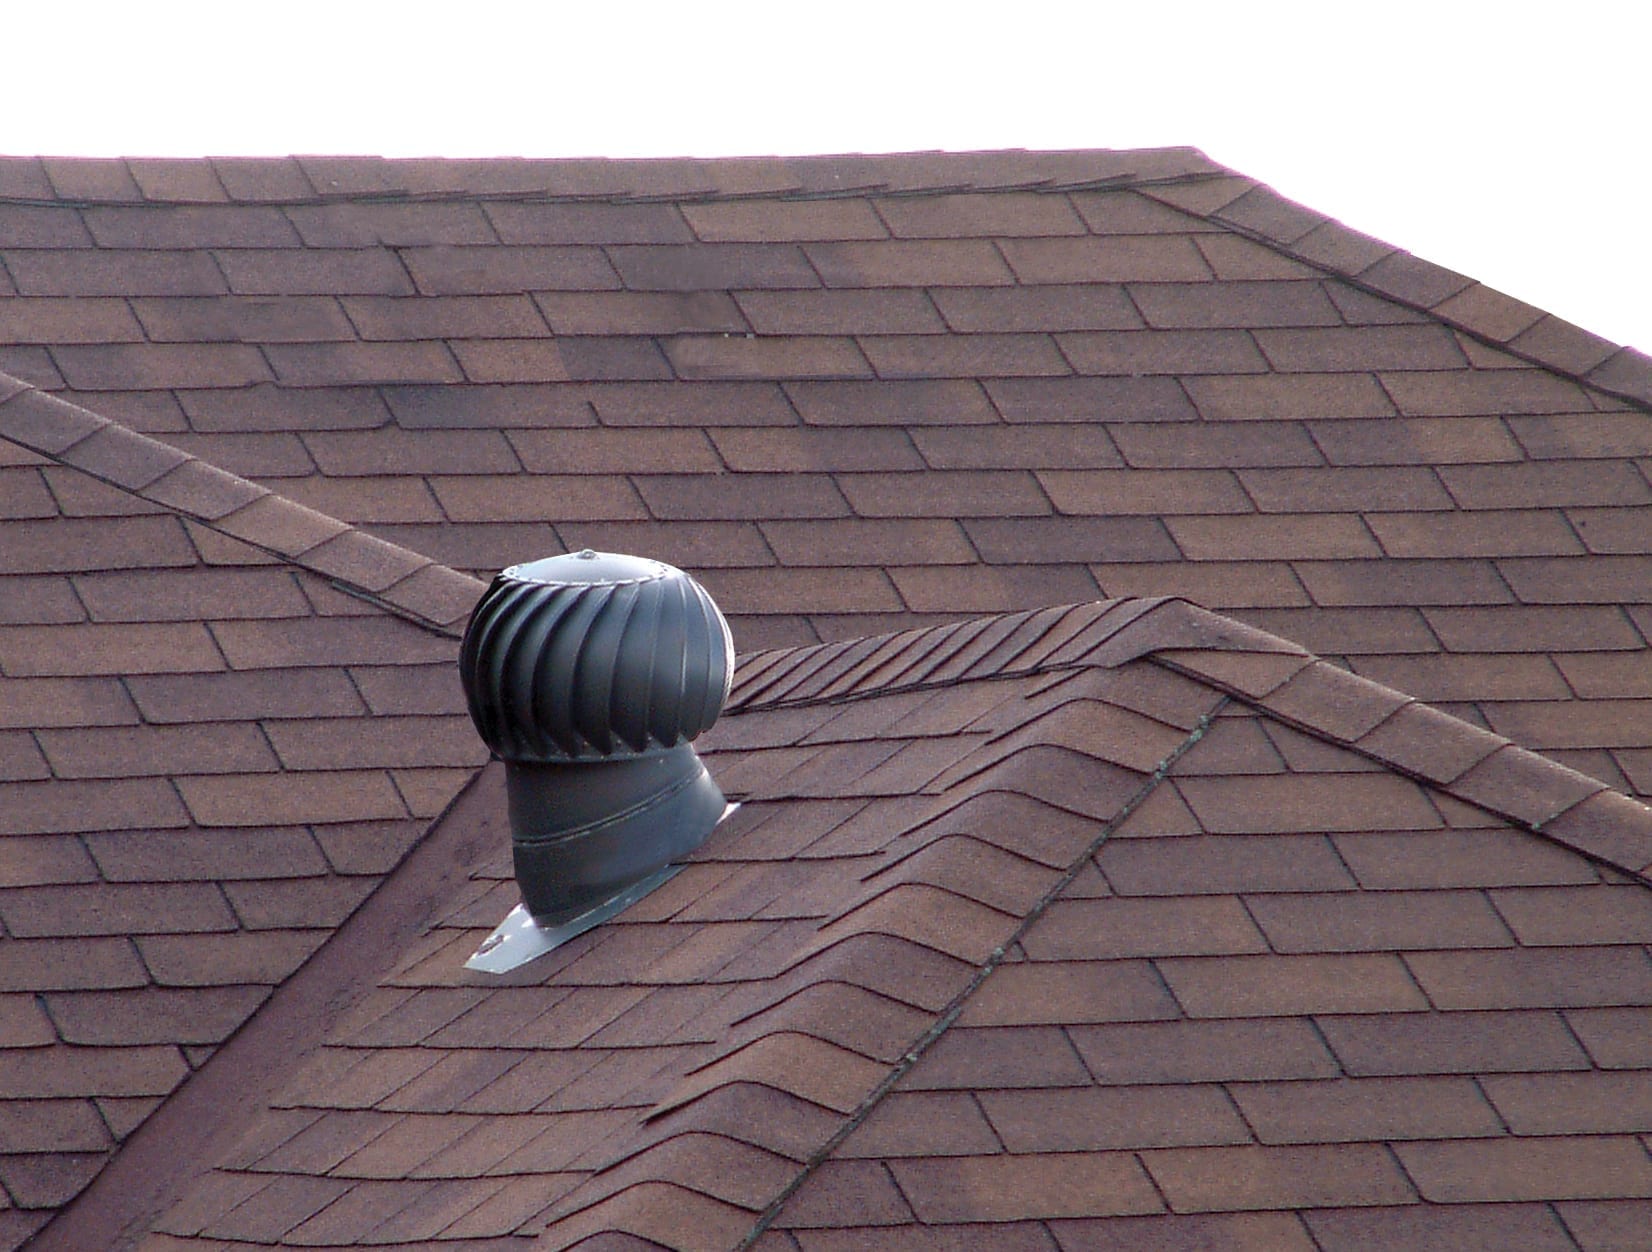
Turbine Vent
A turbine vent draws air from inside the attic as wind turns the turbines. This is most effective in areas where winds average at least five miles per hour, or otherwise will not offer the most effective, reliable source of venting.
How to Install Turbine Vents
The installation of a turbine vent is nearly identical to a static vent. A roofer will, from the attic, mark a spot near the ridge of the roof (he may first use nails from the attic to mark preferred spots between two rafters). From the roof, the roofer will cut away shingles and underlayment, and use a saber saw to cut a hole the same size as the diameter of the vent.
Following manufacturer’s instructions for securing the vent, the roofer will likely spread plastic roof cement on the underside of the vent, place it over the hole, slip the flange under the top-side shingles, and lay the flange over the down-slope shingles.
The roofer will then nail the base in place with galvanized roofing nails and cover nail heads with roofing cement.
(Source: NRHA and House Logic)
Powered Vent
A powered exhaust vent is much like a roof-mounted exhaust fan. It can be controlled by a thermostat or moisture monitor. Blades spin within the unit to expel air from the attic until the right temperature or moisture level is reached, at which point it will automatically shut off.
How to Install Powered Vents
From inside the attic, your roofing professional will drive a nail about one third of the way down from the ridge between two rafters to mark the desired spot for installation. From the roof, he will cut a hole the same size as the diameter of the vent. As with static and turbine vents, he will then secure the flange under the top-side layer of shingles, lay the flange on top of the bottom shingles and use roofing cement (or manufacturer-recommended waterproofing materials) to seal the unit.
(Source: Home Guides and Roofing Canada.)
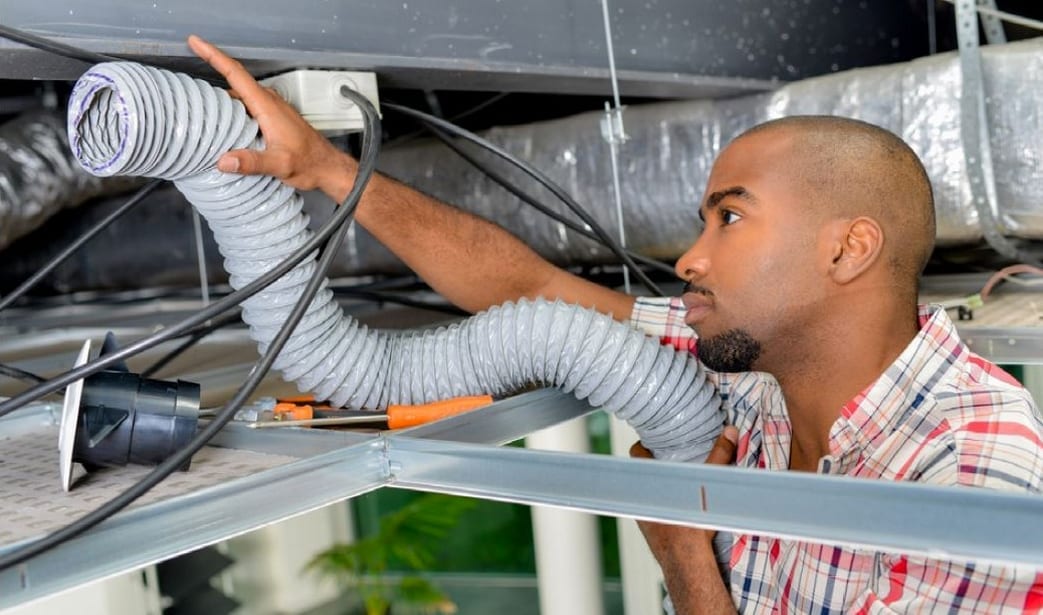

A Note About Bathroom And Kitchen Exhaust Vents
Bathroom and kitchen exhaust vents are not a type of roofing vent. It should be noted that these vents, which expel warm moist air from the bathroom and food prep areas of the home, need their own ducts and vent hoods, which direct air to the home’s exterior. These vents and ducts should never share space with the roof vent, and air should never be vented directly into the attic.
(Source: Family Handyman.)
The Lasting Benefits Of Ventilation
With the right balance of intake and exhaust ventilation, a homeowner can help optimize the life of his roof system and his home’s energy efficiency. He can also feel confident neither the roofing system nor the contents of the attic will be victim to the destructive effects of condensation so common to poorly ventilated roofs.