Disclaimer: This article is intended for general educational purposes and reflects commonly accepted industry practices related to working at heights. It is not a replacement for formal safety training, certification, or site-specific safety protocols. The content does not constitute legal, safety, engineering, or compliance advice. Fall protection requirements, interpretations, and enforcement of regulations—including OSHA and OHSA standards, and provincial or local codes—may vary by jurisdiction and change over time.
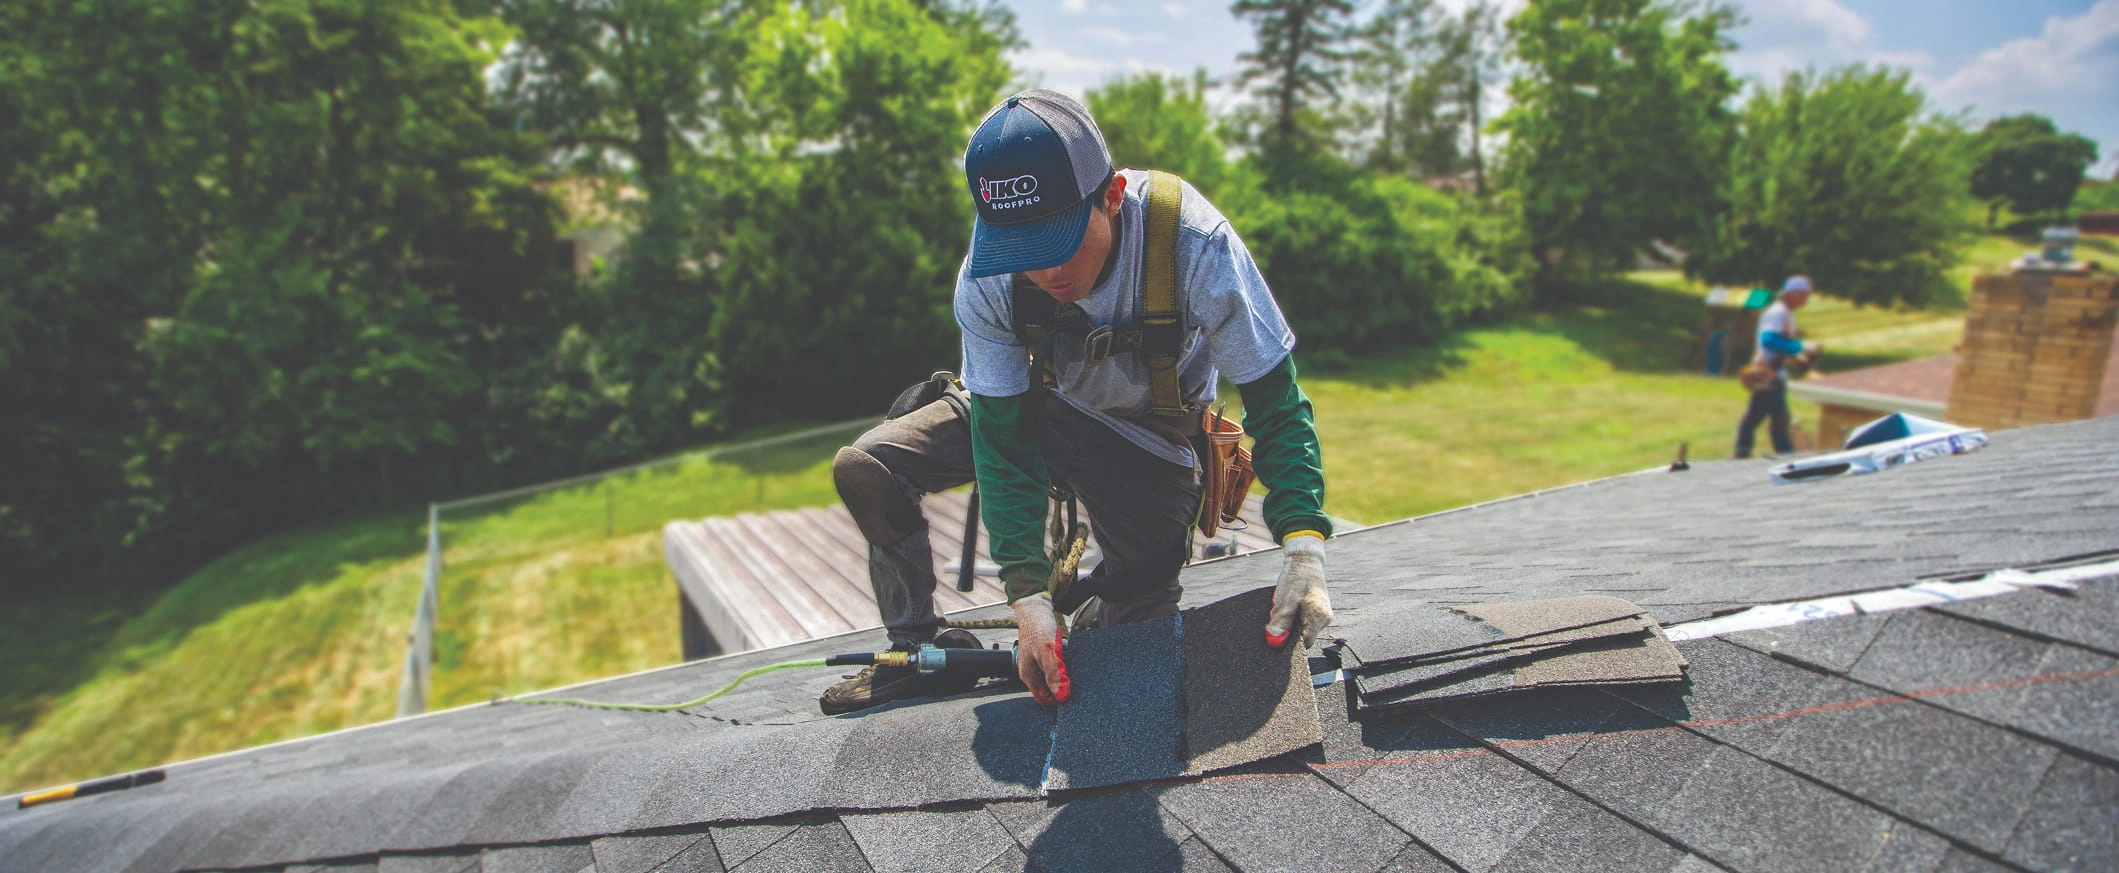
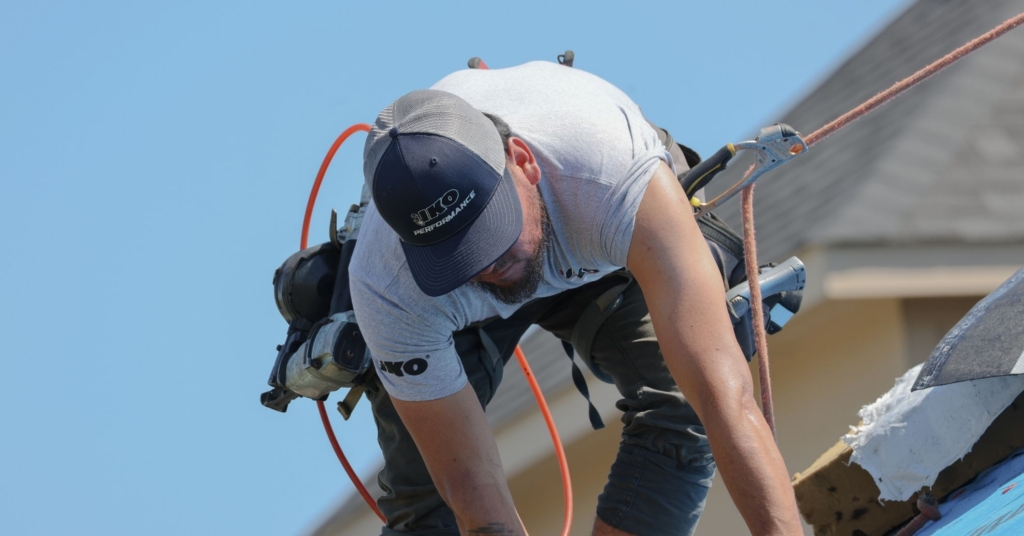
A safety harness is a roofer’s best friend. Choosing the correct fall protection harness and using it properly will protect you from falls and serious injuries when used correctly.
Fall protection harnesses are only one option among many fall protection systems. However, they are widely used by residential roofers. Usually, roofers do not want to spend the time to set up guardrail systems on a residential home. Fall protection harnesses are a convenient and safe alternative.
Though fall protection harnesses have become comfortable to use in recent years, not all roofers take them as seriously as they should. Failure to use a fall protection system properly results in many falls a year and an average of 37 fatalities per year in the United States. Therefore, keeping up to date on how to use a fall protection harness and other safety training is essential.
This guide will walk you through the basics of what an approved personal fall arrest system (PFAS) should look like and how to use it properly. We’ll cover the Occupational Safety and Health Administration (OSHA) standards for fall safety for Americans as well as Canadian safety standards from the Occupational Health and Safety Act (OHSA). We’ll also cover recent changes to the CSA Group rope grab standards.
At What Height is a Roof Safety Harness Required?
First, you need to know when you should use a roof safety harness. As a professional roofer, it is mandatory you use a roofing harness when working from a certain height.
In most jurisdictions in the United States, the OSHA requires you to use one if you are working on a high-sloped roof that is six or more feet off the ground and not using guardrails and safety nets. Or, if you are working on a low-sloped roof of 4:12 or less, which is also 6 feet off the ground, you have the option to use a roof safety harness or a few different combinations of guardrail and warning line systems. However, you should always check with your local regulations, which may differ from this national standard.
What are the regulations for Canadian roofers? Safety regulations vary in Canada by province. However, in most provinces, including Ontario, British Columbia and Alberta, a worker must wear a personal fall arrest system if they can fall from a height of 3 meters or more and does not have guardrails.
What is the Difference Between a Personal Fall Arrest System and a Fall Restraint?
There are two main types of harnesses: PFAS and travel restraint harnesses. In both Canada and the United States, safety regulations make a distinction between PFAS and travel restraints, which are more commonly called fall restraints in the United States.
When you wear a fall or travel restraint, you cannot reach the edge and fall. In contrast, a PFAS allows you to work on the edge of the roof, but prevents you from hitting the ground when you fall, so long as it is used correctly.
A roofer should use a PFAS to reach the edge of the roof to do their work. A travel restraint system may not offer enough protection to meet your safety requirements. In this article, we will discuss only how to use a PFAS.
The Parts of a Personal Fall Protection System
A proper PFAS has five components, all of which must be in good working order:
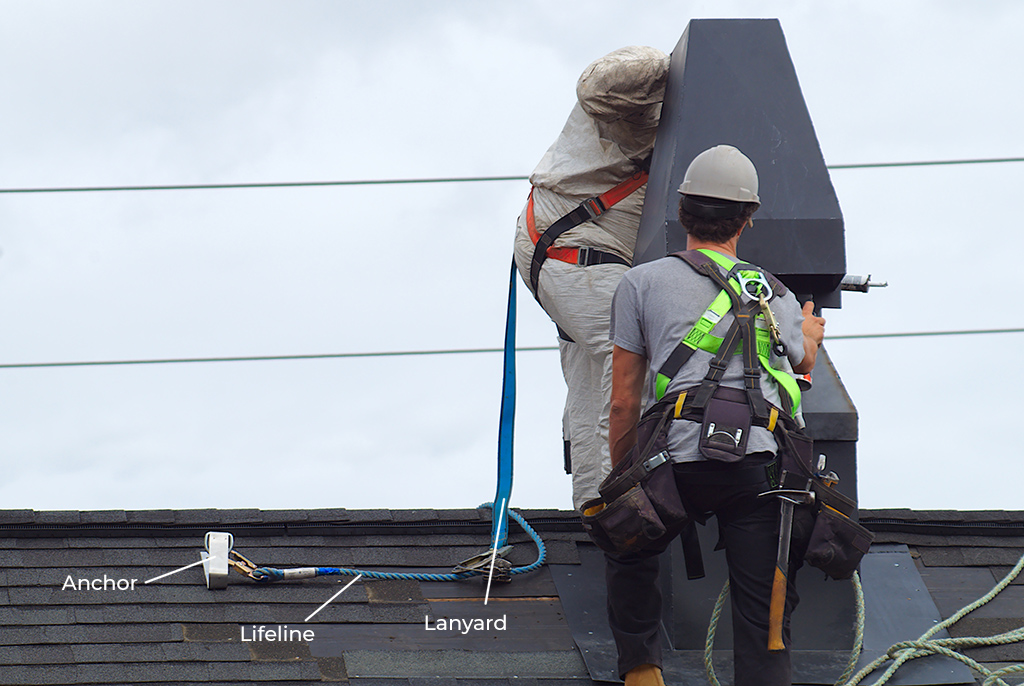
- Anchor Point: This is the metal anchor where the PFAS connects to the roof. It has holes for nails or screws. You must take care to secure the anchor as per manufacturer recommendations before you clip onto Most roofs have an anchor point and loop left in them from the time of construction. These should never be used and should be considered compromised — we’ll discuss how to attach the anchor point to the roof below.

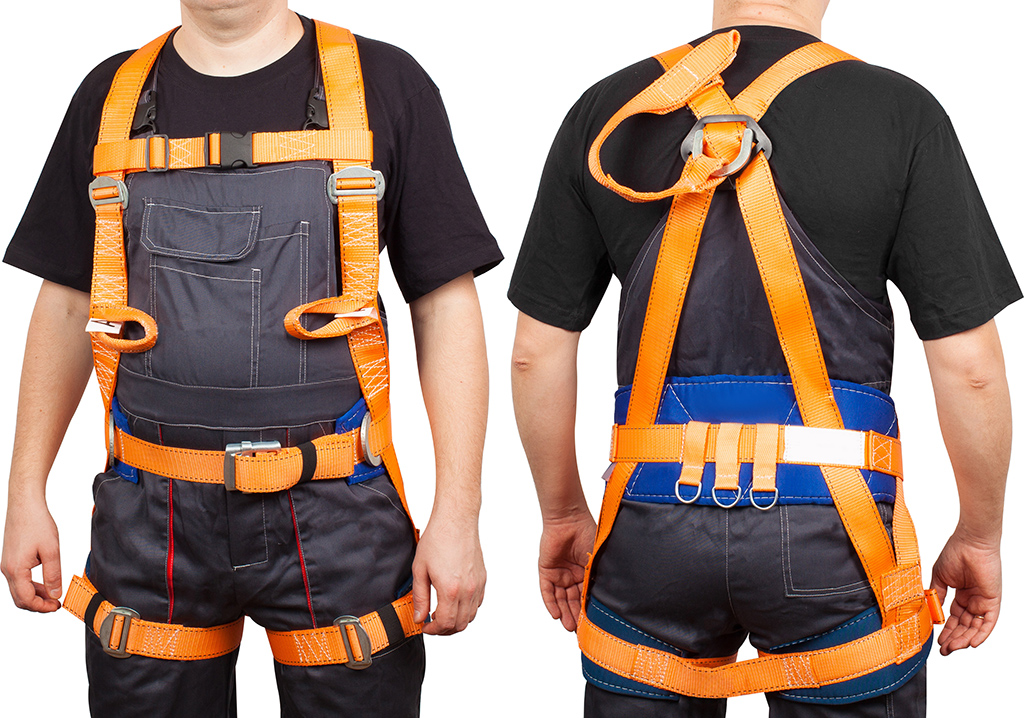
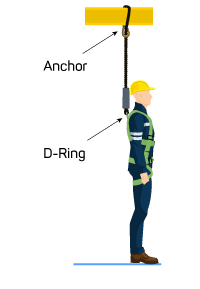
- Full-Body Harness (FBH): The harness is the strapping system that you wear to attach yourself to the PFAS. If you are in Canada, this harness must be a CSA-approved Class A full-body harness. The harness should fit comfortably around both of your legs and the center of your chest, distributing the impact if you should fall. It also must have a D-ring (Class A) for attachment on your back, in the center between the shoulder blades.
If the harness is part of a travel restraint system, it may, in some areas, be acceptable for it to have a body belt. However, when as part of a PFAS harness, OSHA requires it to have leg straps instead of a body belt. Always check with your local regulations to be sure your harness meets requirements.
- Lifeline: A lifeline is the rope that connects the lanyard and rope grab to the harness and anchor point.
- Rope Grab: Metal clamps that connect the lanyard and lifeline. Your roof safety harness kit will likely be an “integrated system.” This means that the rope grab is already connected to your lanyard and they are typically sold together. However, Canadians may have learned about rope grabs as separate devices. In fact, your existing rope grab is still CSA Group certified, but you may purchase a system with an integrated rope grab and lanyard the next time you need one.
- Lanyard: A shock-absorbing system that helps reduce the severity of your fall. If you do not have a lanyard, then your lifeline must have a deceleration device or you must have a self-retracting lanyard (SRL) as it is a required safety feature included in all roof safety harness kits.
Local regulations and standards will require your anchor point to hold a certain amount of force. Under OSHA regulations, a PFAS must sustain a minimum tensile load of 5,000 pounds of force for every person attached. This accounts for the force generated when falling. Your regulations may require a different weight, so be sure to check.
Note that the “weight capacity” is a different measurement than the amount of force the anchor can withstand. PFAS harnesses have different weight ratings, so check the label.
Also, when you buy a fall protection harness, keep in mind that it is wise to buy a full roof safety harness kit, instead of buying the harness, lifeline, lanyard, rope grab and anchor point separately. You want to be sure each part of your safety harness is meant to work together, as there are different ways the rope may attach to the harness and anchor, depending on how the system is meant to work. When you buy a roof safety harness kit, you know each piece will work together.
How to Use a Roof Safety Harness
Now that you understand what a fall protection harness is and when you should use it, we can detail how to use it properly.
1. Prepare the Harness
Before you get on the roof or put the fall protection harness on, there are a few things you need to do:
- Examine the Harness: Make sure that the harness looks as it should and that it hasn’t been damaged. Remember, if a safety harness has been through a fall, it must be taken out of service. Check with your manufacturer for details to determine when and if the harness should be sent back.
- Fit the Harness: Ensure that the harness is snug around both legs and at the chest. You don’t want the straps to restrict your movement or breathing, but you don’t want them so loose they could get caught on something. A secure fit also helps prevent injury, as loose straps can cause orthostatic trauma. As a harness must be fit to each individual, it is best if each roofer is provided with their own harness and that roofers do not share.
2. Calculate Fall Distance
What’s your total fall distance? It is the minimum vertical distance between the dorsal D-ring on your harness (the metal ring found on the back of the harness between your shoulder blades) and the lower level (of the roof or the ground) that is necessary to avoid hitting the ground.
Your local regulations will restrict how far your PFAS can allow you to fall. For example, under OSHA regulations, your PFAS must not allow you to fall more than 6 feet without slowing your fall. Also, it must not allow you to contact the ground or a lower roof level. If two levels of the roof are less than 6 feet apart, you need to shorten the lanyard or lifeline so that you won’t hit the lower level if you fall from the upper level.
Before you begin work, you need to calculate your total fall distance and ensure it is within your local regulations’ requirements. To do so, you need to add up the following measurements:
- Freefall Distance: The distance you can fall before your PFAS device starts to slow you down. This must be less than 6 feet. A deceleration device can help shorten this length.
- Deceleration Distance: Despite its confusing name, this is the length the lanyard stretches to help arrest the fall. While OSHA requires this be 3.5 feet or less, you should check with your local regulations.
- Slack in the Harness: This is the distance the harness stretches when the D-ring is pulled. This distance will depend on the construction of the harness, the weight of the roofer and what they are carrying at the time. Roofers typically assume this is 1 foot, though actual stretch may vary by harness design and load.
- Back D-ring Height: This is how tall your worker is from his or her feet to the D-ring. You should measure each worker, but on the average 6-foot man, the D-ring is 5 feet above the sole of your shoes.
- Safety Margin: A 2-foot safety margin is fairly standard, but check with your local regulations.
Freefall distance + Deceleration distance + Slack in the harness + Back D-ring height + Safety margin = Fall distance
Before fall
After Fall – Cumulative distances used to calculate total fall clearance distance.
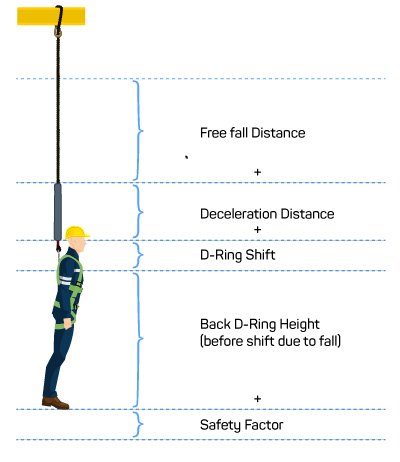
If your total fall distance is equal to or more than the distance you could fall, you need to shorten some element of the PFAS, typically the lanyard, to ensure you will not hit the ground. Just don’t shorten the safety margin!
3. How to Install a Roof Safety Harness Anchor Point
Now, you need to install the anchor point on the roof. Anchors are labeled with the manufacturer’s recommendations for installation; read these instructions and follow the directions. Be sure to select the nail or screw the manufacturer lists, install it in the correct place (such as into a truss). Add as many nails or screws as the manufacturer lists and do not skip any steps.
You may wonder how you can get to the roof’s ridge (where you will install the anchor) safely when your PFAS is not yet secured. There may be no single, safe way to reach the peak of a steep slope roof to properly install your anchor point.
Contact your local safety authority, such as OSHA or NRCA representatives, or attend local training on working safely at heights, to get expert advice on how to handle this critical part of fall safety in your specific region.
4. Connect Your PFAS
After you properly install your anchor point, you need to attach the rest of the system to it.
How you connect it typically depends on whether you are using a PFAS or an SRL system. However, you should always read and follow the manufacturer’s instructions.
If you use a PFAS system, you will typically attach your lifeline to the anchor as your manufacturer recommends. You then attach your rope grab and lanyard to the lifeline. First, inspect and put on your harness to ensure it is safe and comfortable. Attach the lanyard (the shock absorber end) to the D- ring, which is located on the back of your harness. You may need help, so do this on the ground.

If you use an SRL system, attach it to your anchor directly unless it has an integrated anchor system. Then, attach the snap hook end to your dorsal D-ring. The benefit of this more complicated system is that the SRL acts like a seatbelt and eliminates the possibility of a fall when used correctly.
5. Stay Close to Your Anchor Point
The last step to using your fall protection harness properly is to keep the system taut at all times. Avoid extreme distance to reduce the chances of a pendulum effect should you fall. Refer to your fall distance calculations and recalculate as necessary.
When you need to move on to another part of the roof, you need to move the anchor point with you. To save time and increase safety, some roofers will install multiple anchor points and then simply switch between them as they move across the roof.
How Many People Can Safely Anchor to One Roof?
No national roofing regulation limits the number of roofers you can anchor to a single roof. Instead, you must use common sense and understand the engineering principles of the roof itself to make sure that the roofers will be safe. However, roof harness manufacturers suggest that you should ensure that everyone working on the roof has their own anchor point.
Fall Protection Harnesses and Safety for Roofers
Knowing how to use a PFAS properly will ensure that you follow safety regulations and avoid injuries on the job. It’s wise to periodically check to see if safety regulations have changed. All regulatory bodies occasionally update their rules to better keep you and your staff safe on the roof.
Now, while you’re exploring a fall protection system, it is a great time to ensure you have enough insurance for your roofing company. It’s best to be protected.