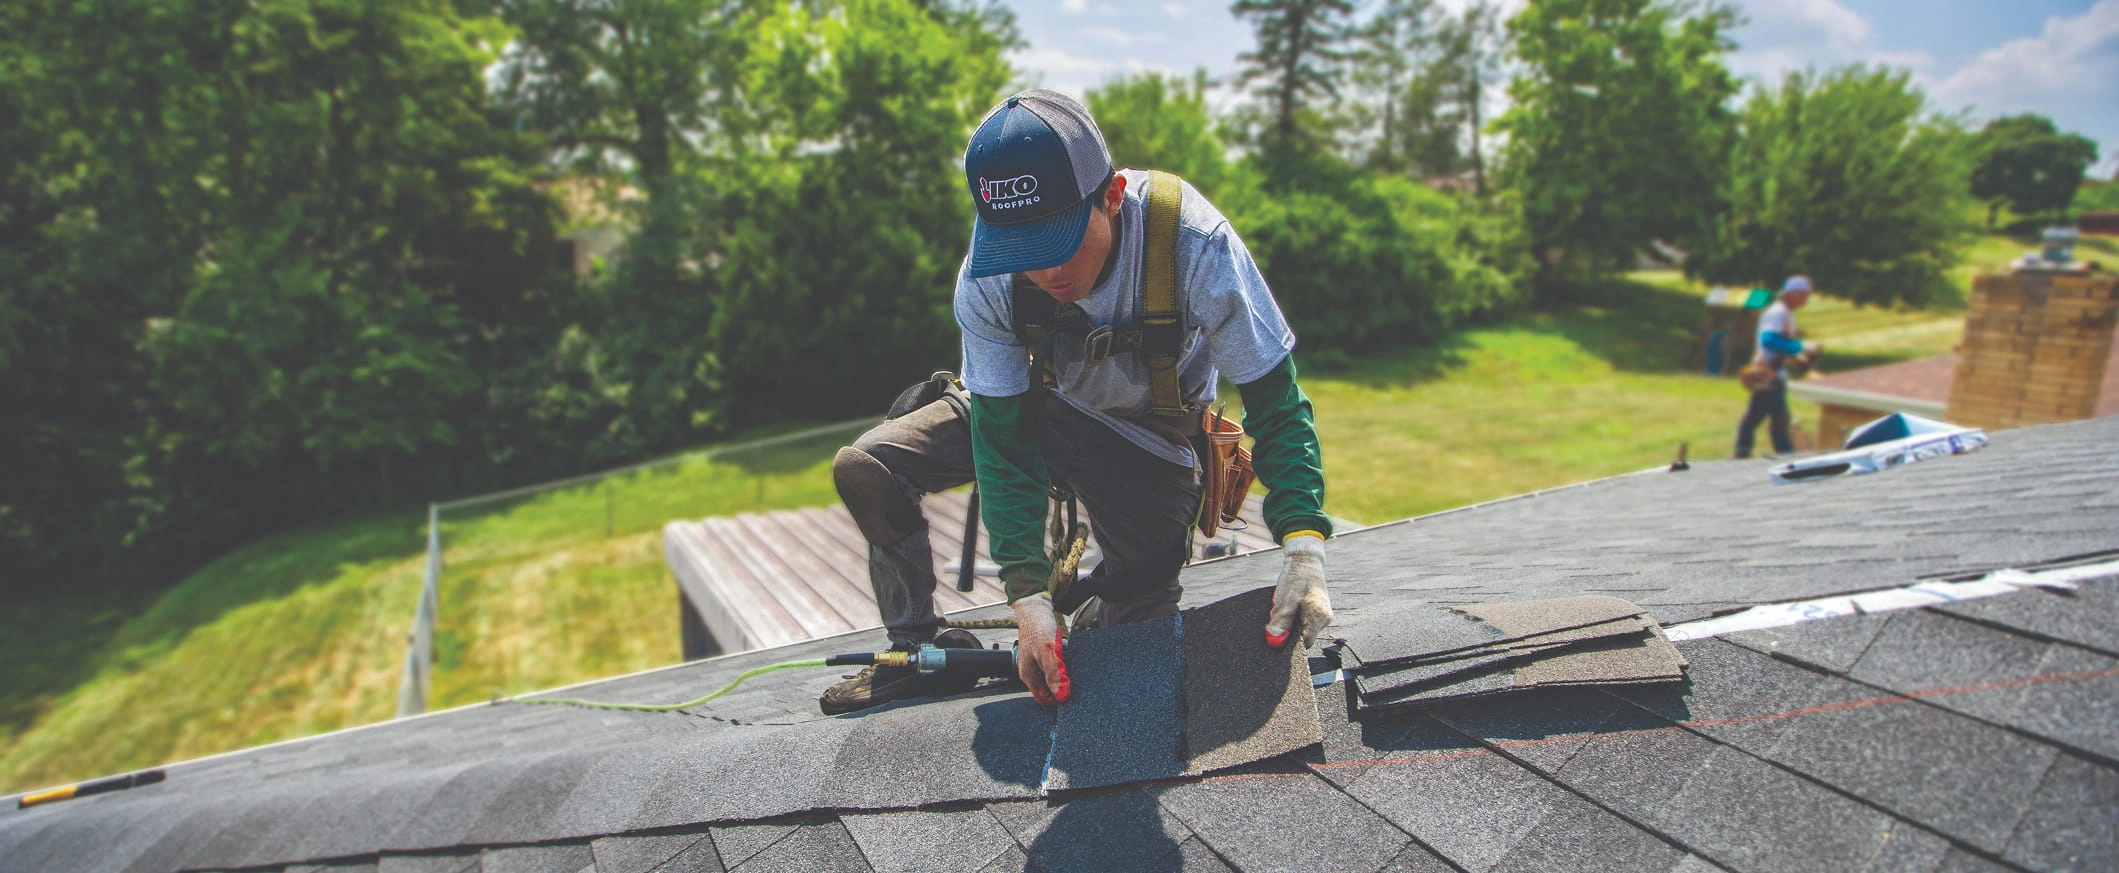
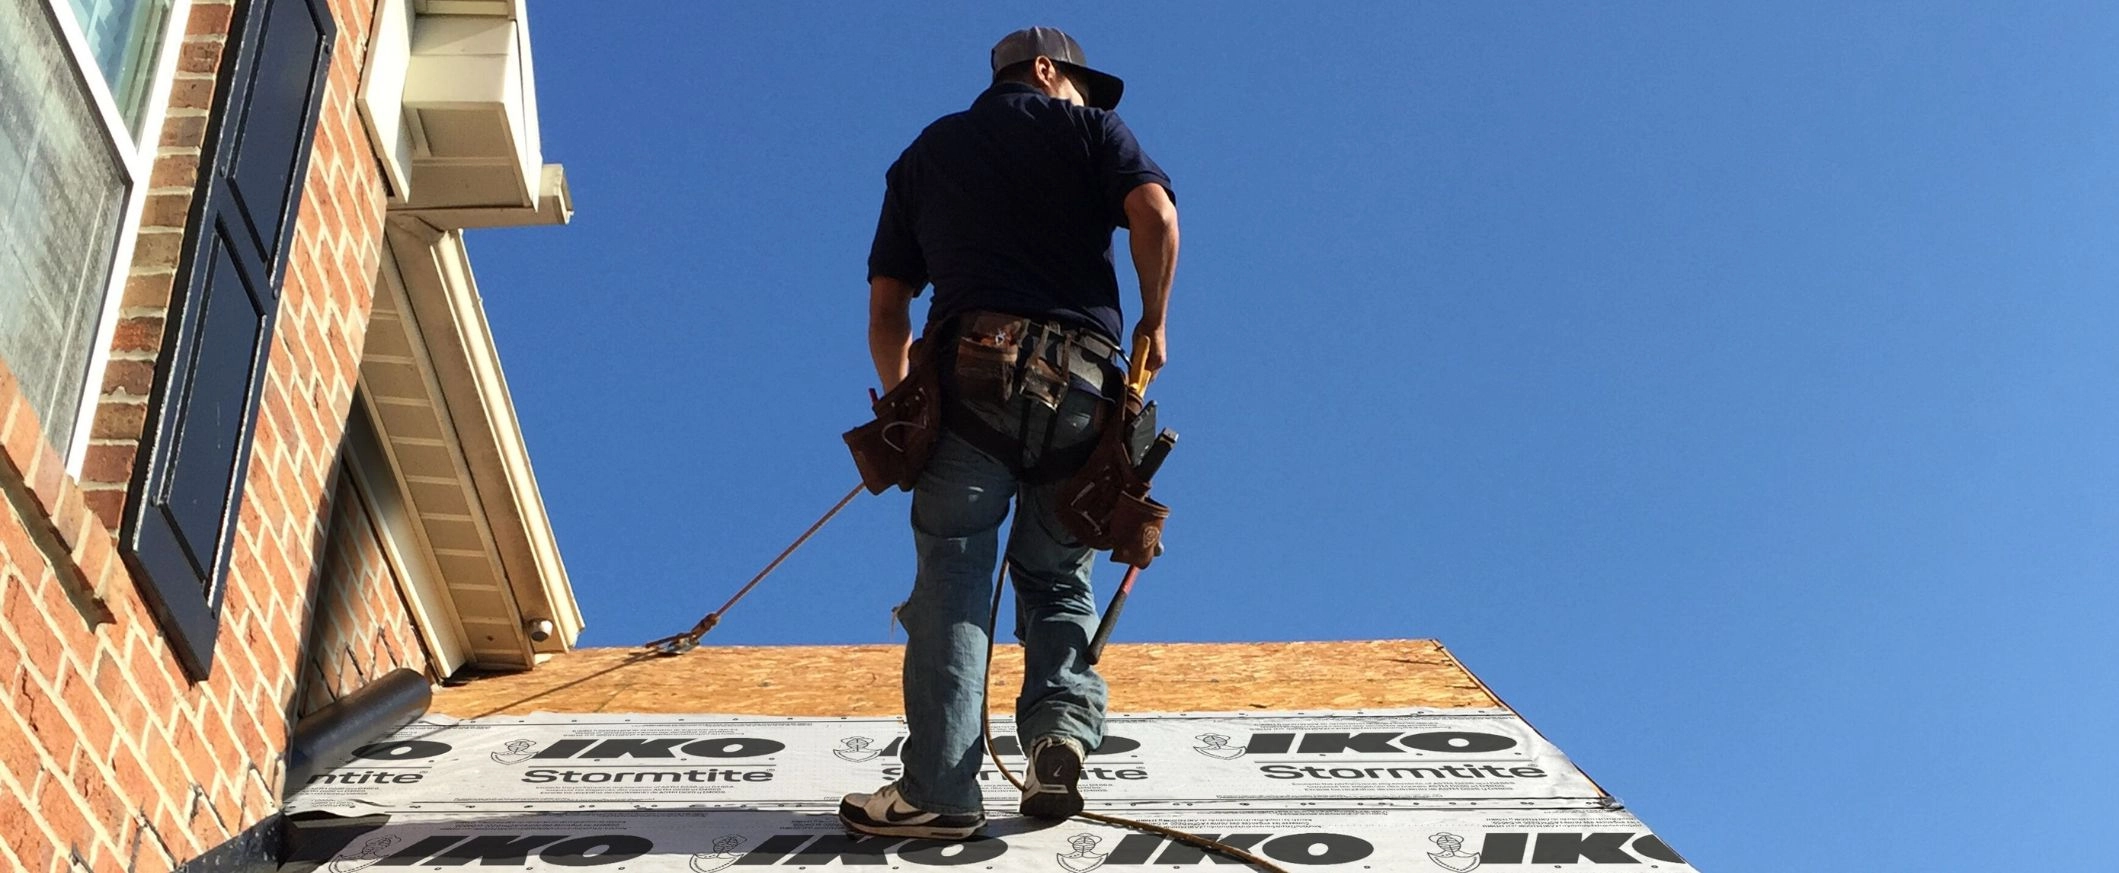
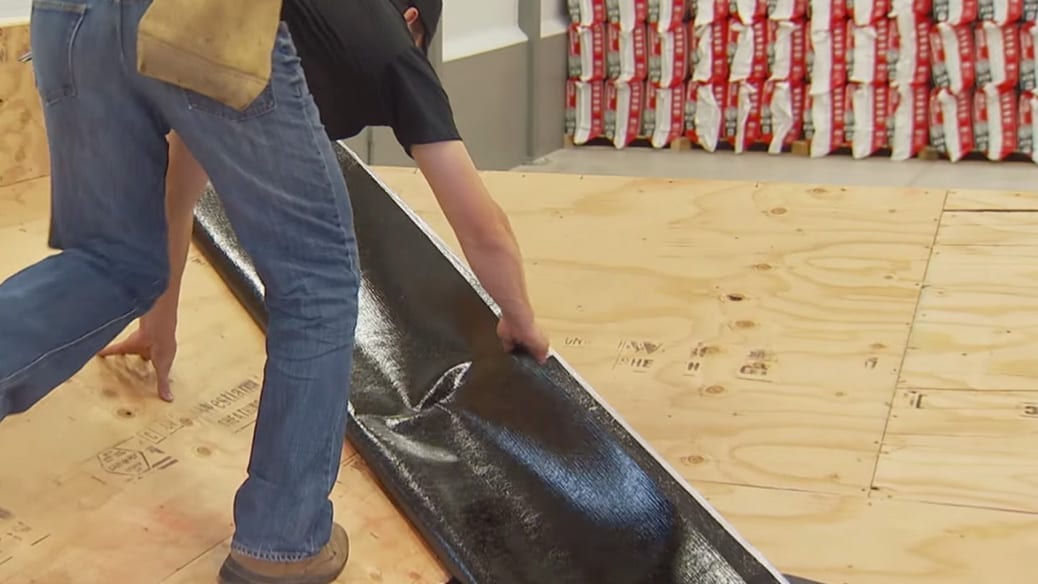
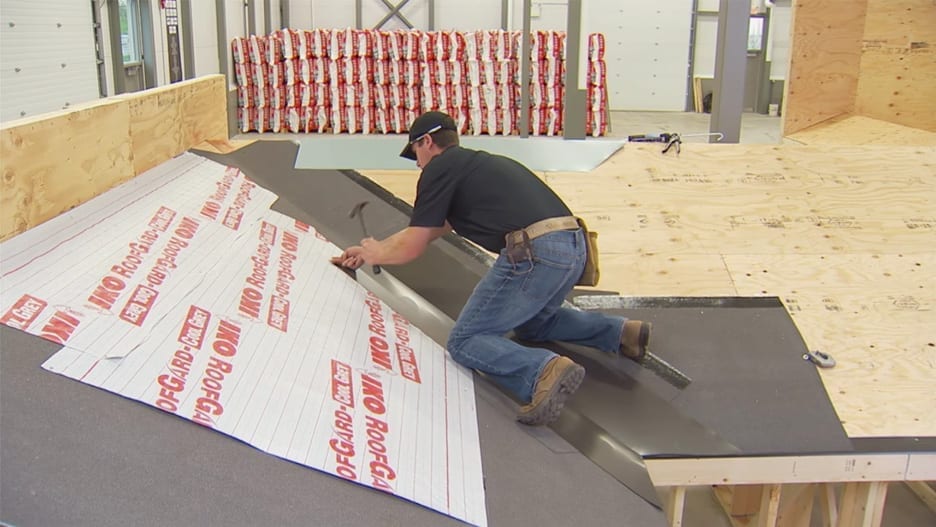
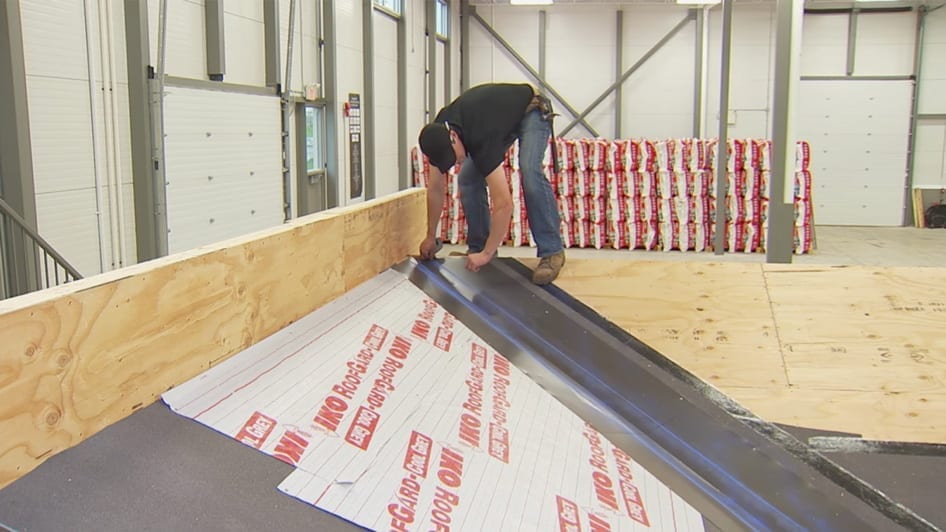
Now that the roof deck has been properly prepared, let’s flash the valley. The low-lying area, or valley, where the roof planes intersect is highly vulnerable to water penetration. You need to protect against this with an open, closed, or woven valley application. For optimal roof performance, IKO strongly recommends open metal valleys. Center a 36″wide strip of ice and water protector membrane in the valley. Temporarily tack into place with nails along one edge. Carefully peel away the backing, position the membrane, then smooth out any wrinkles. Work your way up the roof installing additional pieces to overlap by at least 6″. Remove the temporary nails. We recommend using a minimum 28-gauge pre-finished galvanized metal, or similar non-standing material, as flashings. But check local codes, it must be at least 24″ wide. Next, center the metal flashings in the valley. Nailing at the edges only, fasten it with just enough nails to hold it in place. Overlap each metal piece by at least 6″ and use asphalt plastic cement under each section of overlap. Snap two chalk lines the full length of the valley, 6″ apart at the top, 3″ on each side of the valley’s center line and increasing in width 1/8″ per foot toward the bottom toward a maximum of 8″ apart. When you’re applying the shingles, lay them over the valley flashing, trim the ends to the chalk line, and nail the shingles at least 2″ back from the chalk line. Cut a 2″ triangle off the top corner to direct water into the valley and embed the valley end of each shingle into a 3″ band of asphalt plastic cement. You’ve done a great job prepping the roof deck and protecting the valleys with flashing.
Table of Contents:
- A Guide to Roofing Valleys with Architectural Shingles
- The Three Methods to Shingle a Roof Valley
- How to Shingle a Valley With Architectural Shingles
A Guide to Roofing Valleys with Architectural Shingles
A roof valley is formed where two roof slopes meet. Water collects in a valley to flow off the roof. Your choice of valley installation method is critical because, when improperly installed, valleys are risks for serious leaks.
Essentially, there are three main ways to shingle a roof valley: woven, closed-cut and open. There are various techniques you’ll need to know for each type of installation, which we’ll go over in detail. When deciding how to shingle a roof valley, you will need to consider your materials, the climate and the desired look of the roof. IKO recommends that you install architectural shingles with the open valley method for the best roof performance. This recommendation includes IKO’s premium shingles.
The Three Methods to Shingle a Roof Valley
1. Woven Valley Shingle Installation
To achieve a woven valley installation, a roofing professional lays shingles in the valley and weaves them together. Some homeowners prefer the consistent look that a woven valley provides. But, if the shingles are not laid in the valley properly, a woven valley may not lay flat, creating bumps and detracting from the overall look of the roof.
The woven valley shingle installation method does not call for roofing cement, relying instead on the weave pattern to protect from water infiltration. So, if you are installing a woven valley, you must push the shingles snugly into the valley, while not nailing within six inches of the valley center. If this is not done properly, hollow space may develop under the shingles.
This “bridging” is a serious problem for the durability of a roof. The empty space makes the shingles vulnerable to penetration, either by footsteps, hail or other debris. For this reason, installing some manufacturers’ shingles in a woven valley may void their limited warranty.
A woven valley shingle installation has other drawbacks, including that they are slow to install, especially in cold weather, and more difficult to repair than the other types. In order to shingle this kind of roof valley, a roofing professional has to install both roof faces at the same time, which is quite slow. If repairs are needed, the contractor has to remove and then reweave multiple shingles to replace a single one. While a woven valley may save on initial installation costs, because they require less materials, they may cost more in the long term.
Woven valleys are suitable for three-tab shingles as their single-layer construction allows them to be woven together and overlapped more easily. When considering how to shingle a valley with architectural shingles, you must take into account their thickness and reduced flexibility. Laminated shingles are more liable to create bumps in woven valleys. Often, they are too thick to be woven at all. Thus, IKO does not recommend installing a woven valley with laminated shingles.
2. Closed-Cut Shingle Valley Installation
Closed-cut valleys, also called closed valleys, are installed quickly and have a cleaner, sharper look than woven valleys. From the ground, it looks as though the shingles meet in a clean line in the center of the valley. One layer of shingles actually crosses the valley beneath the other.
In summary, during the installation of a closed-cut valley, you install the first roof plane’s shingles into the valley. It is essential to only use whole (not cut) shingles during this step. As you install roof shingles on the second roof plane, you allow them to lap over the valley on top of the first shingles. The shingles on the second layer are then cut, ideally creating a clean line down the center of the valley. A chalk line can be used to guide you as you cut the shingles.
Unlike a woven valley, a closed valley will not have hollows. However, closed valleys still rely on shingles to protect the valley, which has its drawbacks. The shingles in the valley may lose their granules, and thus their coloration and protective capability, faster than the rest of the roof. Ultimately, laying any shingle in a valley can restrict proper water and debris flow, unlike the metal flashing used in an open valley.
A Variation of Closed-Cut Valley: the California Valley
One variant of the closed-cut valley is the California valley, also called Long Island valley and New Jersey valley. For this method, the last shingles on the “cut” side of a cut valley are actually installed sideways, so they run up and down the valley. This saves the time of cutting shingles and is the fastest way to shingle a roof valley, but it does not provide adequate protection in most climates. Indeed, California valleys are prohibited in some areas. Always be sure to refer to your local codes to see if they demand a particular kind of valley installation.
3. Open Valley Shingle Installation
An open valley relies on metal flashing for protection. That flashing is left exposed, so the roof has visible lines of metal running down the valley. Some homeowners do not like the look of open valleys, while others feel the metal accentuates the roof’s shape, particularly if copper or painted flashing is used.
IKO recommends installing an open valley with architectural or laminated shingles. Jeff Tessaro, a knowledgeable IKO sales representative, explains that open valleys have key advantages, including longevity. Tessaro says, “Provided the rest of the roofing shingles were properly installed and are performing properly, my experience has been that an open valley system holds up better over time.”
Metal sheds ice and water faster than shingles, reducing the risk of ice dams and blockages of debris. Also, as all valley flashing metal is galvanized, it isn’t susceptible to losing its integrity under running water. Neither can it be pushed open by an ice dam or wind-driven rain. Additionally, the National Roofing Contractors Association explains that low-slope roofs are good candidates for open valleys because they are more likely to accumulate debris.
Tessaro also says that the open method allows for faster replacement and repair than the other techniques of shingling a roof valley. As another benefit to the roofing professional, open valleys are sometimes used to easily bridge the gap between roof faces of vastly different pitches.
If homeowners are looking to have their roof last for many years, an open valley is IKO’s recommended choice and a good up-sell opportunity for the roofing professional.
Valley Flashing Options for an Open Valley Installation
If you are installing an open valley, you will need to select a flashing material. Generally, flashing is a metal. Possibilities include:
- Copper (may be cold-rolled or high yield).
- Aluminum.
- Steel (must be stainless or galvanized).
- Zinc alloy.
- Painted terne (steel with a lead and tin coating).
Different codes may require different materials, but IKO recommends, as a minimum, a 28-gauge galvanized metal. If not metal, the material must still be corrosion-resistant and non-staining. Also, at a minimum, valley flashing must be 24 inches (610 mm) wide.
Take care to understand your code’s thickness requirements for flashing, as there is often confusion about this point according to Professional Roofing. Also, it is ideal to install valley flashing that will match or outlast the life span of the shingles, so they can be replaced together.
You also want to consider the valley flashing profile. While some flashing is straight, others have a “W”-shaped bend in the center. This creates a crimp in the center of the flashing, which prevents water from crossing from one side of the flashing to the other. This can be useful if you are adjoining two roof planes that are asymmetrical in size.
Then, consider the aesthetic of the flashing. Some homeowners want the flashing painted to match the shingles. Others want a dramatic look with contrasting colors, or with the copper or steel face left unaltered. Your choice of shingle color and flashing can make a dramatic difference to the exterior of a home.
How to Shingle a Valley With Architectural Shingles
- Step One: Ensure ice and water protector has been installed along the valley first. Then, starting at the base of the valley, center your first piece of flashing in the valley.
- Step Two: To secure the roof valley flashing, nail it down carefully. Only nail at the edges, with only enough nails to hold it in place. Extra nails may increase the risk of leaks.
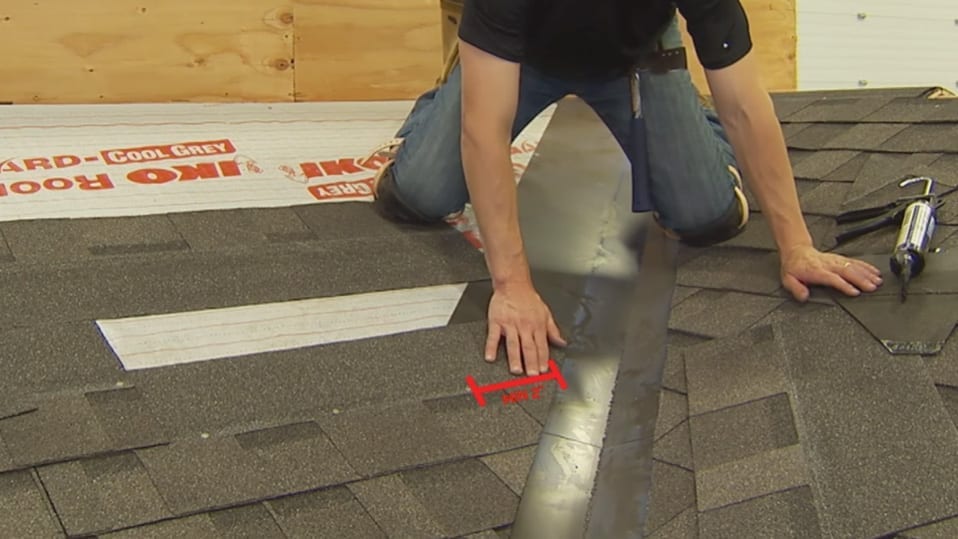
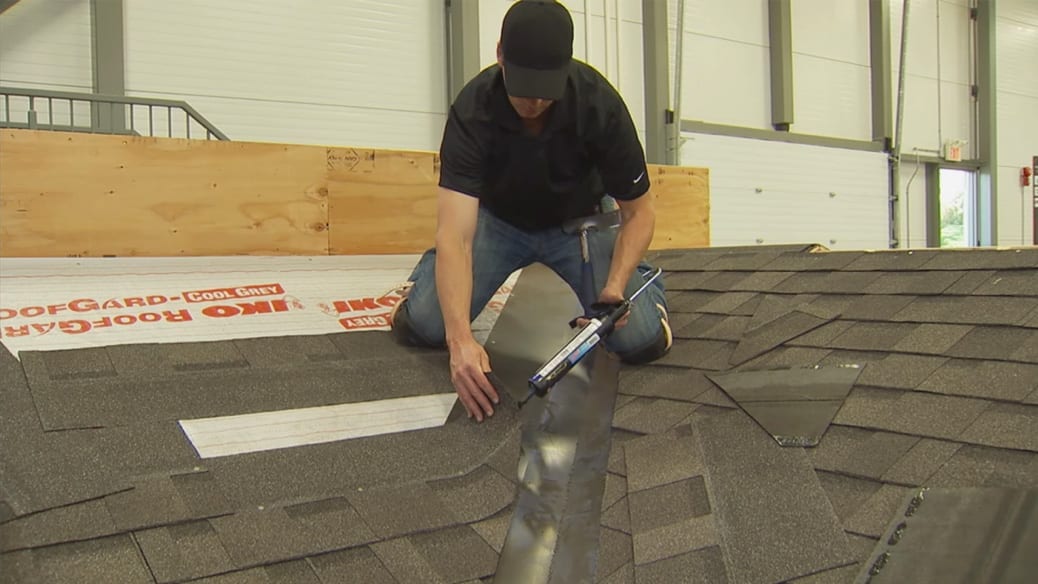
- Step Three: Moving up the valley, install any additional roof flashing, as required to cover the entire length. Overlap each piece of flashing by at least 6 inches (150 mm). First, apply asphalt plastic cement under the overlap area, then place and nail down the second piece of flashing.

- Step Four: Now you need to set out chalk lines to guide you as you install shingles along the valley. Snap two chalk lines parallel to the valley and down its entire length. At the top of the valley, the lines should be 6 inches (150 mm) apart. Then, they should gently slope outward at a quarter inch (3 mm) every 12 inches (300 mm), to a maximum of 8 inches (200 mm) apart at the base of the valley. As a stream of water moves down a valley, it gets wider; so, the exposed flashing must also get wider.
- Step Five: Begin to install roof shingles on either roof face. When you reach the valley, lay the shingles over the valley and trim the edges to the chalk line. You can use a straight edge to achieve a straight cut.
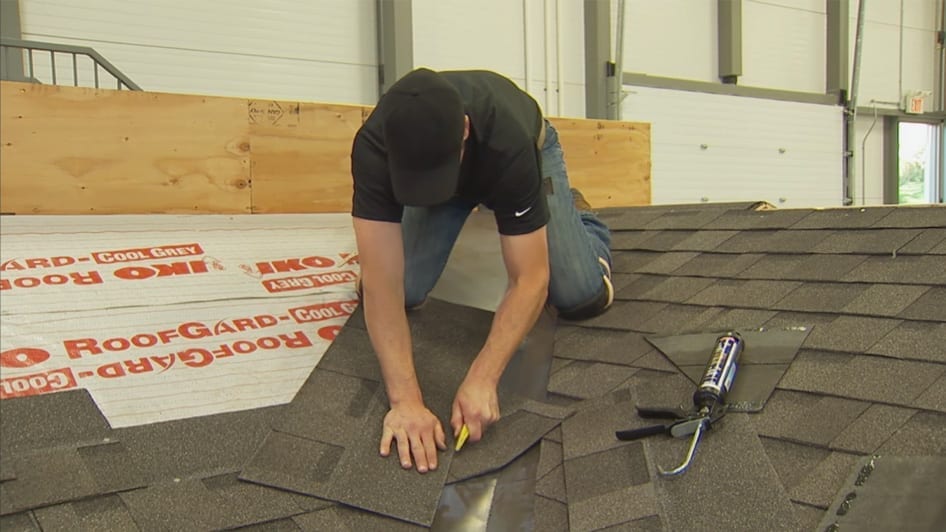
- Step Six: Nail down each valley shingle at least two inches (50 mm) back from the chalk line. Over-driving nails is always a problem, but it is especially dangerous in a valley, where water collects. Take care to drive nails straight so that the heads are flush with the shingle surface.
- Step Seven: Finish installing valley shingles by embedding each shingle into three inches (75 mm) of asphalt plastic cement.
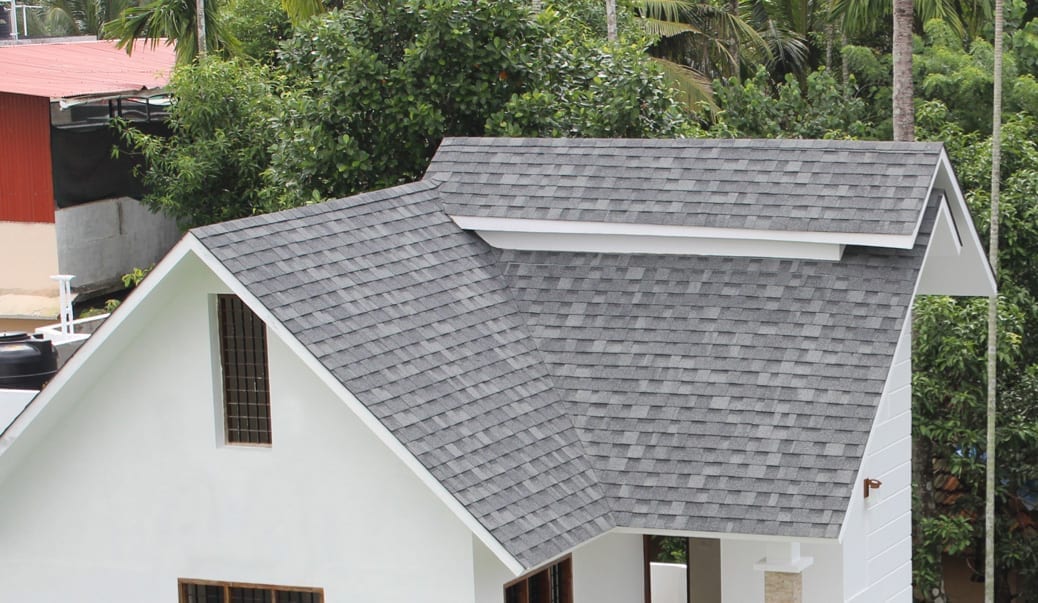
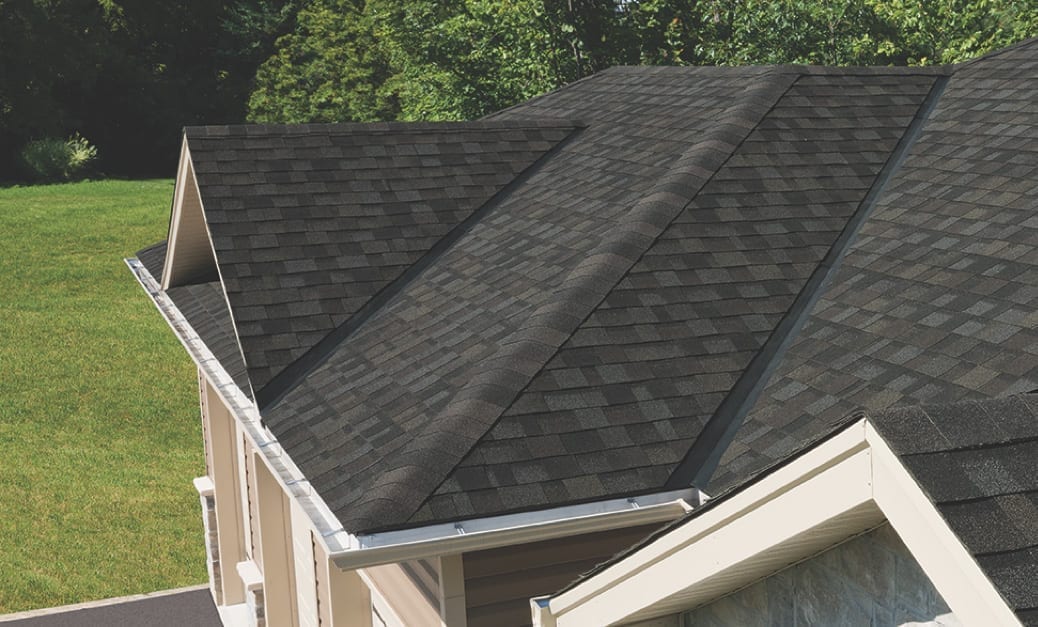
After you have laid all of the shingles in the valley, it should look uniform, like the roof below.

A proper valley installation is a critical component of any roof, ensuring the long-term protection of this vulnerable area. IKO’s recommendation is to install laminated shingles, or architectural shingles, using the open valley method, for best roof performance. To learn more about roofing, please visit our Roofing 101 section. To find a local roofer in your area, please visit our Contractor Locator page.