Learn the basics of installing an asphalt shingle roof, courtesy of IKO.
When it’s time to replace your roof, the amount of information available can be overwhelming. Lots of websites and videos go into great detail on how to shingle a roof. This article from the experts at IKO Roofing will help you make sense of it all by highlighting the basic steps and outlining the fundamental purpose for each roofing system component. This article is not a substitute for proper live training and IKO recommends that only properly trained professional roofing contractors engage in the shingling of roofs.
The next time you read the package instructions or watch a how-to video on YouTube, you’ll have a much better understanding of why roof shingles are installed the way they are.
Here are the basic steps to shingle a roof.
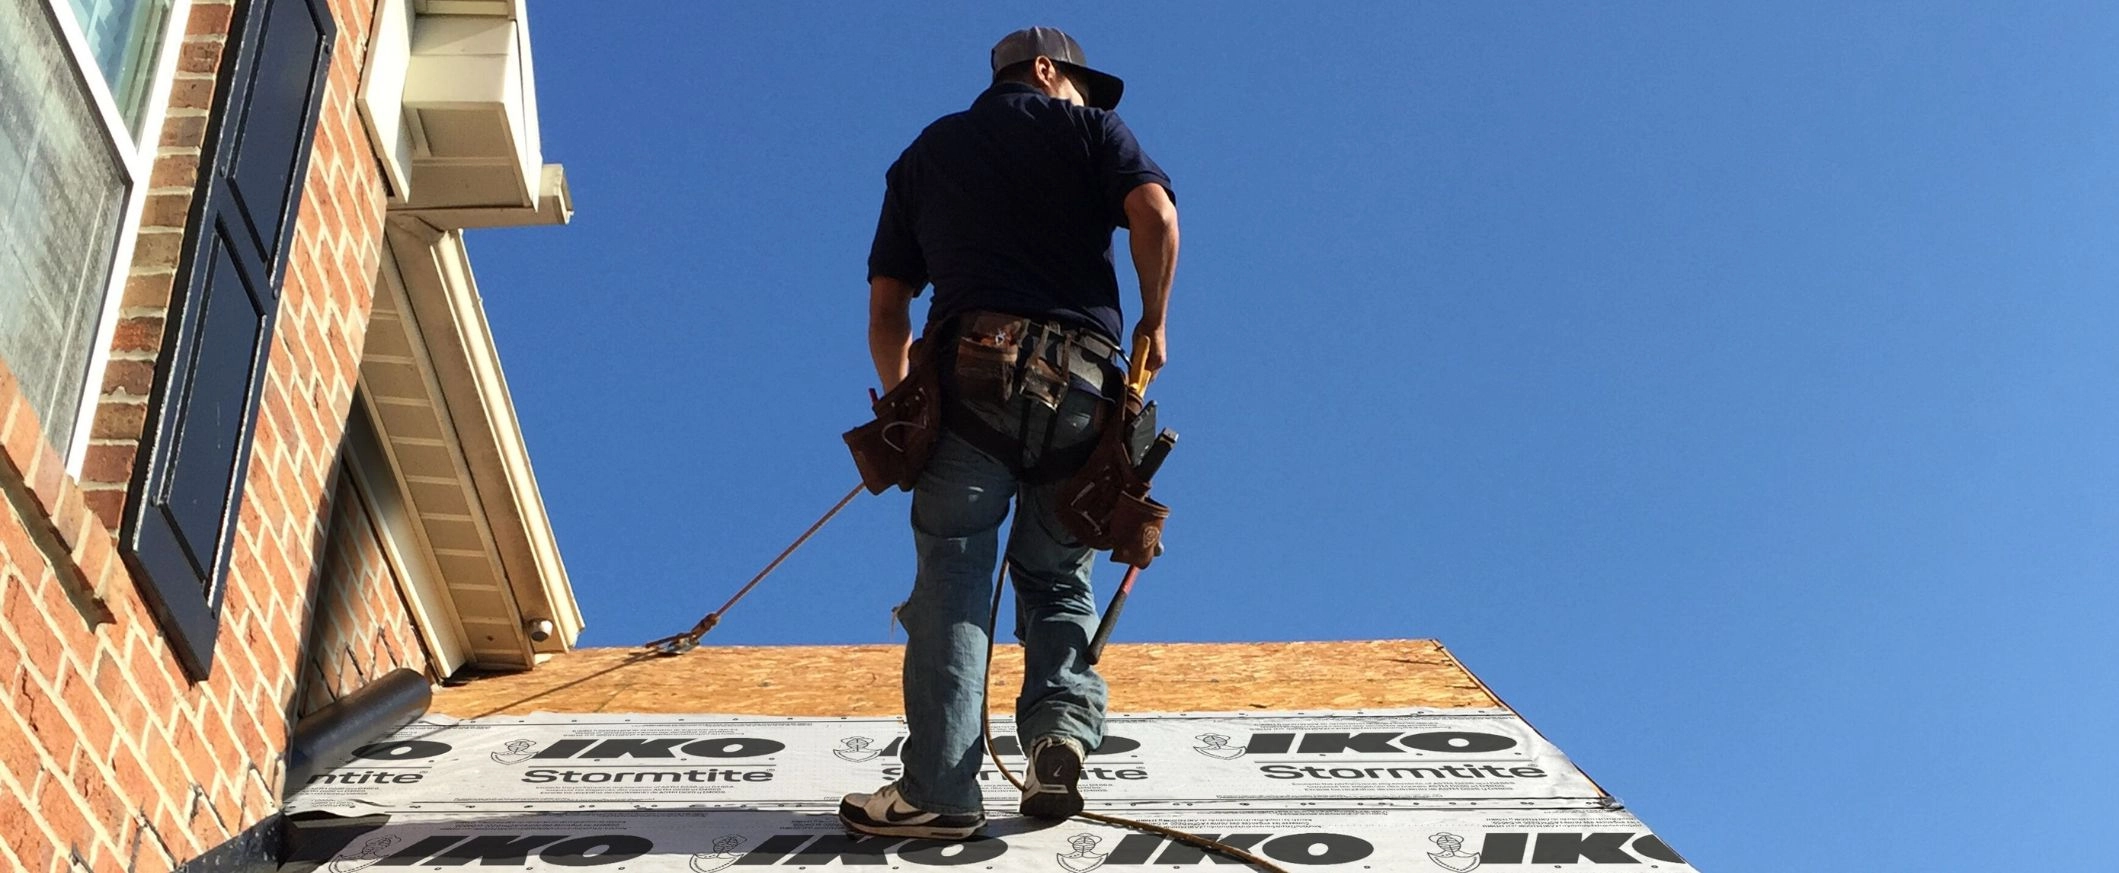
1. Step one in any roofing project is always safety first.
Working at heights on a roof presents fall hazard risks and other safety concerns. IKO recommends that roofing work be done by qualified professionals who know the best way to shingle a roof and have been fully trained in all aspects of roof construction safety. Further, it’s important to review local applicable building codes and ensure the roof conforms to all requirements.
2. Understand the physics of how a sloped shingle roof works.
Asphalt roofing shingles simply rely on the force of gravity to shed water from rain or snow melt. If the roof shingles and all accessory roof components are arranged and overlapped with this in mind, the roof should successfully shed water. In the dictionary, “to shingle” is defined as “to lay out or arrange so as to overlap.” So now let’s look at the sequence of overlapping roof construction components to see how this applies.
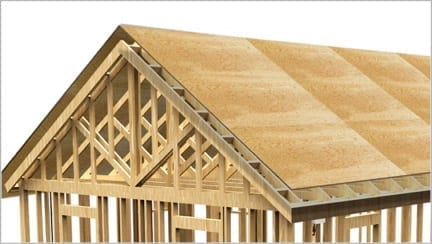
3. Deck preparation.
Before installing any roofing materials, make sure that the roof deck is smooth, properly fastened to the roof trusses, dry and free of any gaps or holes. Having a clean, flat deck surface will help ensure that the newly shingled roof will likewise appear smooth and flat when finished.
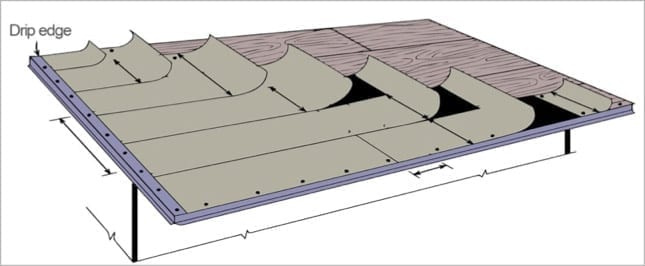
4. Work from the bottom up.
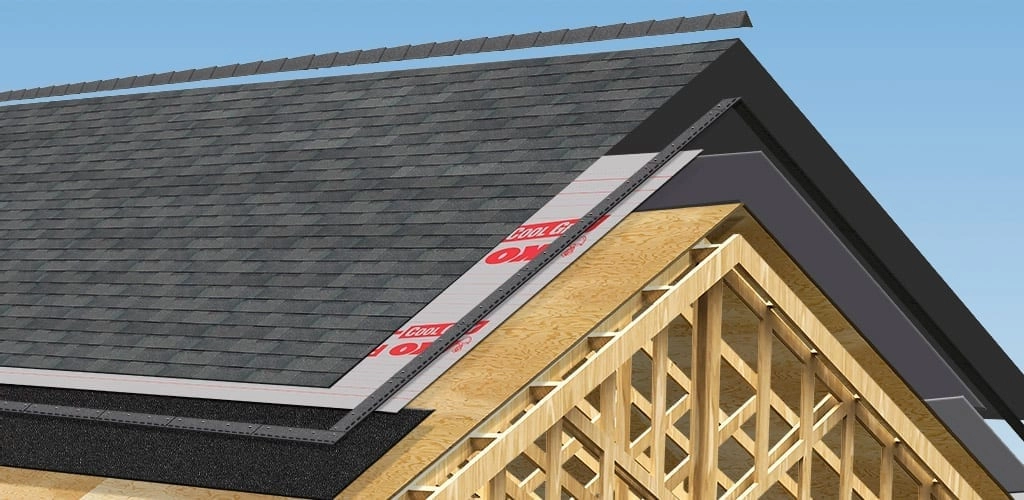
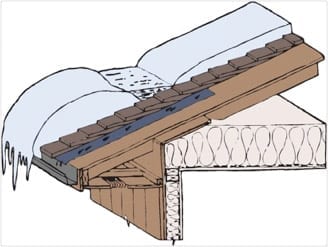
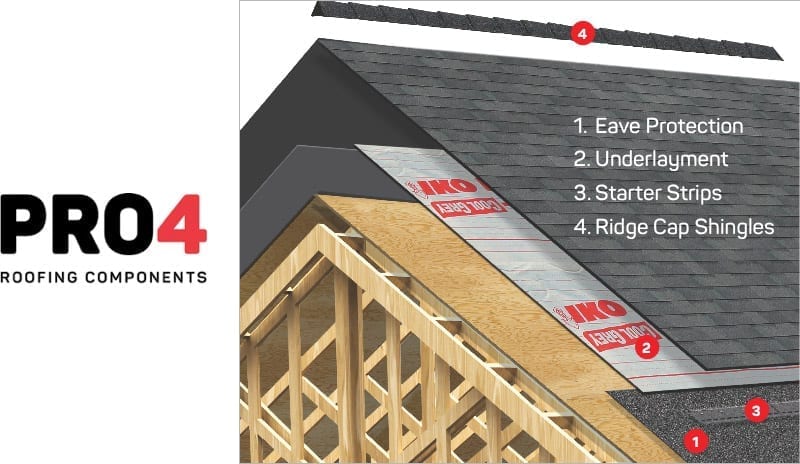
Not only are we working from the bottom of the roof, we’re also starting with the bottom-most layer, in terms of roofing components. The asphalt roof shingles are the visible part and the first line of defense against inclement weather, but what’s underneath them really counts.The first material installed at the eave is the drip edge. It literally provides a clean, sharp edge for the start of the roof and protects the lower edge of the roof deck from water damage by preventing water from “defying gravity” and wicking back “up” before it leaves the roof.
Drip edge is installed under the ice and water at the eaves and on top of the ice and water and underlayment on the rakes.
5. Ice dam protection at the eaves.
If you live in an area where the climate includes significant cold winter weather, you’d wear boots to protect your feet from ice, slush and puddles, right? Well, your roof and the home under it need the same kind of protection that an ice and water protector is engineered to provide. This thin, self-adhering membrane is the next component and it gets installed over the drip edge. Ice dam formation is best prevented by having a proper attic vapor barrier, adequate attic insulation and thorough ventilation; however, an ice protection membrane is a wise roofing system component and is likely required by your local building code in cold climates. This ice and water membrane is typically applied to overhang the eaves by 1/4″-3/4″. To be fully effective, it should extend up the roof to a point at least 24″ inside the vertical extension of the interior side of the wall. At this time, any valleys on the roof should also be flashed with an ice and water membrane. Why an ice and water protector? Because these membranes work on the principle that their rubberized asphalt coating seals around the shanks of the overlying shingle fasteners, adding an extra degree of water-shedding protection.
Ice dams form when melted snow runs down the roof to the eaves and freezes again, which forces water back up underneath the shingles.
StormShield Ice and water protector.
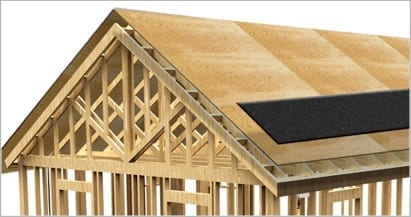
6. Underlayment for overall secondary roof protection.
Next it’s time for the roof underlayment, which can either be an asphalt-saturated felt or a synthetic roof underlayment. Both offer you peace-of-mind protection beneath the shingles. While the asphalt shingles will be the primary water-shedding roof layer, there are many benefits to installing a roof underlayment. The felt is laid in horizontal courses, overlapping the eave ice and water protector by 4″ and the valley membrane flashing by 6″. Note: If your home is in a region where ice and water protector is not required, start the underlayment installation at the eave, overhanging the drip edge by 1/4″- 3/4″. Remember that drip edge we installed at the bottom of the roof? When going up the sloped edges of the roof (called the “rakes”) it goes on top of the underlayment. Although this seems to contradict the overlapping principle, installing the drip edge over the underlayment at the rakes creates a clean roof edge and provides the underlayment attachment with increased resistance against wind uplift. Also, any wind-driven rain blowing on the rake edge would cross the top flange of the drip edge and go on top of the underlayment instead of beneath the underlayment where it could potentially cause a problem.
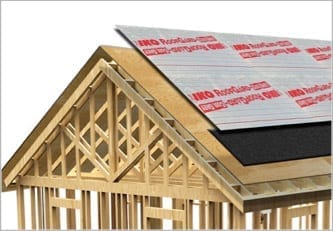
IKO’s RoofGard-Cool Grey Synthetic Roof Underlayment gives your roof secondary layer of protection.
7. Covering the joints and valleys.
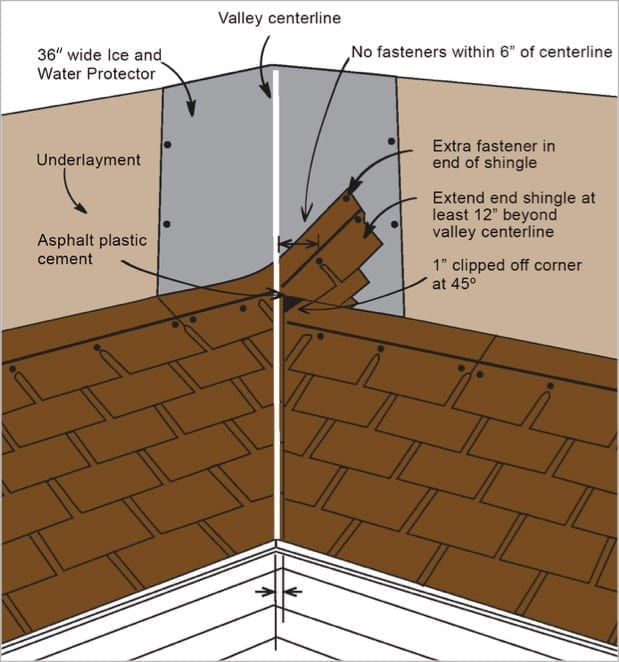
If a roof is going to leak, it will most likely occur wherever the shingle layer is penetrated, interrupted or meets a wall. These are the special areas that require flashing – an added layer of water-shedding material to help keep the water running downslope. Valleys can either be open or closed – open valleys are not covered with shingles, closed valleys are. If your roof will have open valleys, which IKO recommends, now is when the valleys should be lined with a pre-formed width of corrosion-resistant metal. Closed valleys are completed during shingle installation. For longer roof performance, IKO strongly recommends open metal valleys. Complete the application of underlayment and valley flashing before the roofing shingles are applied. The recommended flashing material is a 28-gauge galvanized metal or an equivalent corrosion resistant, non-staining material (check with local codes). Center a 914 mm (36″) width strip of an ice and water protector membrane in the valley. The product is tacked in place temporarily along one edge. Carefully peel away the backing, and put it in place, smoothing out any wrinkles. Start working from the eave, allowing additional pieces to overlap by at least 150 mm (6″). Remove the temporary nails. Center a minimum 610 mm (24″) wide, minimum 28 gauge pre-finished/galvanized metal valley liner in the valley, and fasten with only enough nails to hold it in place, nailing at the edges only. Overlap each metal piece by at least 150 mm (6″) and use asphalt plastic cement under each section of overlap. Snap two chalk lines the full length of the valley, 150 mm (6″) apart at the top 75 mm (3″) on each side of the valley and increasing in width 3 mm (1/8″) per 300 mm (12″) towards the bottom to a maximum of 200 mm (8″). When the shingles are being applied, lay them over the valley flashing, trim the ends to the chalk line and nail the shingles at least 50 mm (2″) back from the chalk line. Cut a 50 mm (2″) triangle off the top corner to direct water into the valley and embed the valley end of each shingle into a 75 mm (3″) band of asphalt plastic cement. It’s critical to flash around plumbing stacks and attic vents because they are the most common roof penetrations. Install metal flashings where shingles meet walls or chimneys, too. Ice and water protector membranes work well to flash and help protect around skylights, dormers, turbines and other tricky roof areas. Apply flashing materials in concert with the shingle installation procedure, with both the flashing and the shingles arranged to work together to protect around the joint areas.
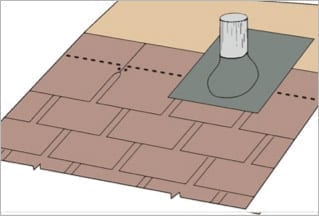
Flashing is placed around plumbing stacks and vents to help prevent leaks.
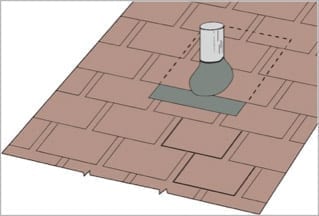
Complete shingle installation above the plumbing stack flashing.
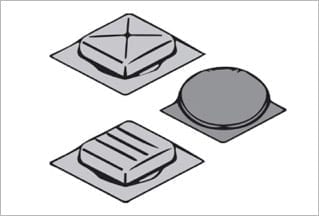
Various Roof Vents
Roof planes that butt against vertical walls at the end of the shingle course are protected by metal step flashing at least 125 mm high and 125 mm wide (5″ high and 5″ wide). When applying the new shingles, each shingle course will be covered by a step flashing.

Metal Step Flashing Pieces
There are two simple rules to follow:
- Each flashing should overlap the one below by at least 75 mm (3″), but not be visible below the shingle top lap.
- Imbed each step flashing in a 75 mm (3″) wide application of asphaltic plastic cement, and nail in place. Then the end of each shingle overlapping a step flashing must also be well embedded in plastic cement.
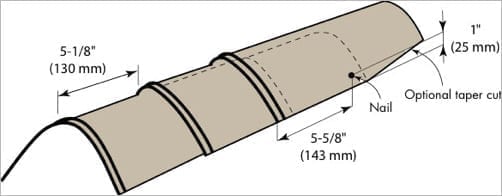
The metal step flashing pieces are rectangular in shape and style, approximately 250 mm (10″) long and at least 50 mm (2″) wider than the face of the shingle being used. For instance, when using metal flashing with shingles with a typical 143 mm (5 5/8″) exposure (such as traditional 3-tab shingles), the size of the flashing will be 250 mm x 200 mm (10″ x 8″). The 250 mm (10″) length is bent in half so that 125 mm (5″) will reach up the wall surface and the other 125 mm (5″) will extend onto the roof deck. Note: Other step flashing sizes are also acceptable. For IKO’s Cambridge shingle, with its larger 5 7/8″ exposure, a 10″ x 8″ flashing piece is still suitable, since the 8″ dimension is still at least 2″ larger than the shingle’s exposure dimension. However, when flashing Crowne Slate, with its much larger 10″ exposure, the flashing piece would need to be 10″ x 12″.
To install the flashing piece on the first course, place it over the end of the starter strip. Place it so the tab of the end shingle covers it completely. Secure the horizontal flange to the roof deck using two nails. Do not fasten the flashing piece to the vertical wall. This will allow the flashing piece to move independently of any differential expansion and contraction that may occur between the roof deck and the wall. Place the second step flashing piece over the end shingle in the first course by positioning it 143 mm (5 5/8″) above the bottom edge of the exposed asphalt shingle.
Make sure that the tab of the shingle in the second course will cover it completely. Secure the horizontal flange to the roof. The second and succeeding courses will follow with the end shingles flashed as in preceding courses.
8. The shingles in the “field” of the roof.
Once everything that goes beneath the shingles has been properly prepared and installed, it’s finally time to learn how to shingle a roof. Regardless of the asphalt shingle type or style you’ve chosen, the process is basically the same as mentioned earlier – you start at the bottom and overlap as you work your way across and up the roof. First – before you lay the field shingles (“field” referring to the large expanse of roof within the boundaries of eaves, ridge and rakes) – it’s important to install a preparatory course of starter shingles which are specifically manufactured for that purpose. But, even if you fashion your own on-site by cutting standard shingles to size, both serve critical functions at the roof’s eave. They provide a sealant adhesion point for the first course of shingles and provide water-shedding protection at shingle joints as well as at any cut-outs. Professional contractors often recommend and use starter strips along rake edges in order to yield a straight edge from which all the field courses can begin. Furthermore, these starter strips enhance the roof system’s wind-resistance at the rake. It’s critical to follow the manufacturer’s instructions for the specific roof shingle because not all shingles have the same exposure (the part of the shingle that’s visible once installed), offset (the lateral distance between joints in successive courses sometimes called ‘stagger’ or ‘edge-to-edge spacing’) and/or nail placement. Problems may occur if the shingles are given too much exposure or too little or if they’re not offset by the proper dimension in successive courses (rows of shingles). You must place nails in the proper location and drive them flush with, but not cutting into, the shingle. Nailing the shingles correctly is critical to the roof system’s wind-resistance. Proper nail placement is also a requirement for the shingles’ limited warranty coverage. If you’ve chosen closed valleys, they are completed as shingle courses approach and run through the valley. The most common closed valley is a “closed cut” valley, where shingles are installed on the entire roof area on one side of the valley first, with each shingle course extending at least 12″ through the valley centerline. As shingles are installed on the adjoining roof area, the end of each course of shingles is trimmed (cut) 2″ back of the valley centerline.
9. The hip and ridge caps.
You’ve nailed in the last field shingle and you can see the finish line from here. Well done! In this case, the finish line is the hip and ridge capping. When you install the field shingles up to the peak of the roof, you can’t just “bend them” over the peak. Instead, individual ridge cap shingles are used to straddle the ridge and shed water down either slope. There are various ridge cap shingles available on the market but, once again, the procedure for installing them is based on the same fundamental principle of overlapping. For hips, start at the bottom and work upslope. Since ridges are on a horizontal plane, the upslope principle doesn’t apply, so ridge cap shingles are typically installed like this: begin at the end of the ridge opposite the prevailing wind direction, for optimum ridge cap wind-resistance. On hip roofs, it’s also acceptable to install the ridge caps starting at each end of the ridge, with the last piece installed in the middle of the ridge. The last ridge cap piece should be nailed in place and, since this will be the only place on the roof where the nails are directly exposed, the nail heads should be sealed and covered with a suitable asphalt roof cement. Always remember to use longer nails for ridge cap shingles. Because the nails must penetrate the ridge caps and the last course of roof shingles below, you’ll need longer nails to fully penetrate through them to the roof deck.
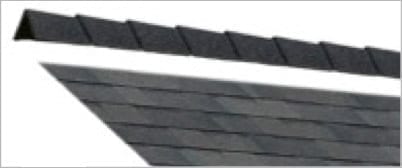
An example of a hip and ridge installation.
Take a look at IKO’s PROFORMAX Integrated Roofing Accessories to see how the various roof system elements described above work together.
Now that you have a greater insight into the major steps involved in how to shingle a roof, you can more fully understand the nuances of the entire process. You may even appreciate why it’s recommended to hire a professional!
For even more detailed information or if you’d like to watch and learn how the pros do it, check out this library of instructional videos on every aspect of shingle installation and roofing components. You can also read our article describing how to replace shingles.